This guide will show the steps for performing a restore using the Retrospect Novus interface.
-
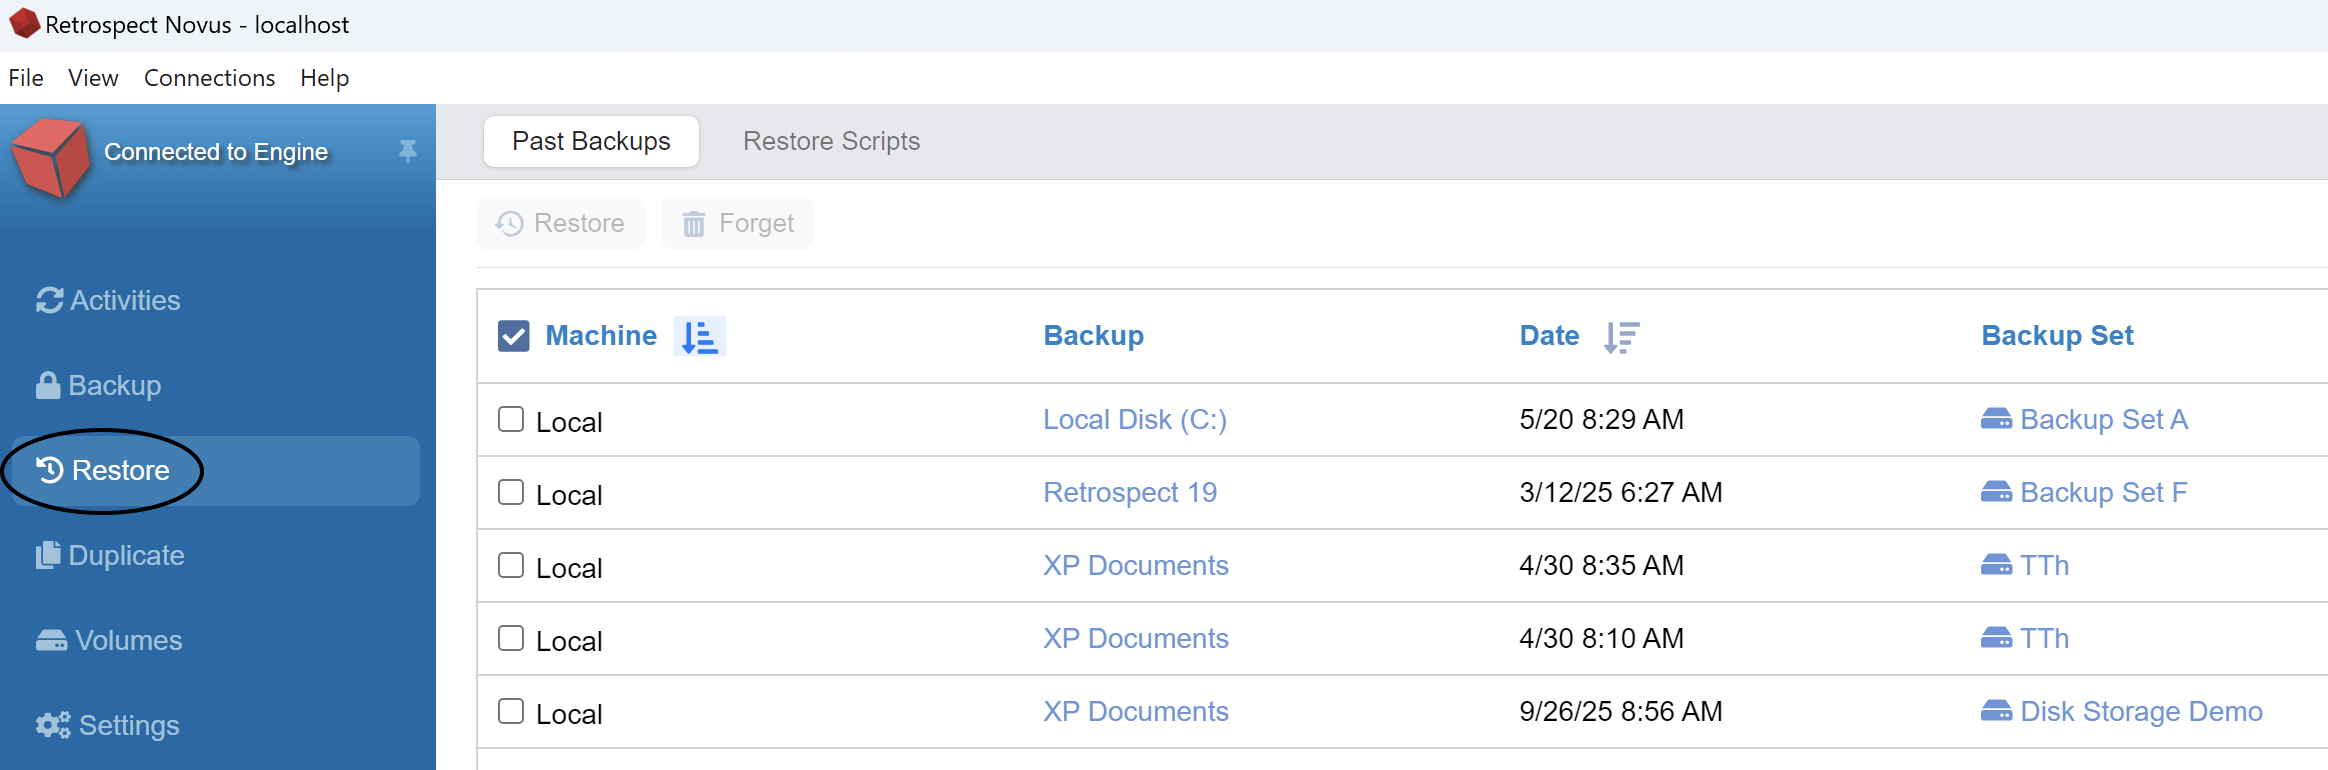
Click Restore on the left side of Retrospect Novus
-
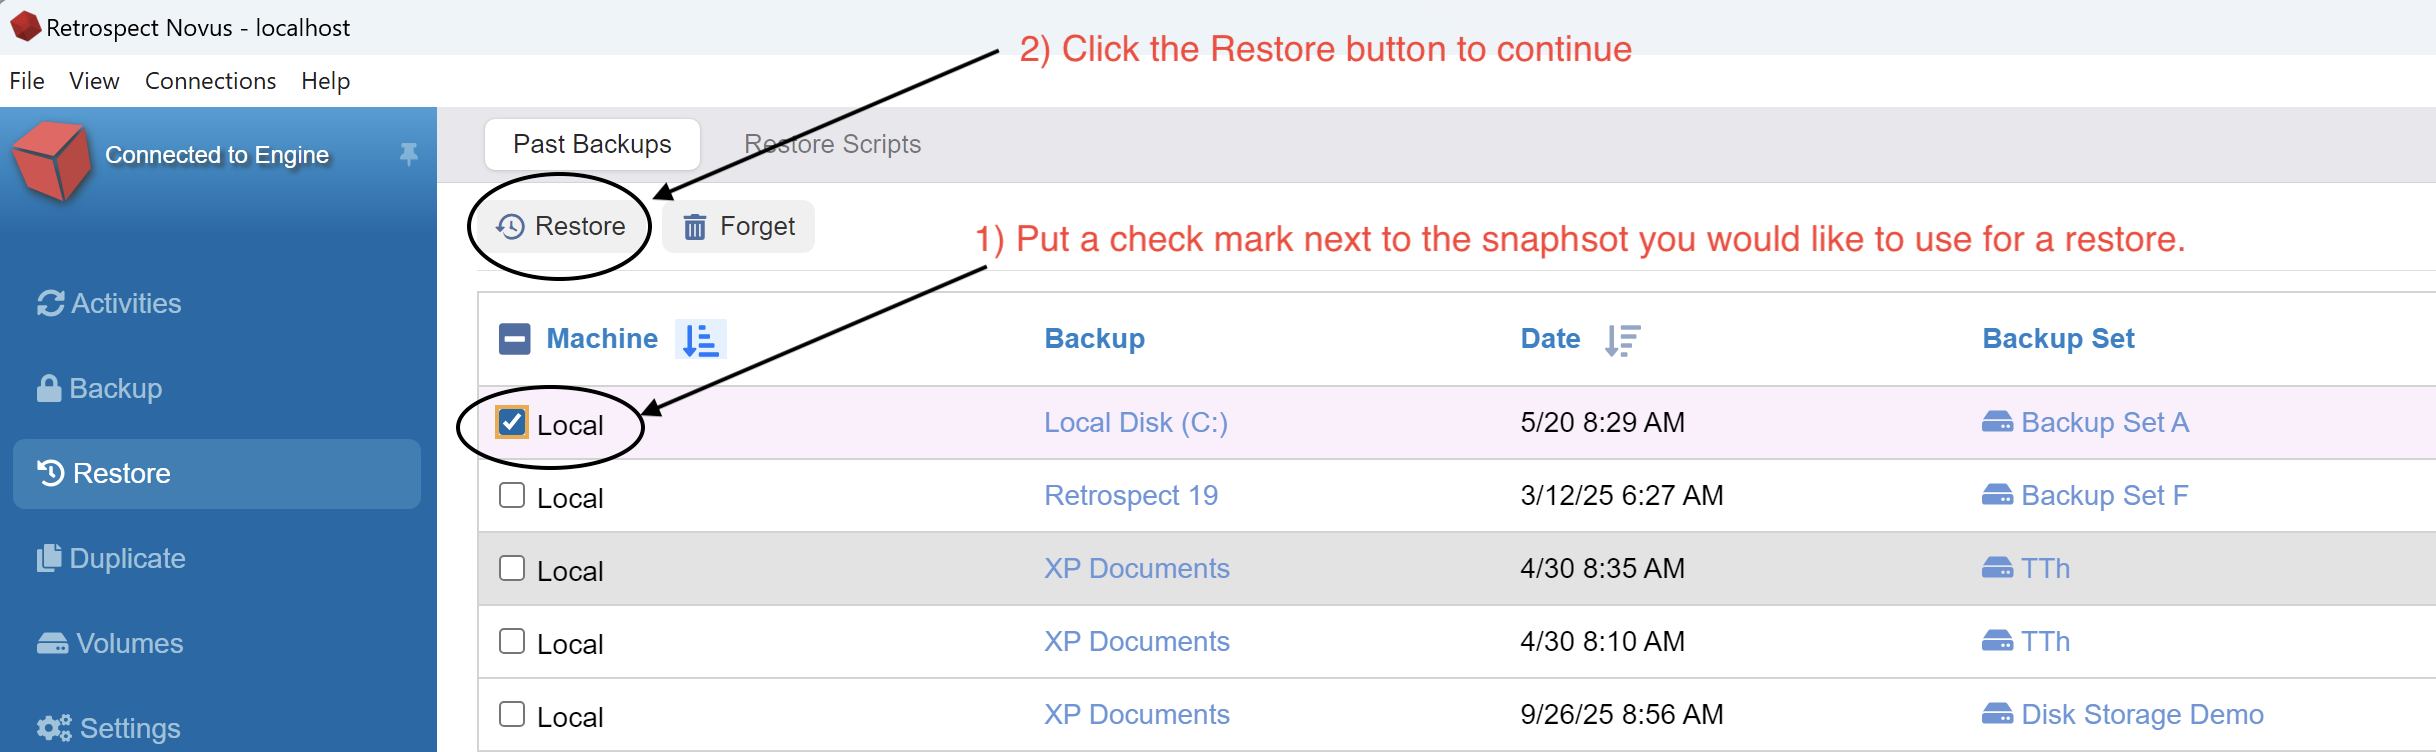
After you click restore you will put a check mark next to the snapshot you want to use for your restore.
-
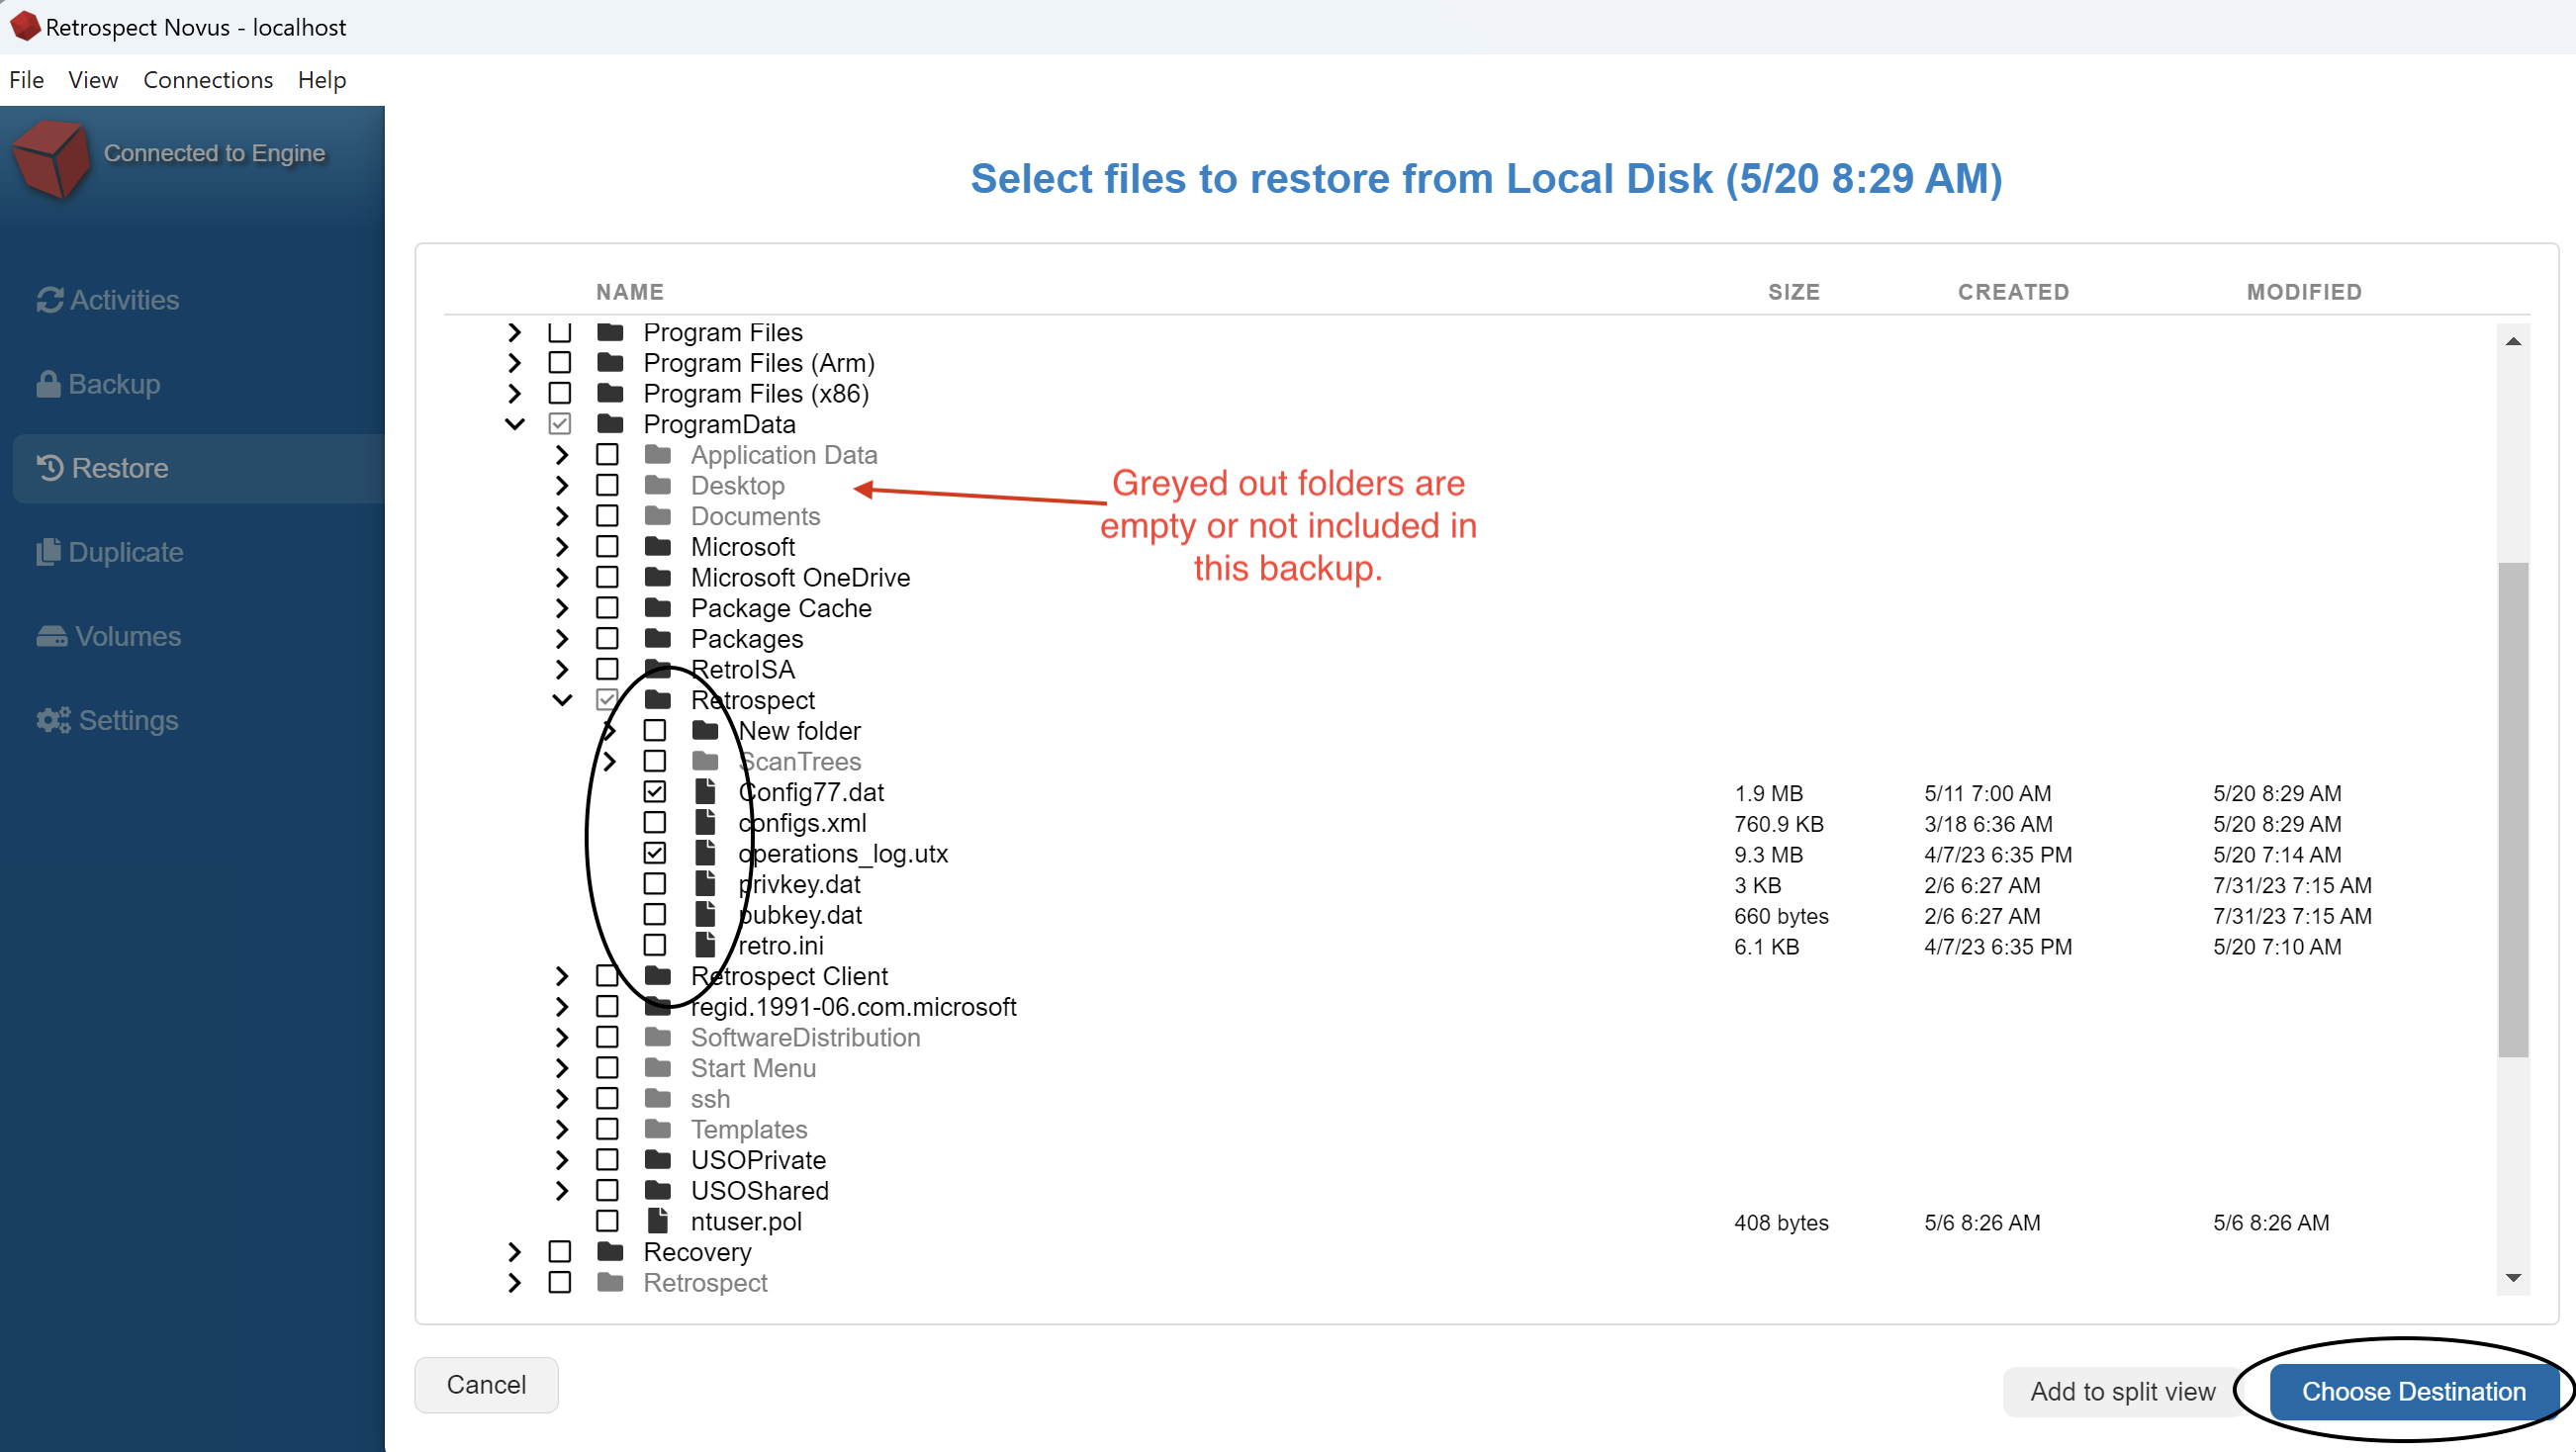
After you check the snapshot you want to use for the restore, you will click the Restore button shown in the above screenshot. Retrospect will take a moment to display a list of files and folders that you can select for the restore. Once you locate the items you want to restore, put a check mark next to the items.
-
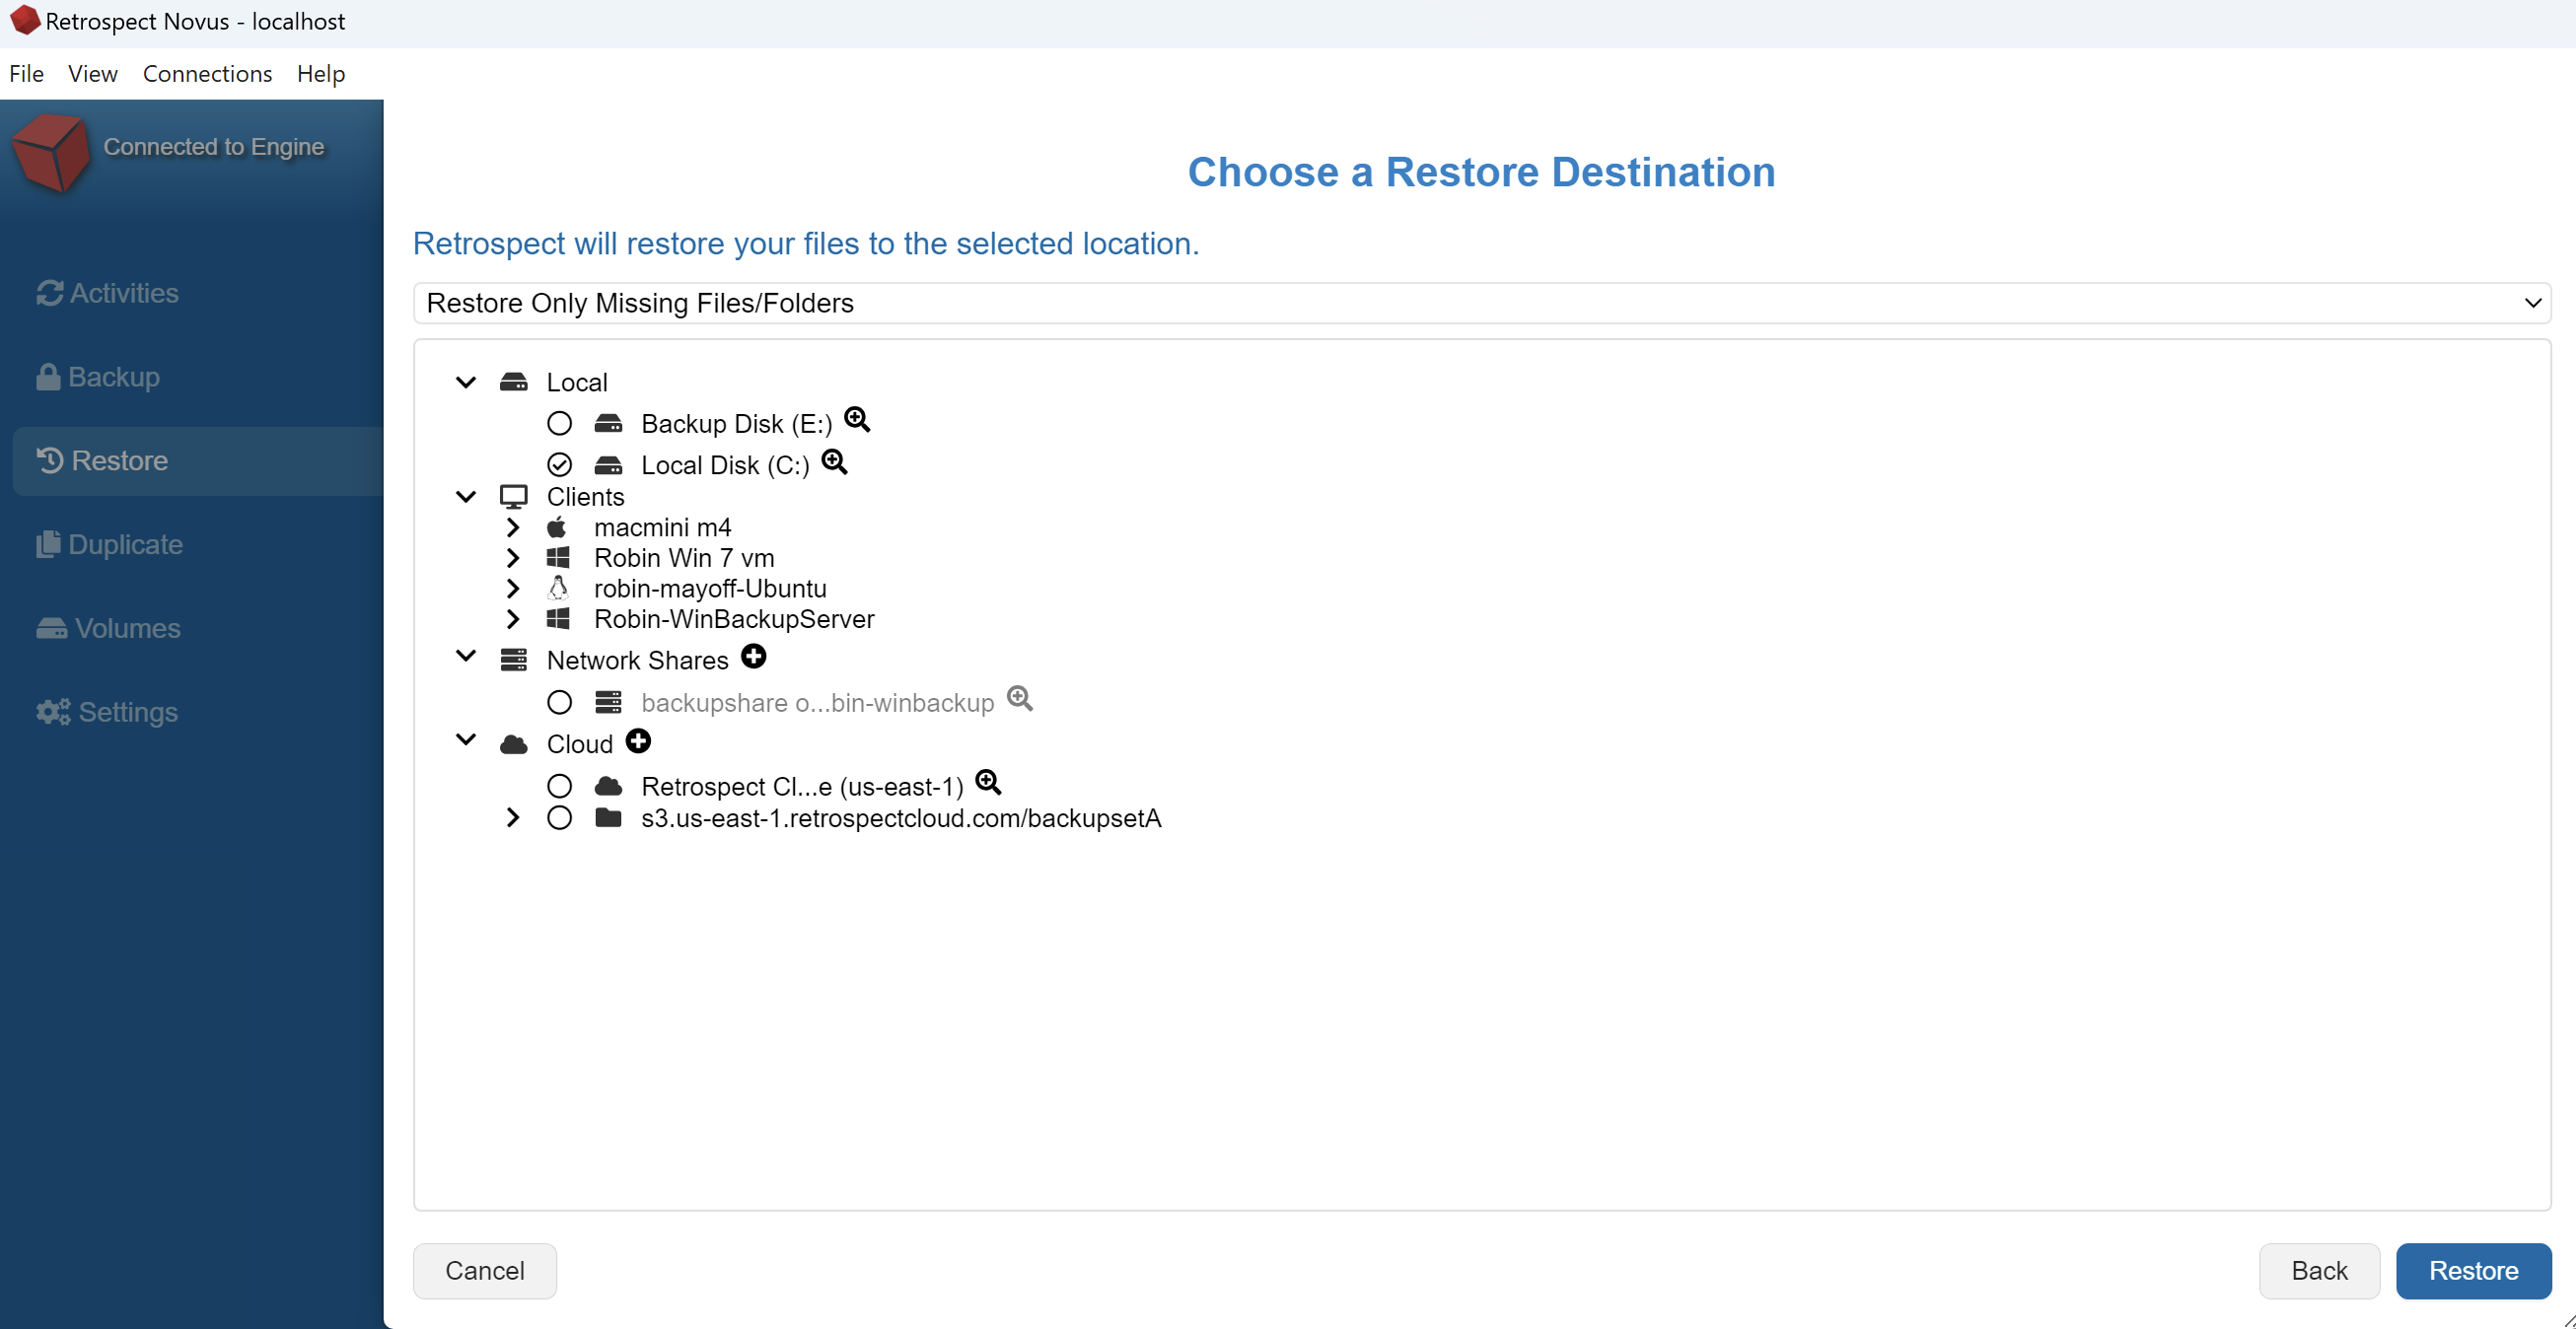
Click the Choose Destination button at the bottom left after you pick your files. Retrospect will display a list of disks or computers you can use as your destination. Put a check mark next to your destination.
-
When you are ready to Restore, select the Restore button at the bottom right.
Destination Options
When you are inside the destination selection screen, you will see a dropdown menu at the top of the window. This allows you to decide if you want to restore data into a new folder, overwrite older files or restore missing files.
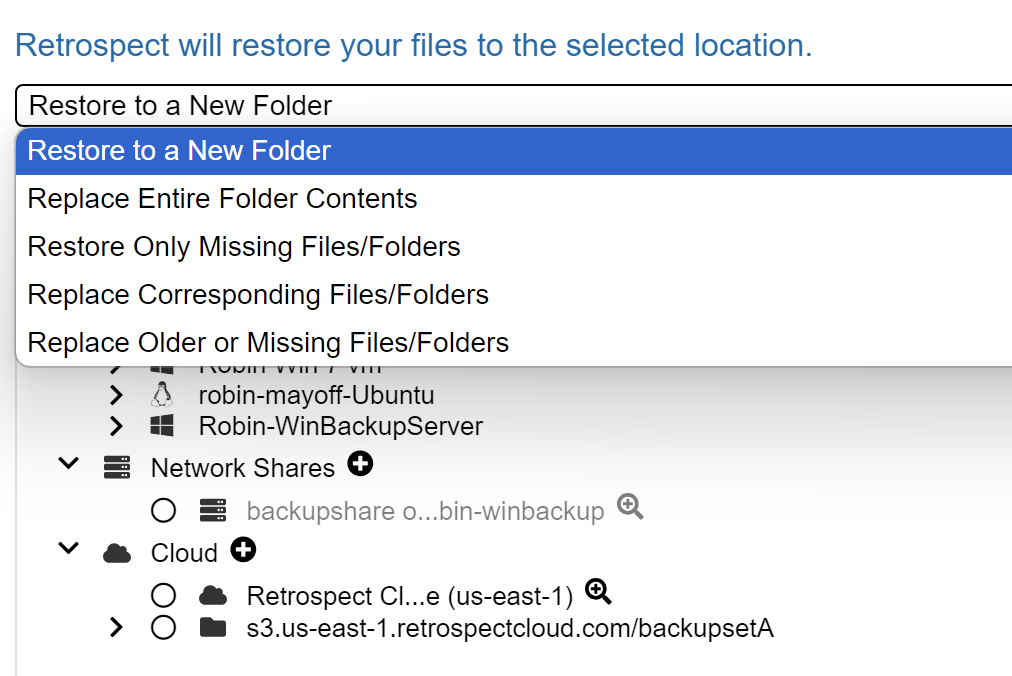
Next to each disk you will see a magnifying glass icon. When you click that button, you can browse the disk and select a specific folder to use for your restore destination.
Next to the Network Shares and Cloud button, you will see a Plus icon. You can use this to add network shares or cloud shares to your volume list.