Creating a Duplicate Copy of Data in Retrospect
This document explains how to use Retrospect’s Duplicate feature to copy user data from one disk or folder to another in the original file format, how to choose source and destination locations safely, select duplication options, run the duplicate, and review incremental results.
Step 1: Open the Duplicate Feature in Retrospect
From the main Retrospect interface, go to the Backup section at the top left and select Duplicate.
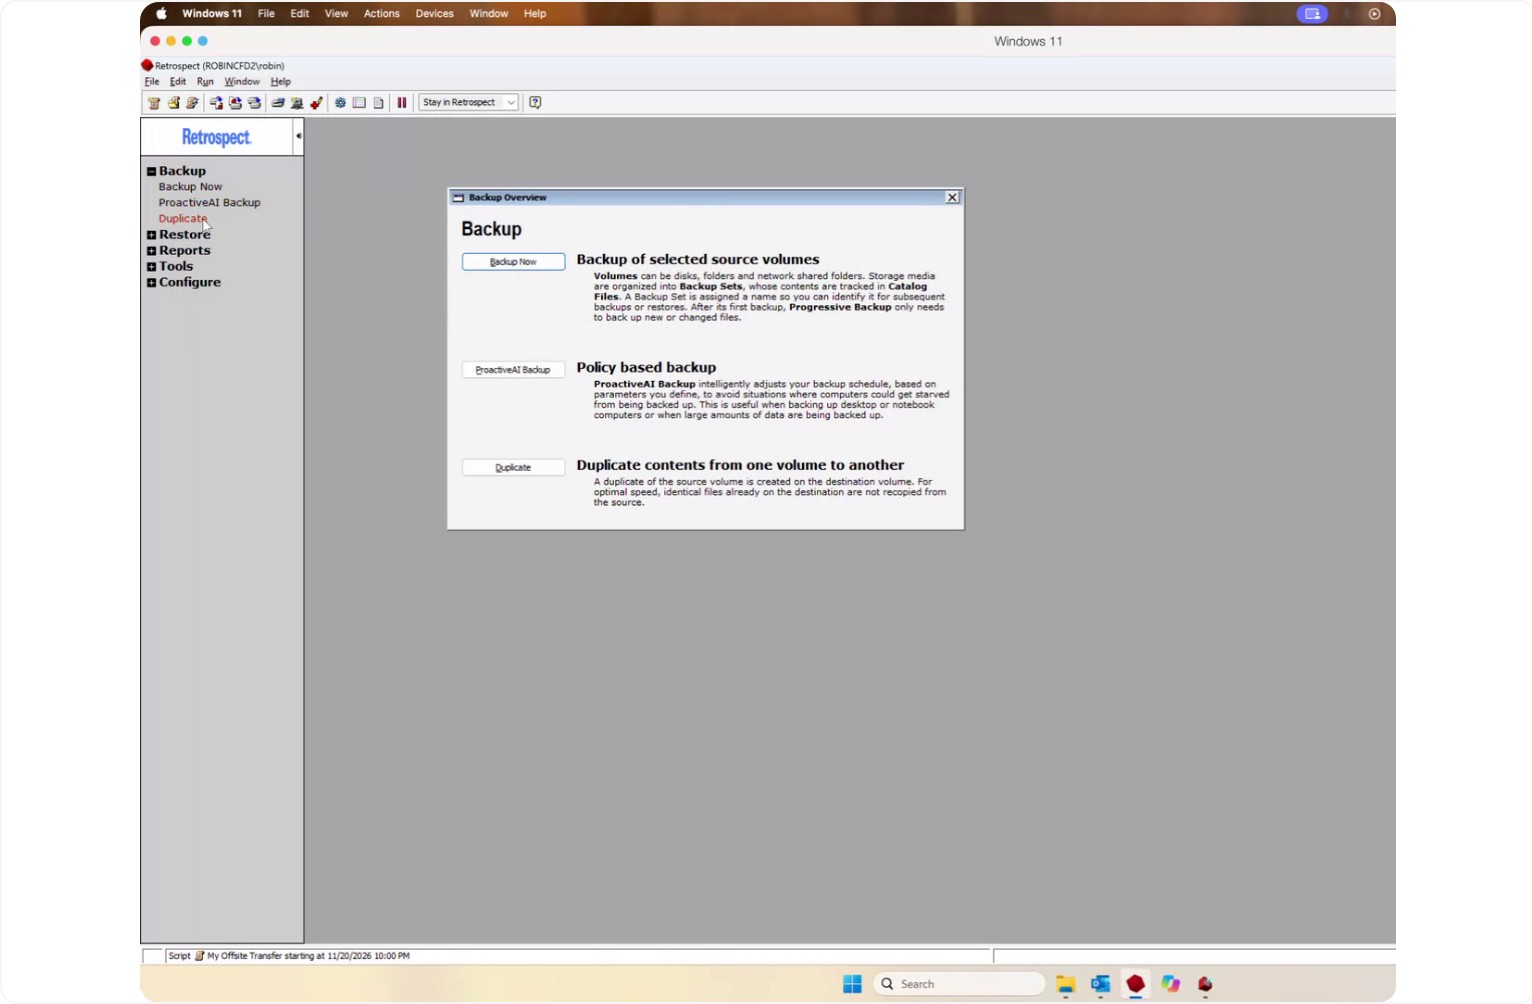
Step 2: Choose the Source Data to Copy
Go to the Sources section.
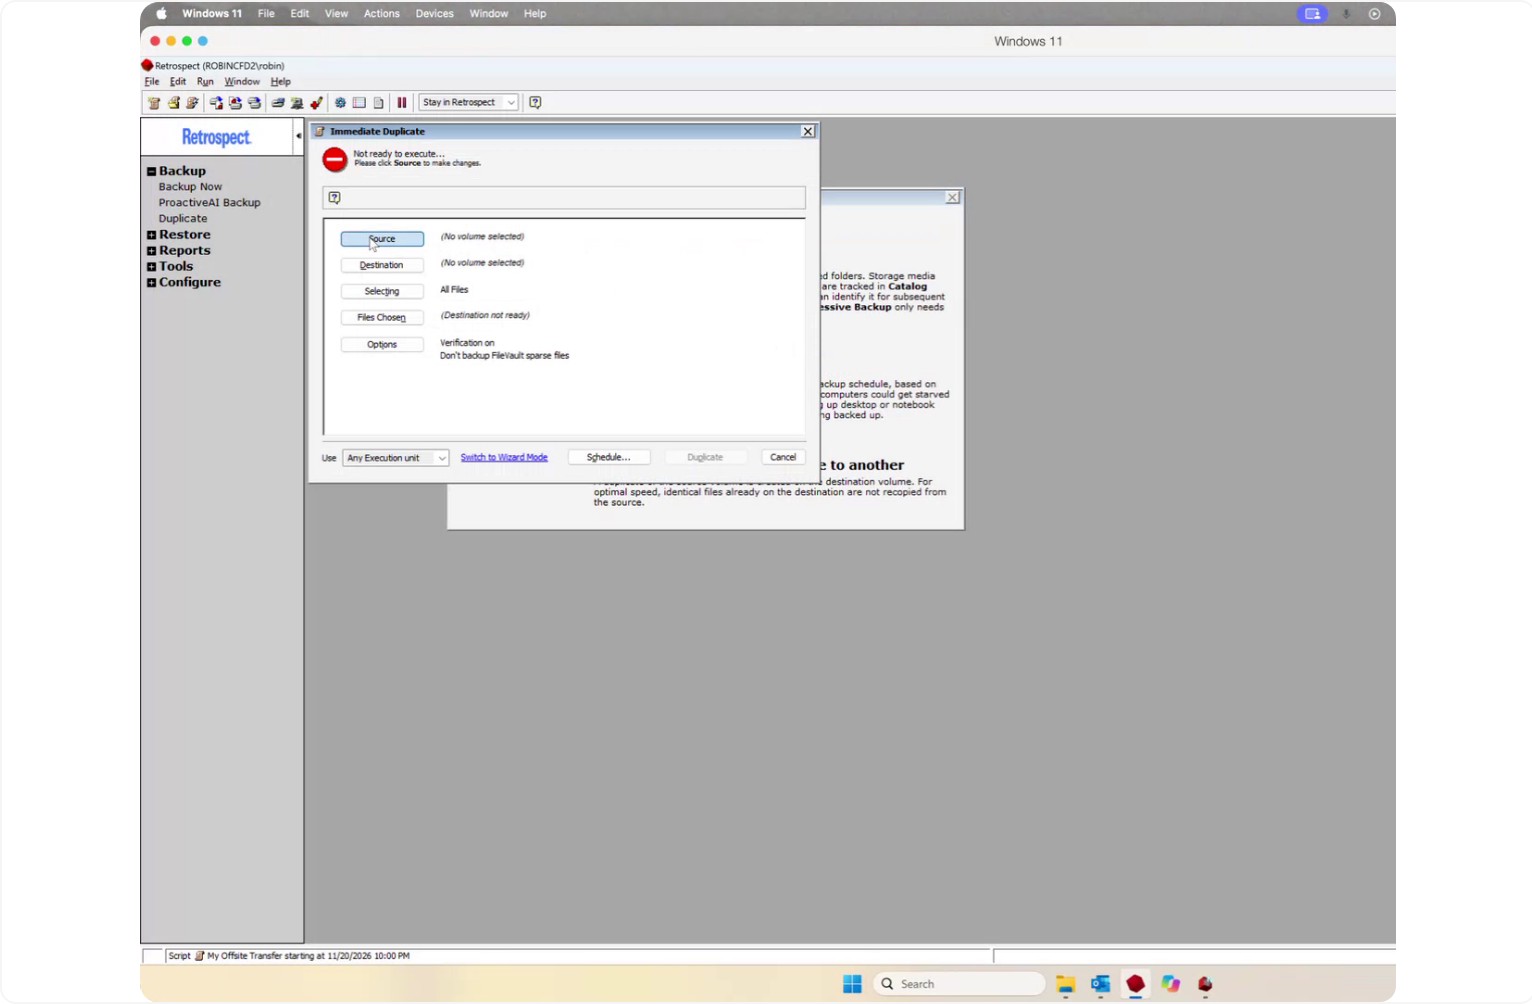
Select what you want to copy:
- You may choose the entire disk, or
- You may choose a specific folder on the disk.
Note: Duplicate is intended for user data only. It is not designed to copy the Windows registry or the operating system.
To copy a specific folder:
- Highlight the source disk.
- Click Subvolume.
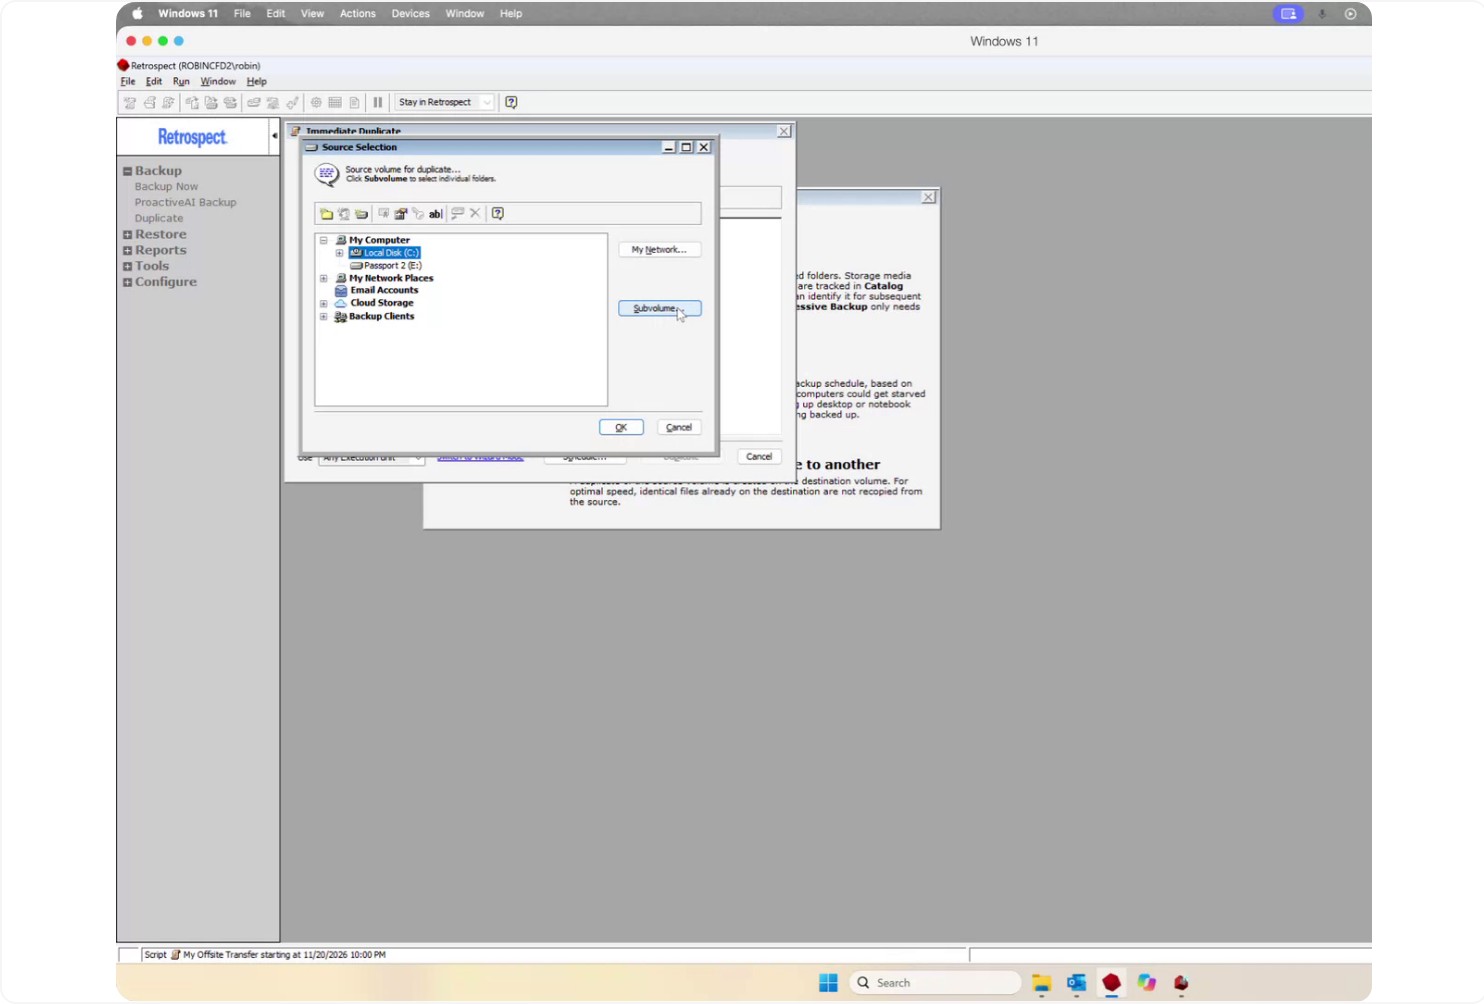
- Browse to and locate the folder you want to copy.
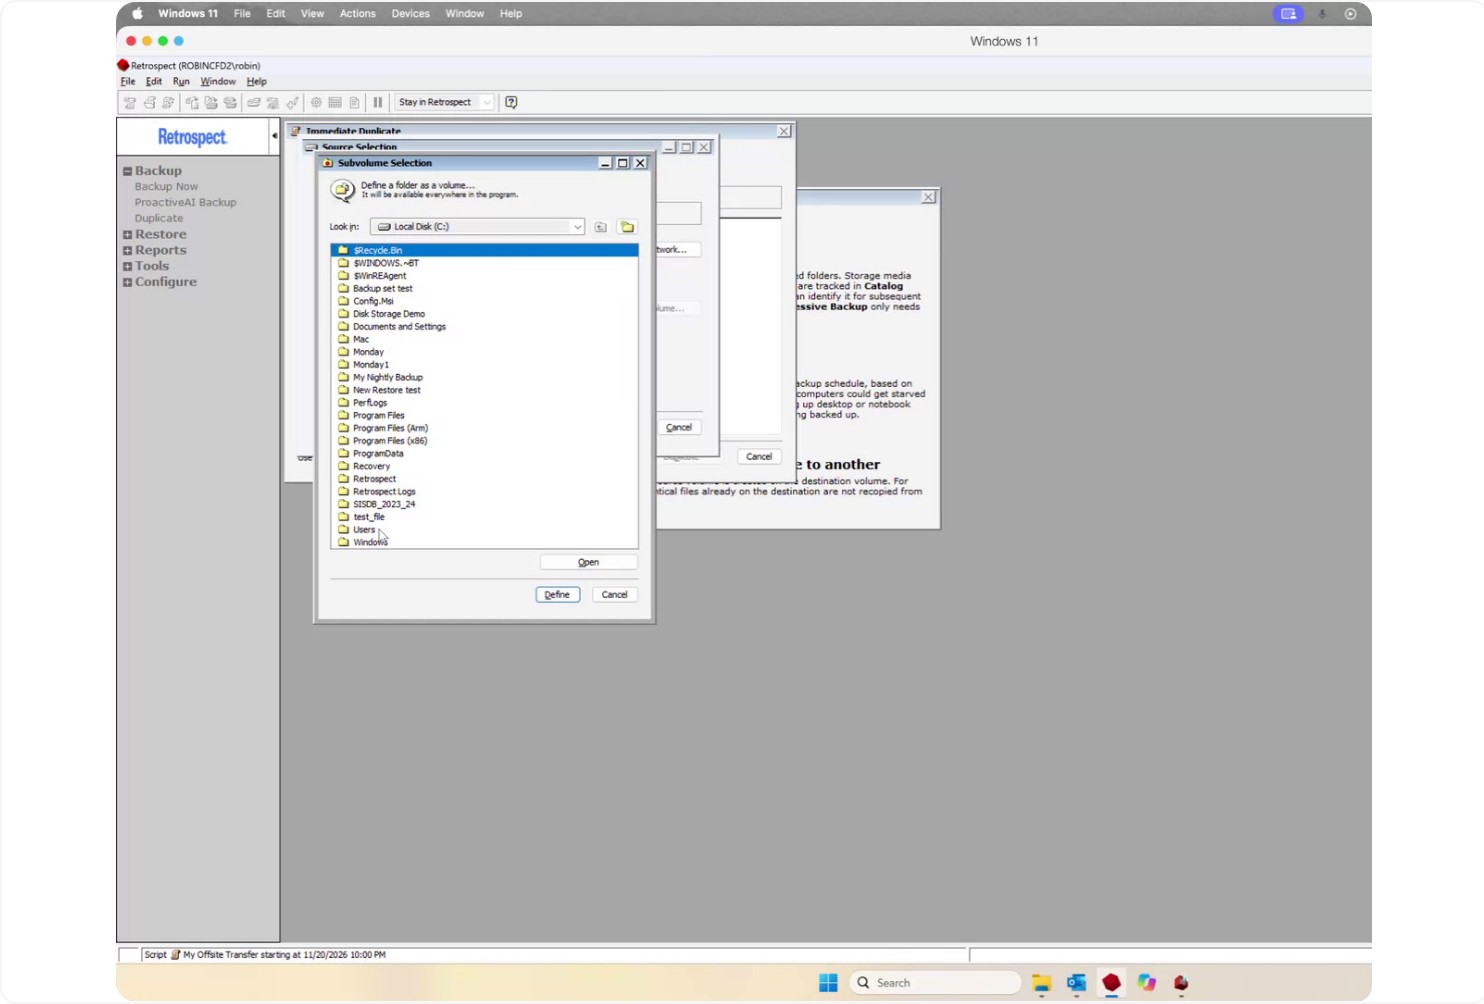
- In this example, highlight the Users folder and click Define.
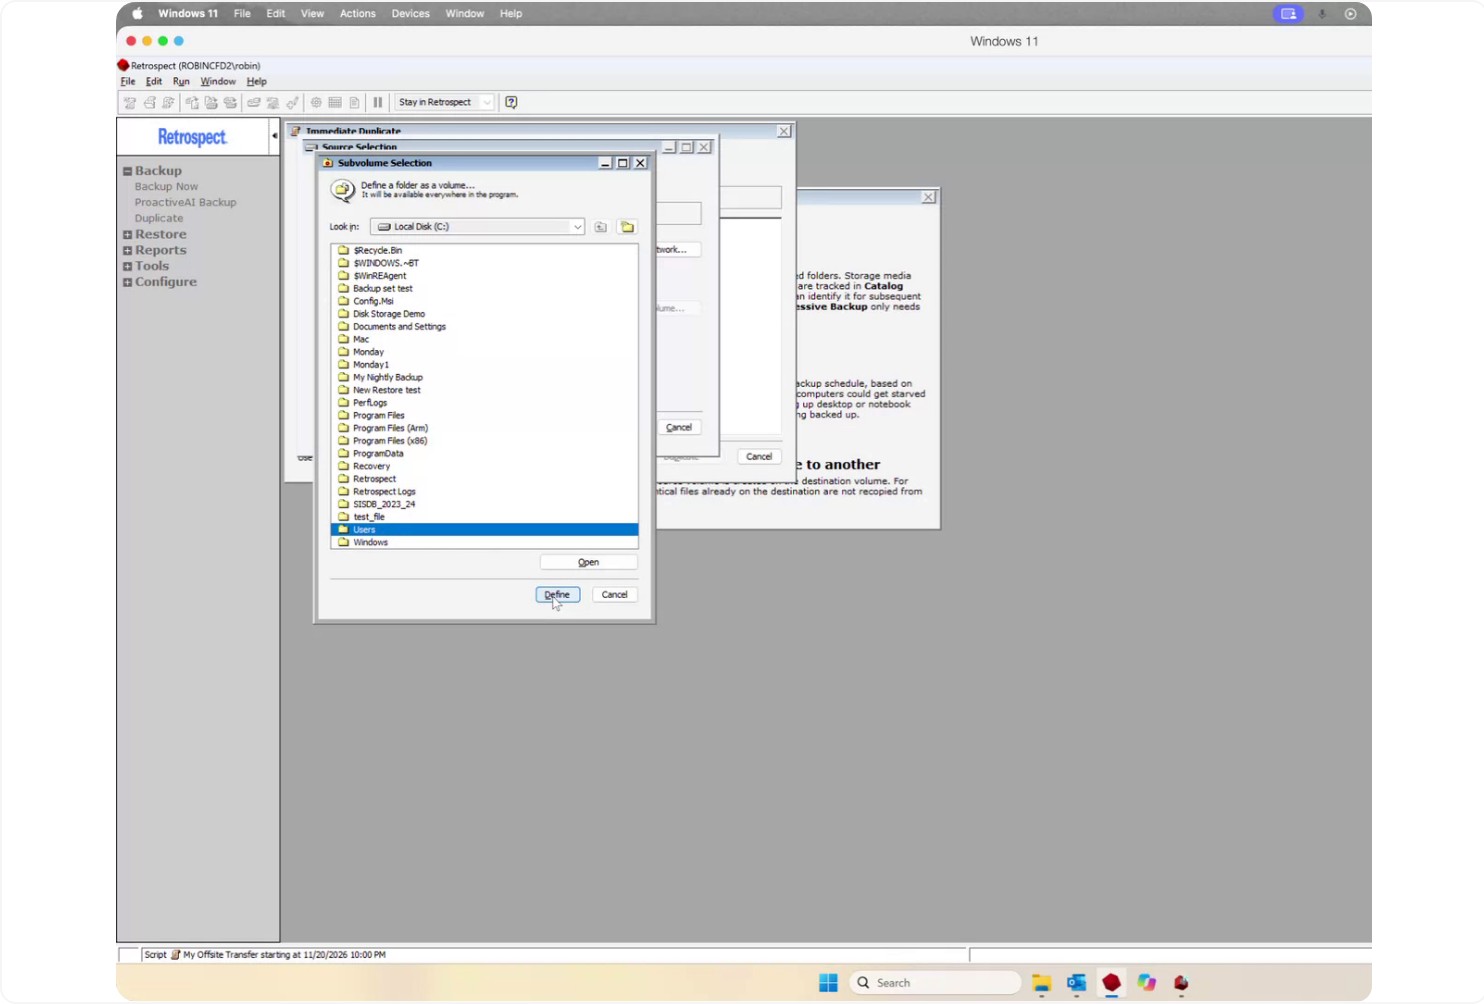
- The folder will be added as a subvolume; click OK to confirm.
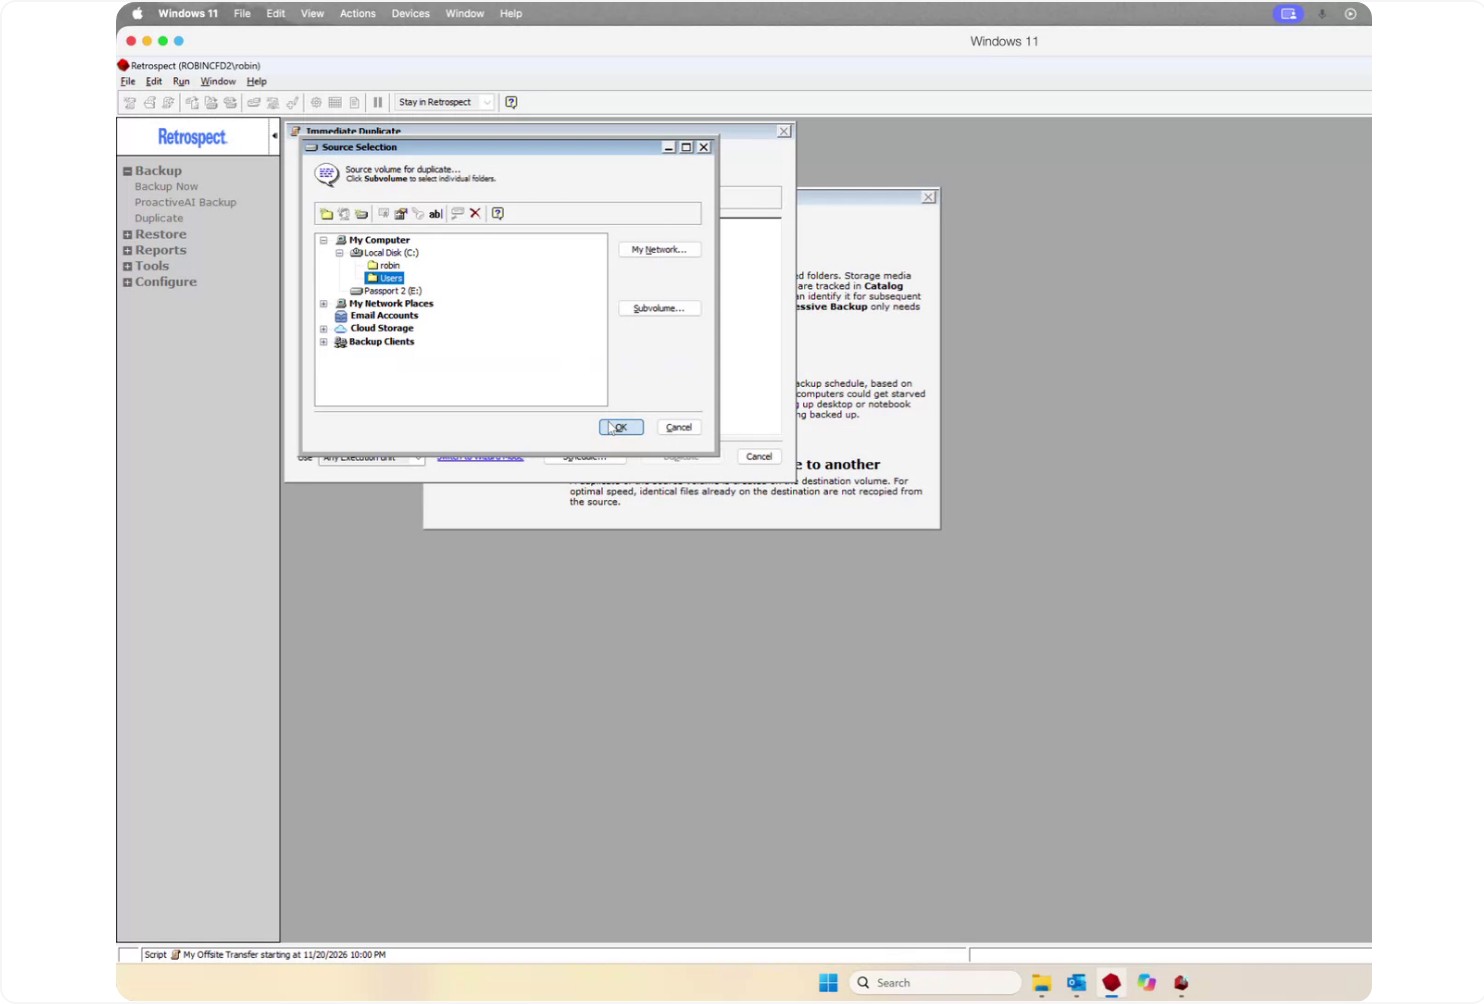
Retrospect will now copy only the Users folder from the C: drive as the source.
Step 3: Select the Destination for the Duplicate
Go to Destination.
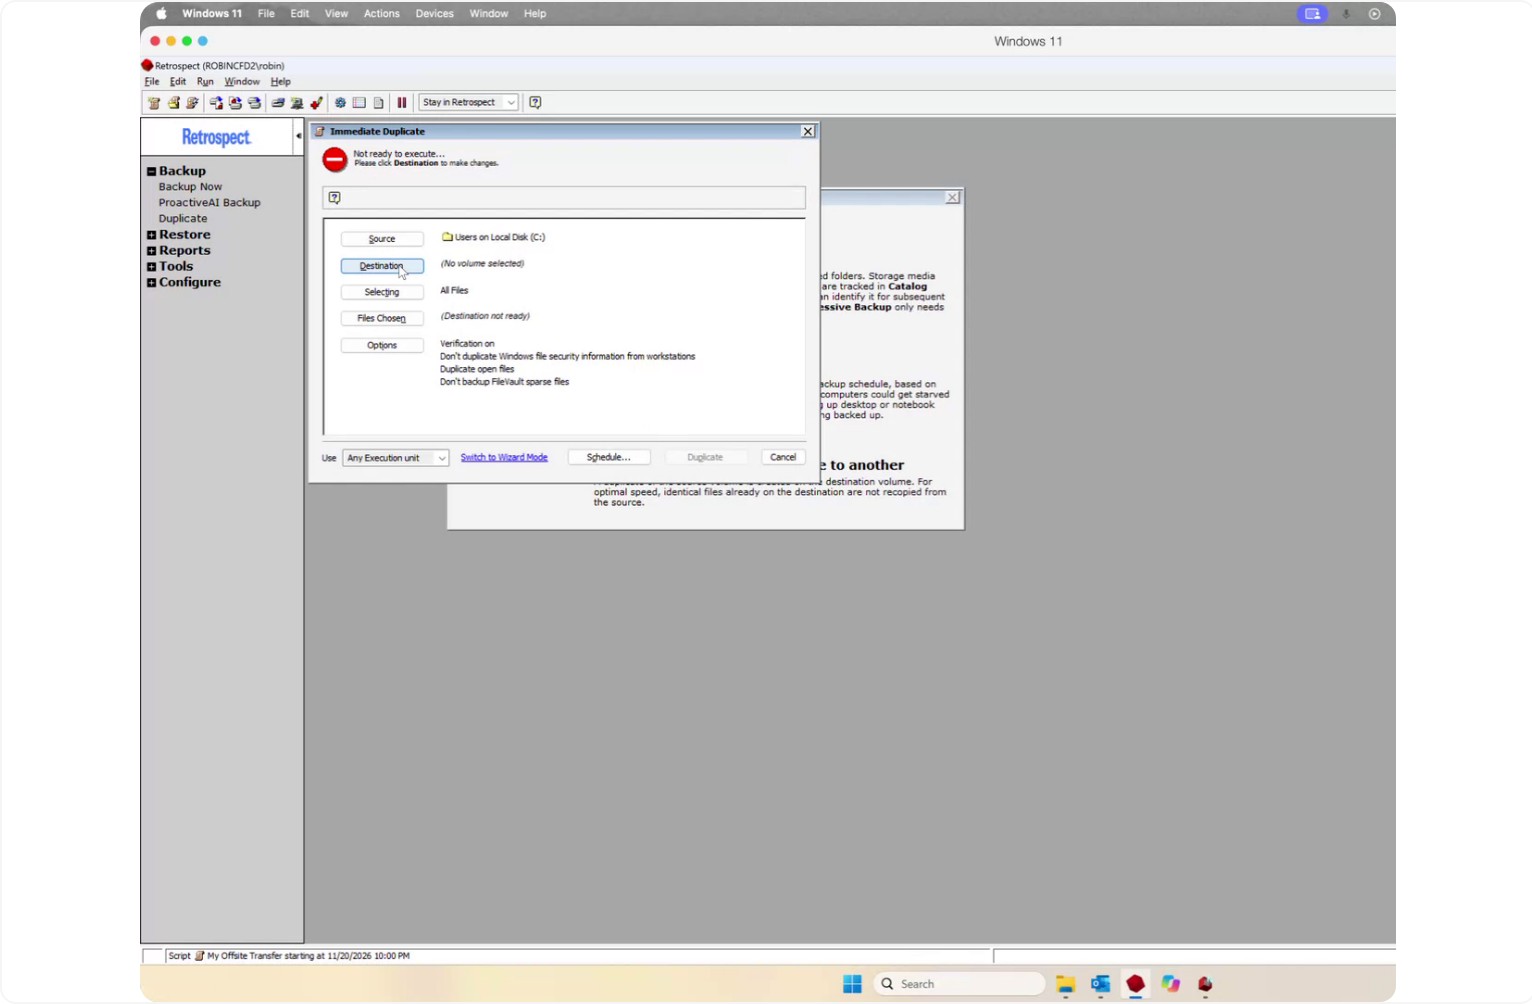
Highlight the disk where you want to store the duplicated data.
You have two main options:
- Use the entire disk as the destination (Retrospect will erase this disk).
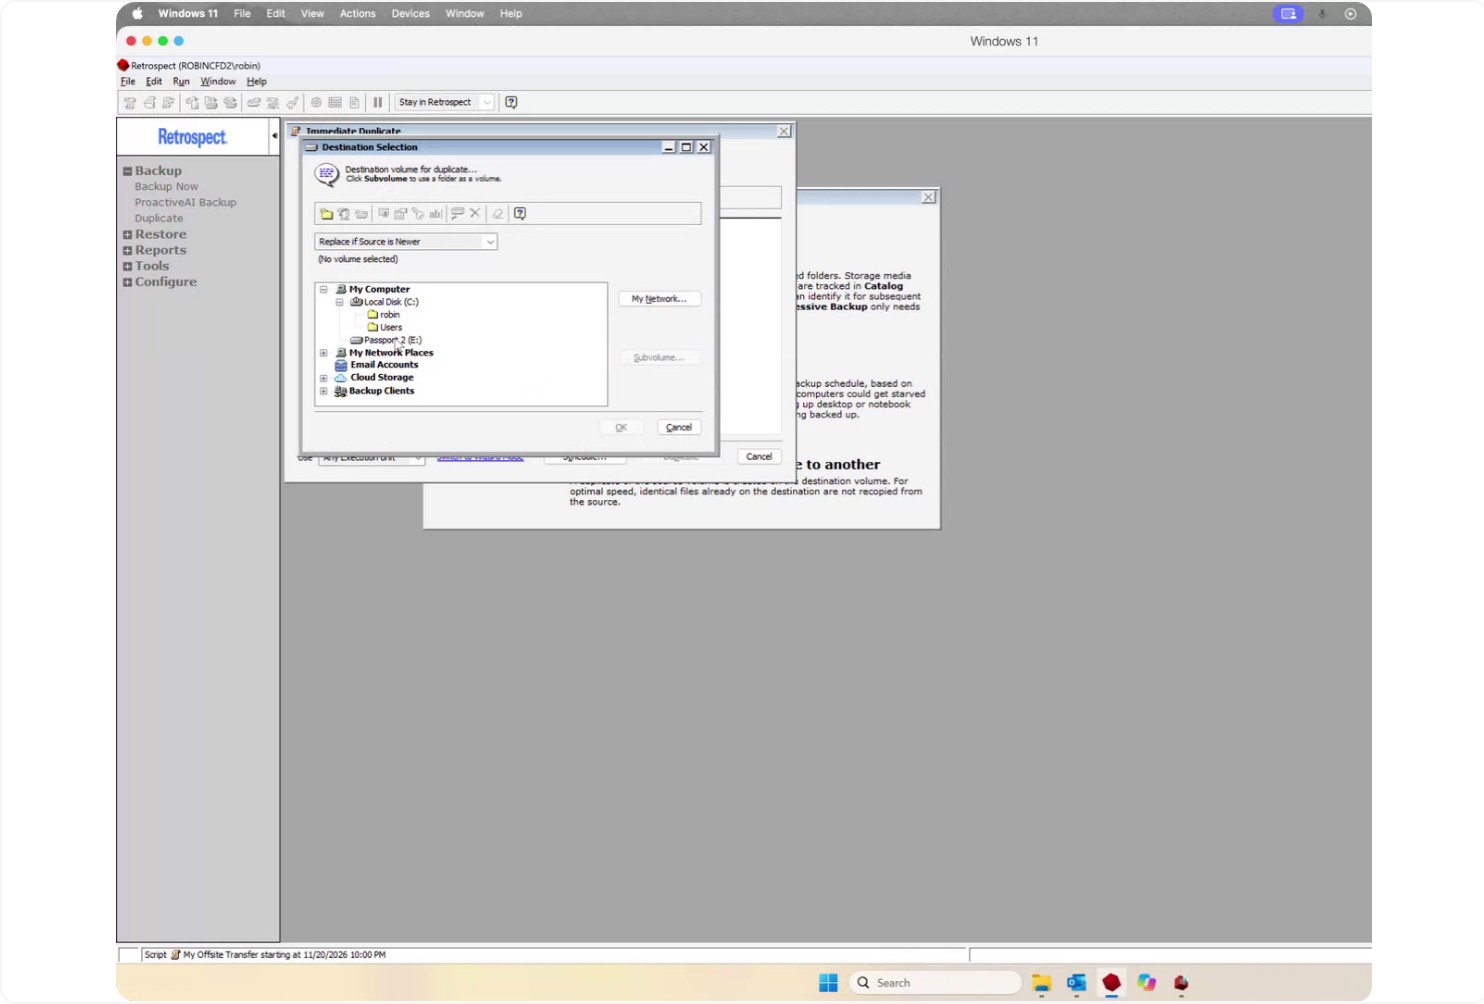
- Use a folder (subvolume) on the disk to avoid erasing the whole disk.
If you do not want Retrospect to erase the entire destination disk:
- Click Subvolume.
- Click the New Folder button.
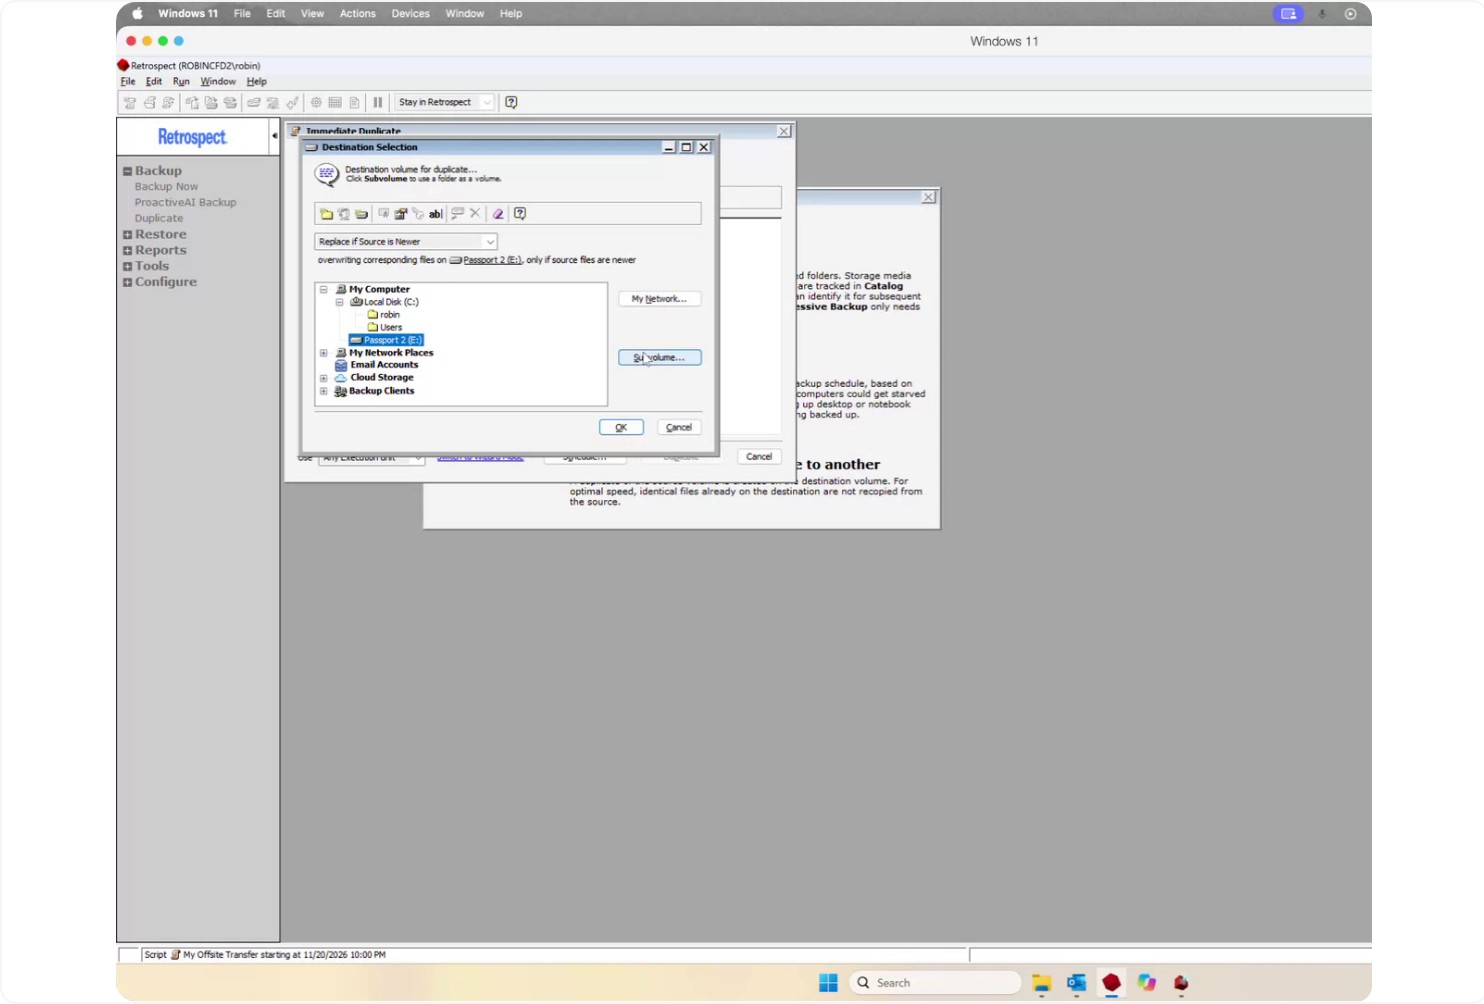
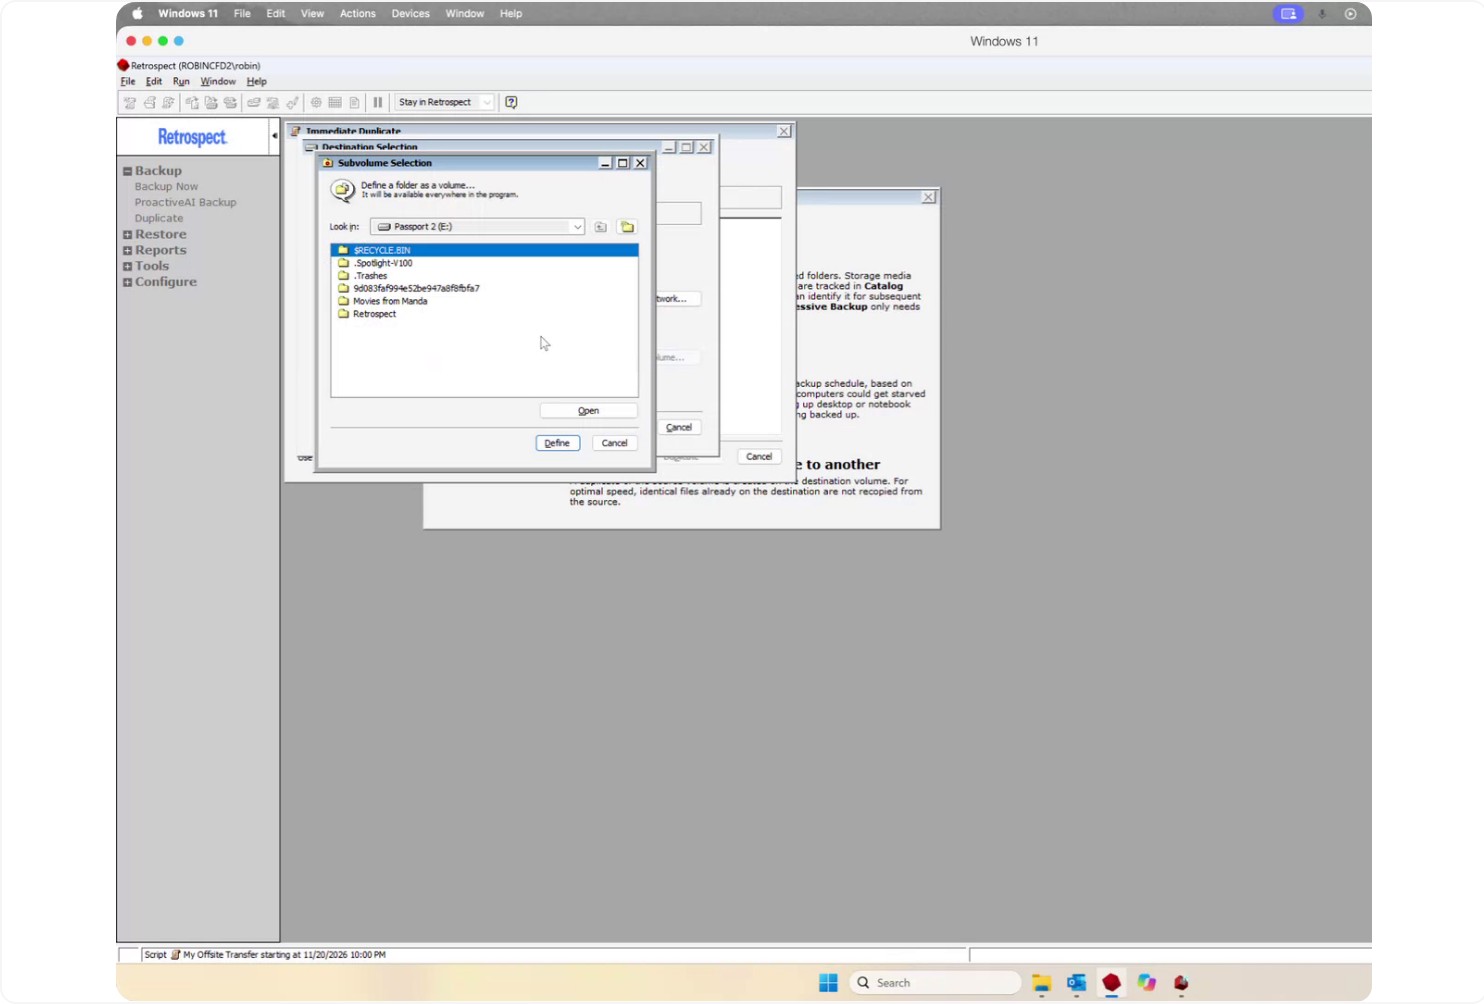
- Name the folder something descriptive, for example, My Duplicate.
- Select this new folder.
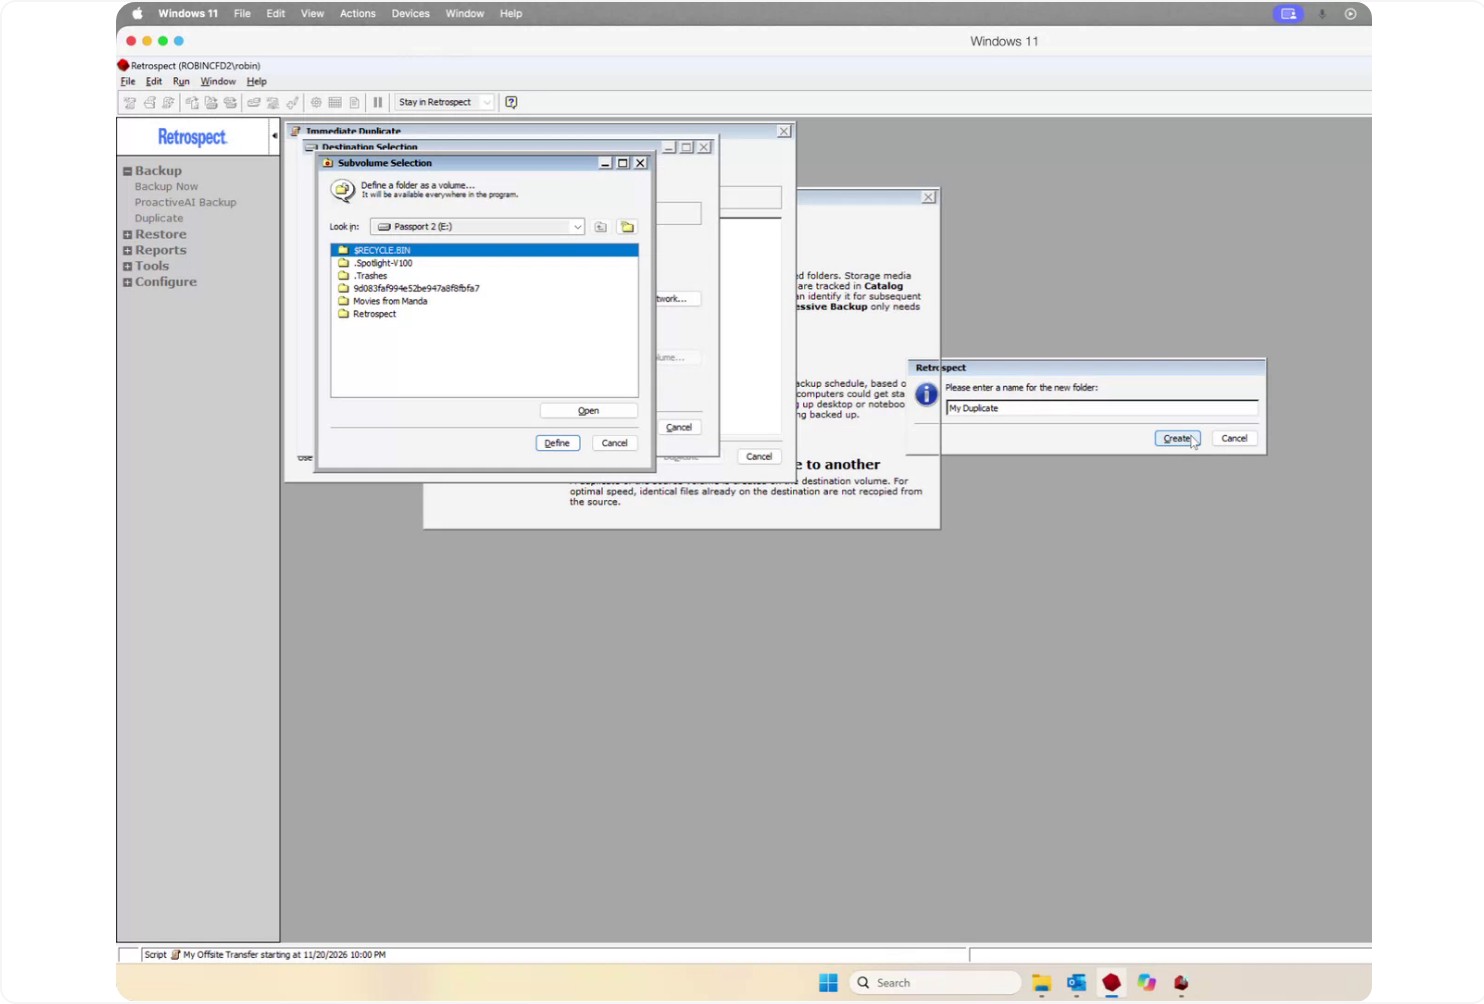
- Define it as a subvolume.
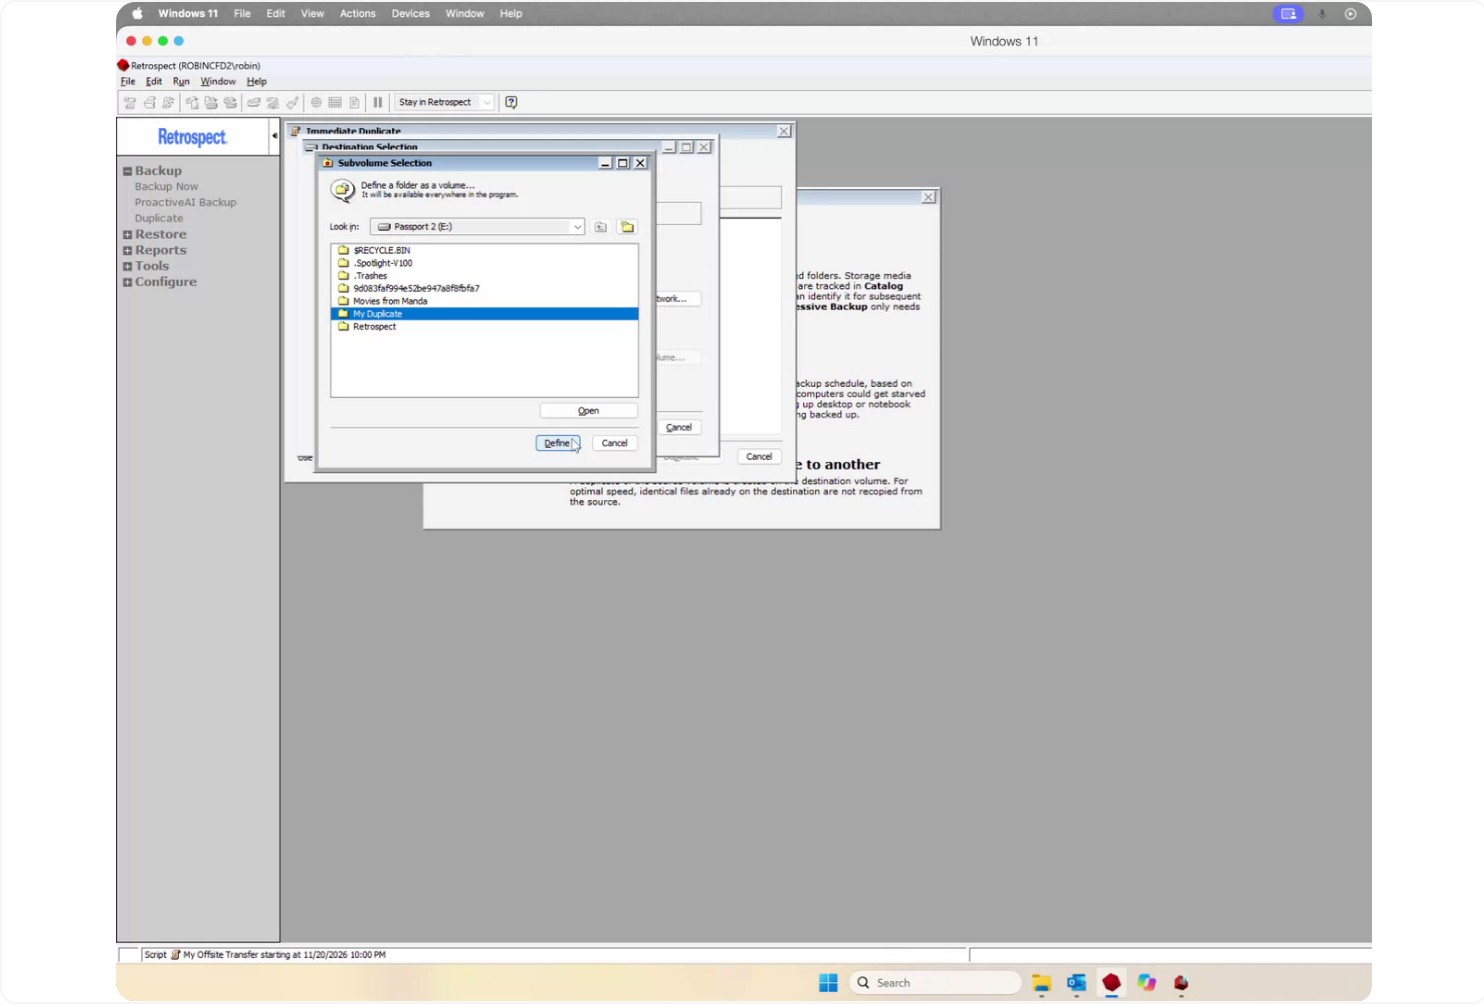
Retrospect will then overwrite only the contents of this specific folder when it copies the data.
Step 4: Configure Duplicate Options
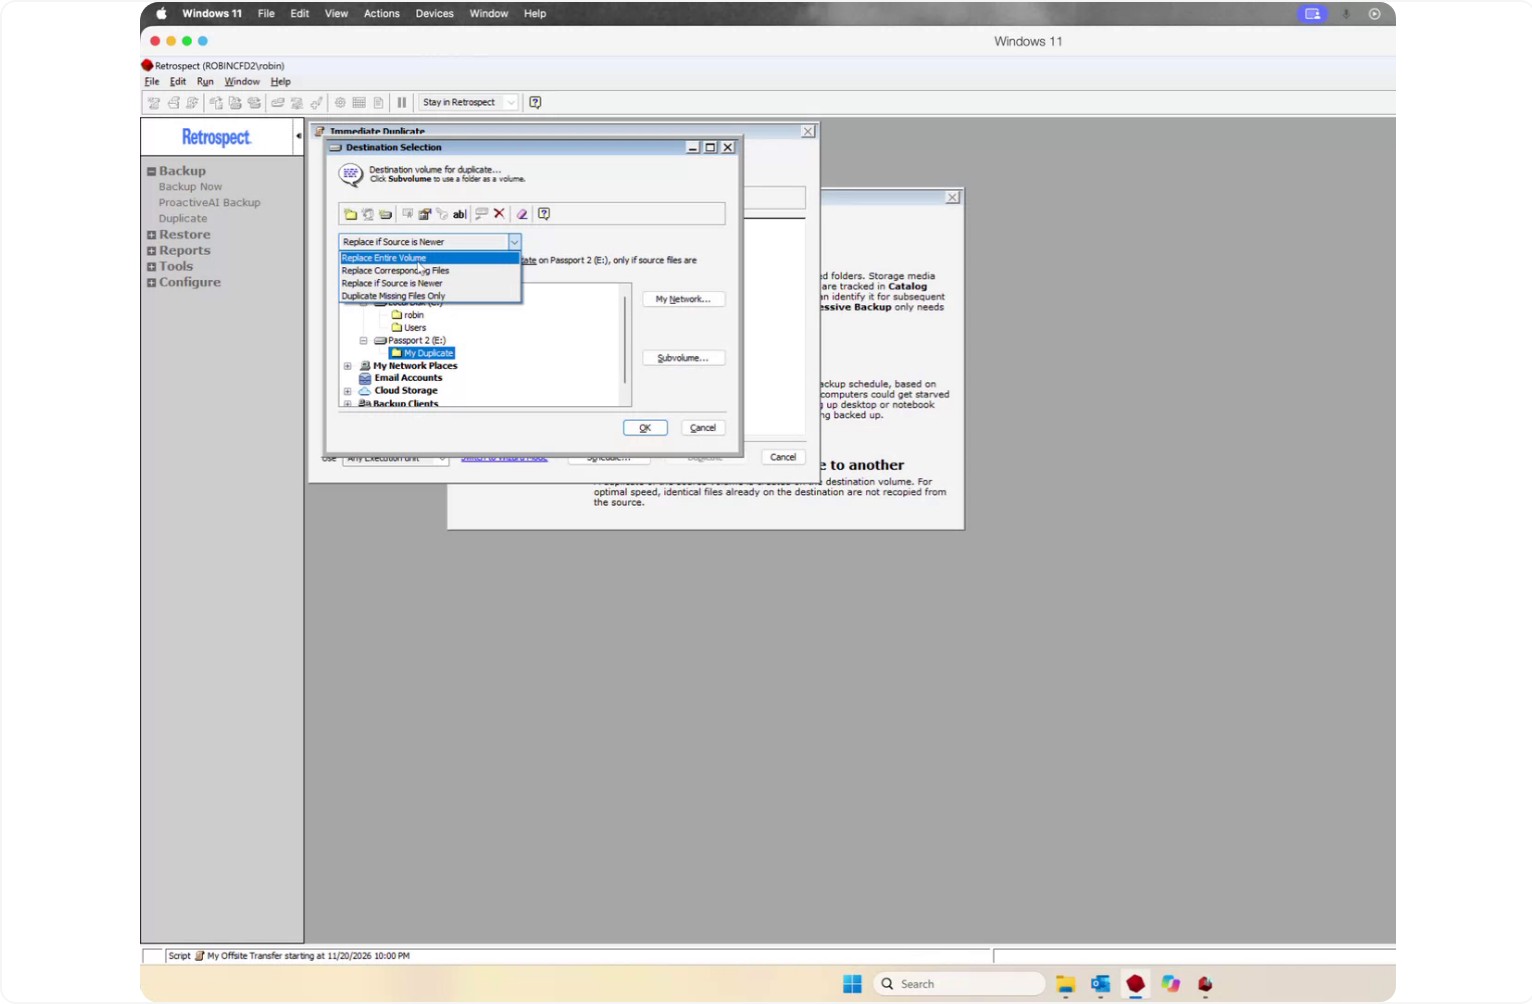
At the top of the Duplicate window, configure how Retrospect will handle existing files on the destination.
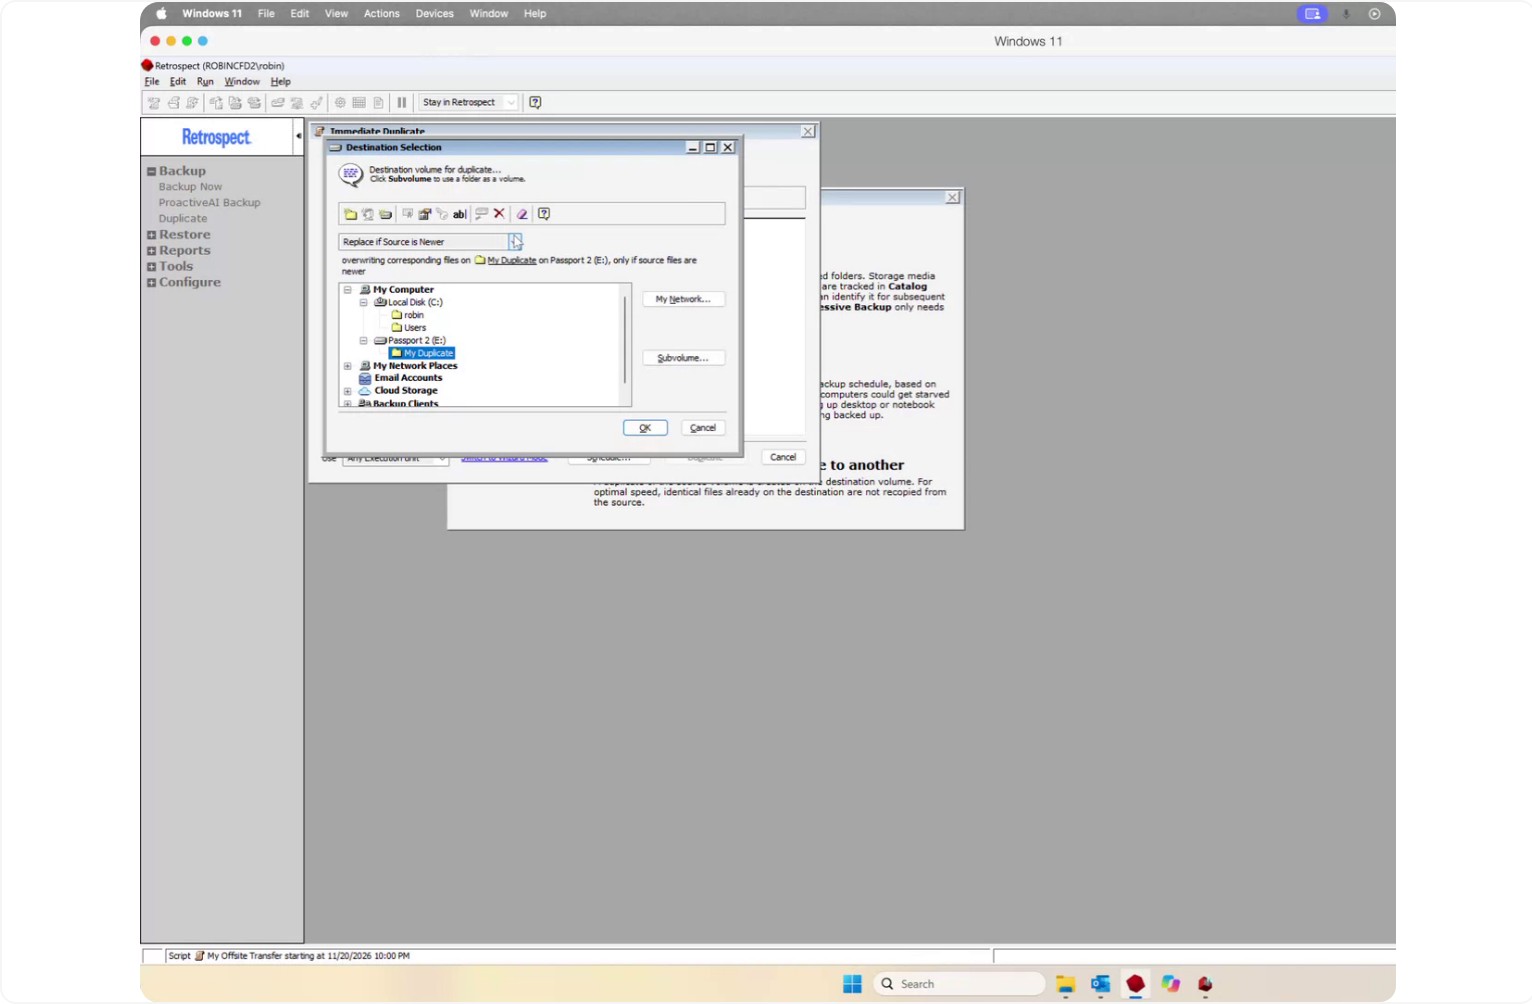
The options are:
- Replace entire disk
Copies all contents of the source to the destination and erases everything in the destination. Any files on the destination that do not exist on the source will be removed. - Replace corresponding files
Copies all files from the source and replaces files on the destination that are different, but does not delete extra files that already exist on the destination. - Replace if source is newer
Copies files only when the source file is newer than the corresponding file on the destination. - Duplicate missing files only
Copies only files that do not already exist on the destination.
All of these options perform incremental copies: Retrospect copies only files that are different or have not yet been copied. Even with Replace entire disk, Retrospect will not recopy unchanged files on subsequent runs.
Select the desired option, then click Replace.
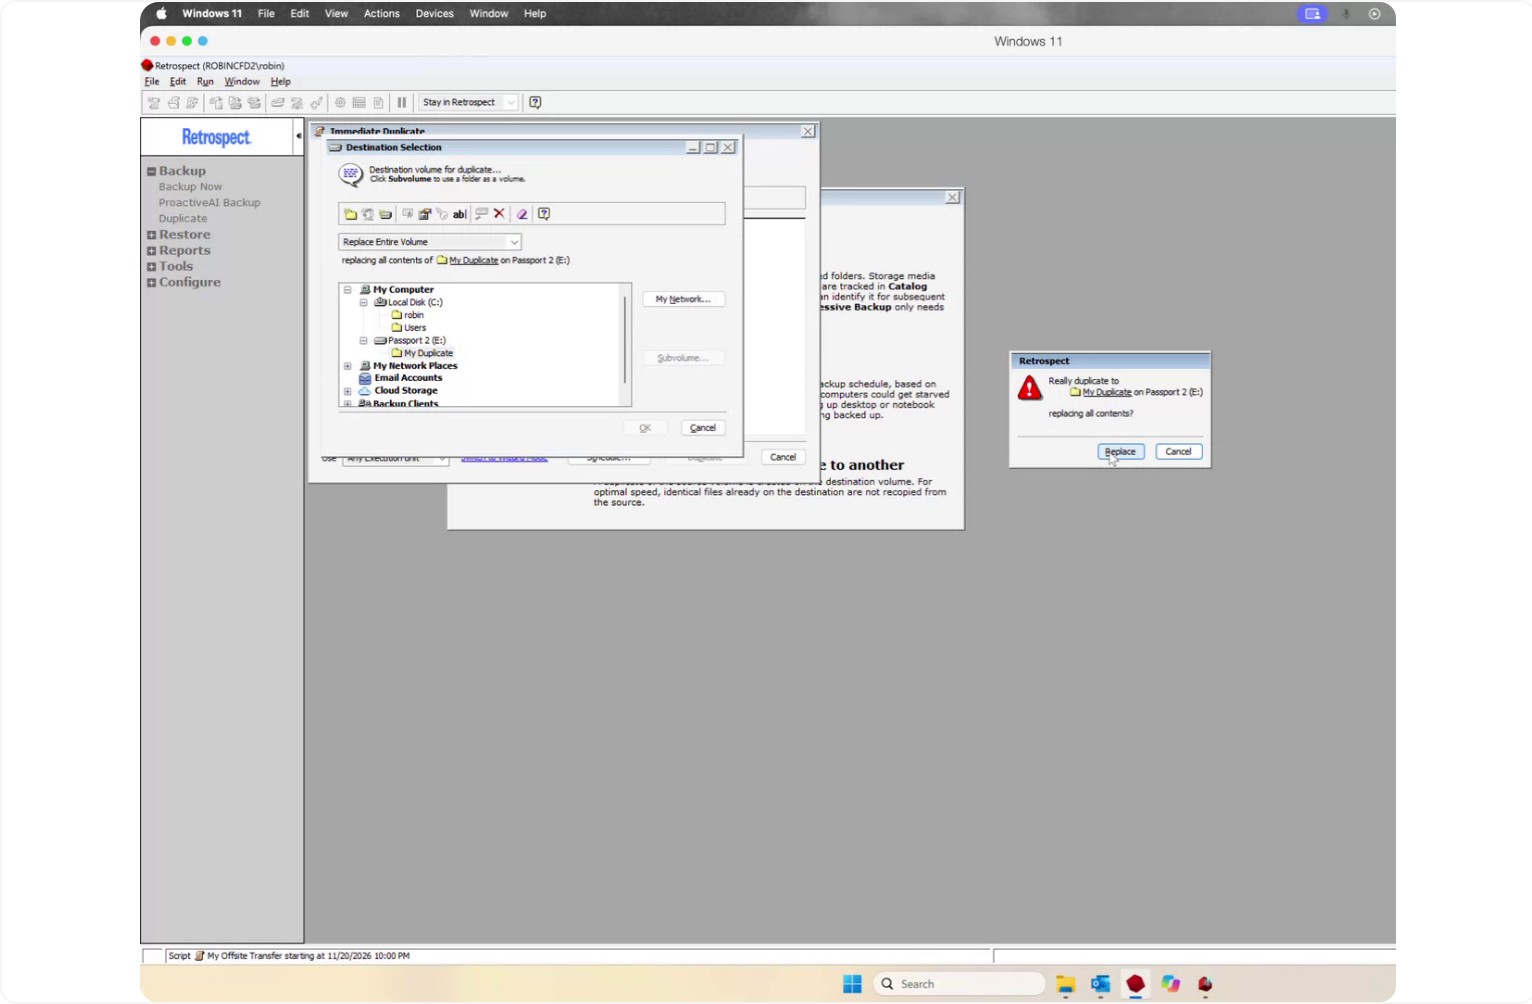
For this example, the source is the Users folder, and the destination is the defined subvolume folder. All files in the Users folder will be processed according to the selected replace option.
Step 5: Run the Duplicate Operation
Ensure the correct source, destination, and file selection (e.g., All Files) are configured. Then choose Duplicate to start the operation.
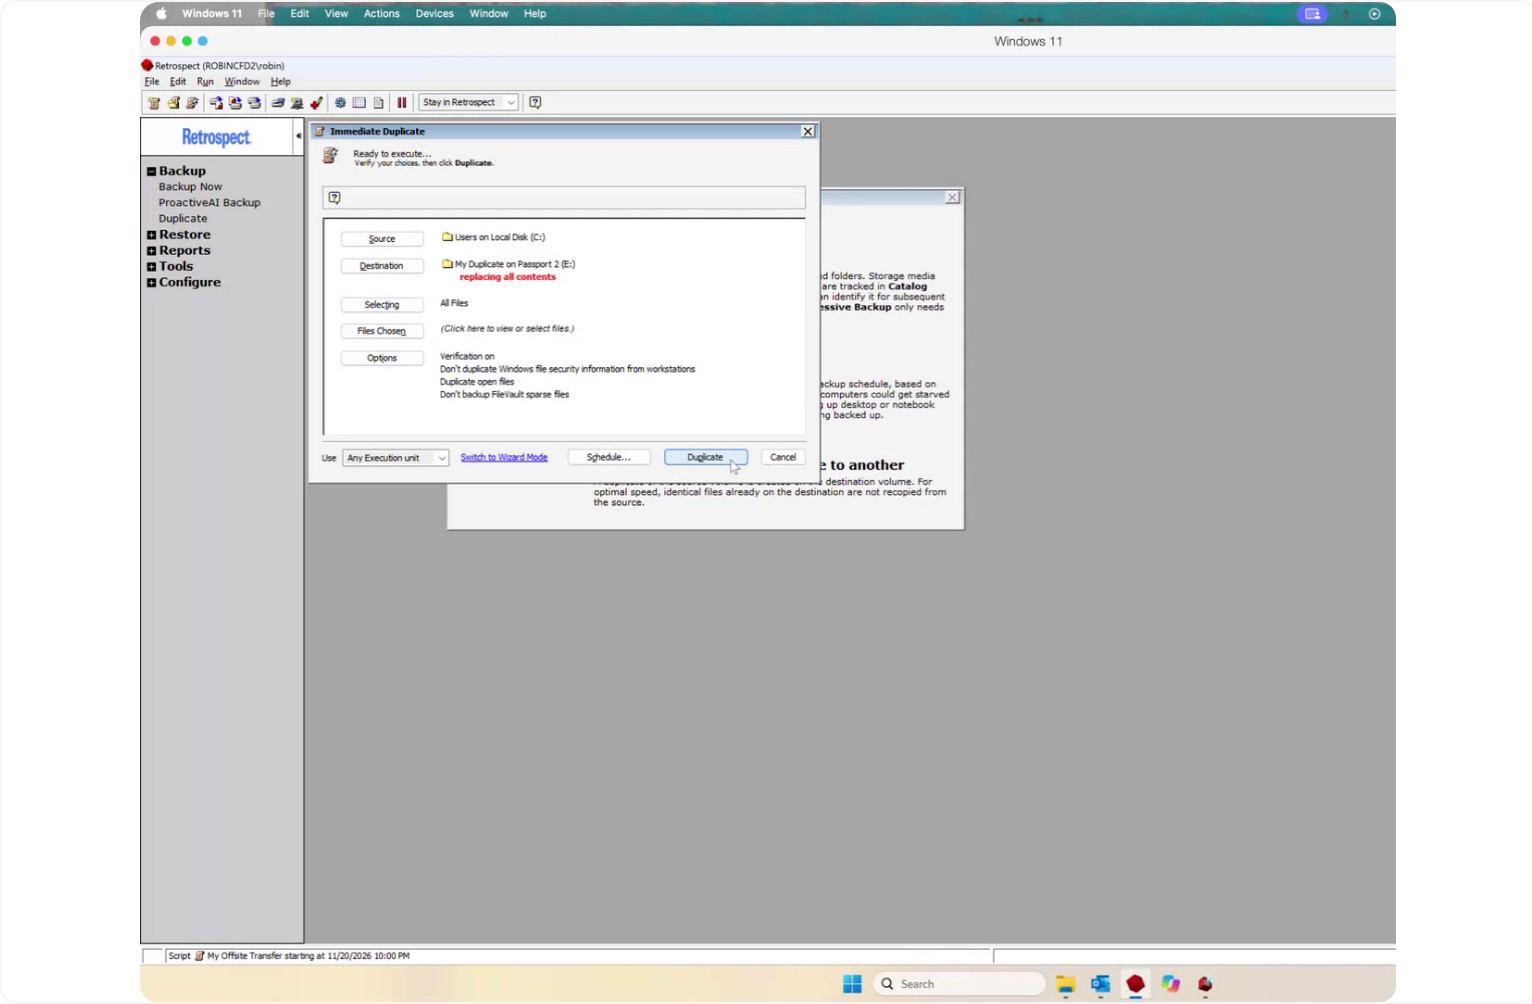
Retrospect will first scan the disk and then begin copying your files.
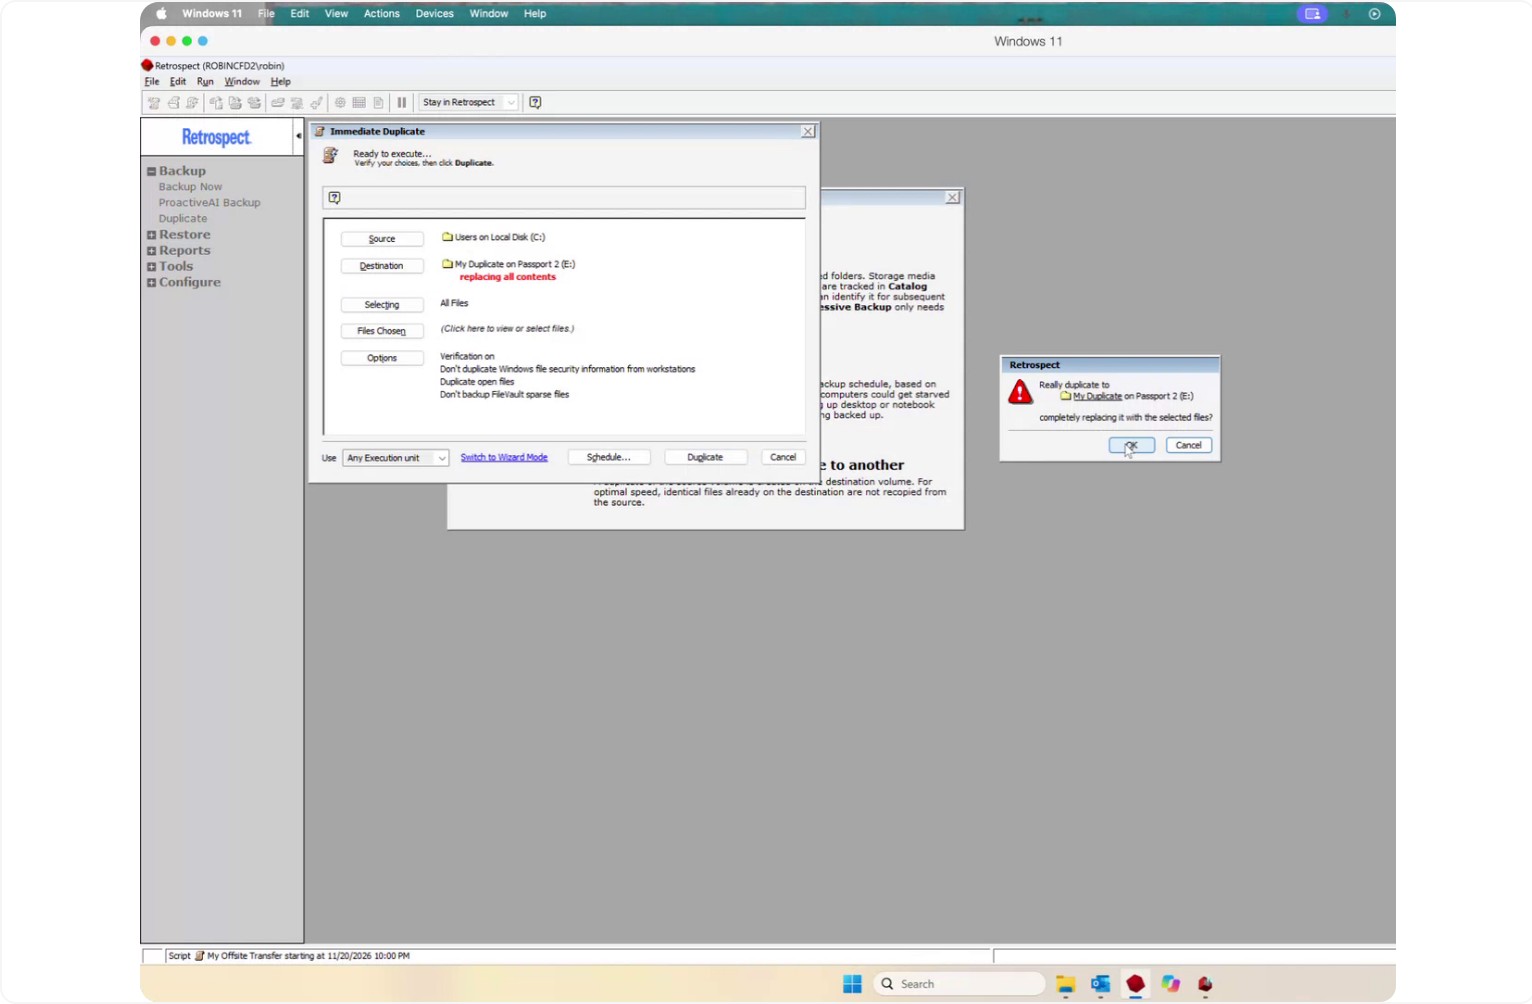
During this process, Retrospect will also prepare for open file backup so that open files can be copied reliably from one disk to another.
The main benefit of using Duplicate instead of a standard backup set is that files are copied in their original format. On the destination, you can:
- Browse the folders directly.
- See files with their original names and types.
- Access them in the future without needing Retrospect.
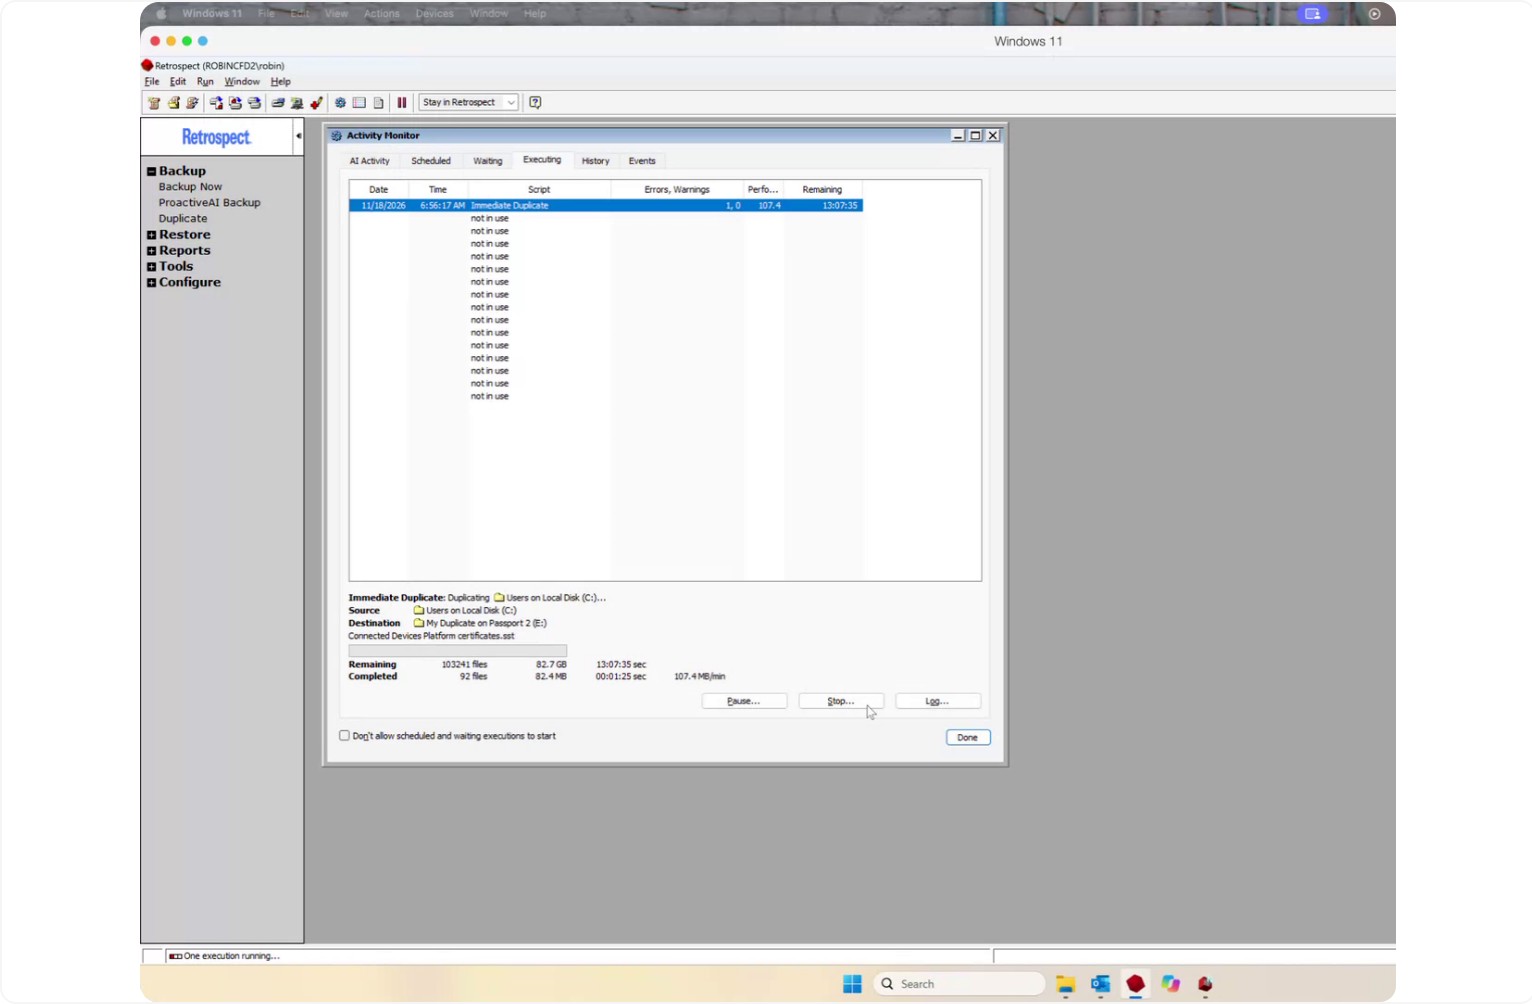
You can monitor progress, including:
- Number of files completed.
- Number of files remaining.
- Estimated time to completion.
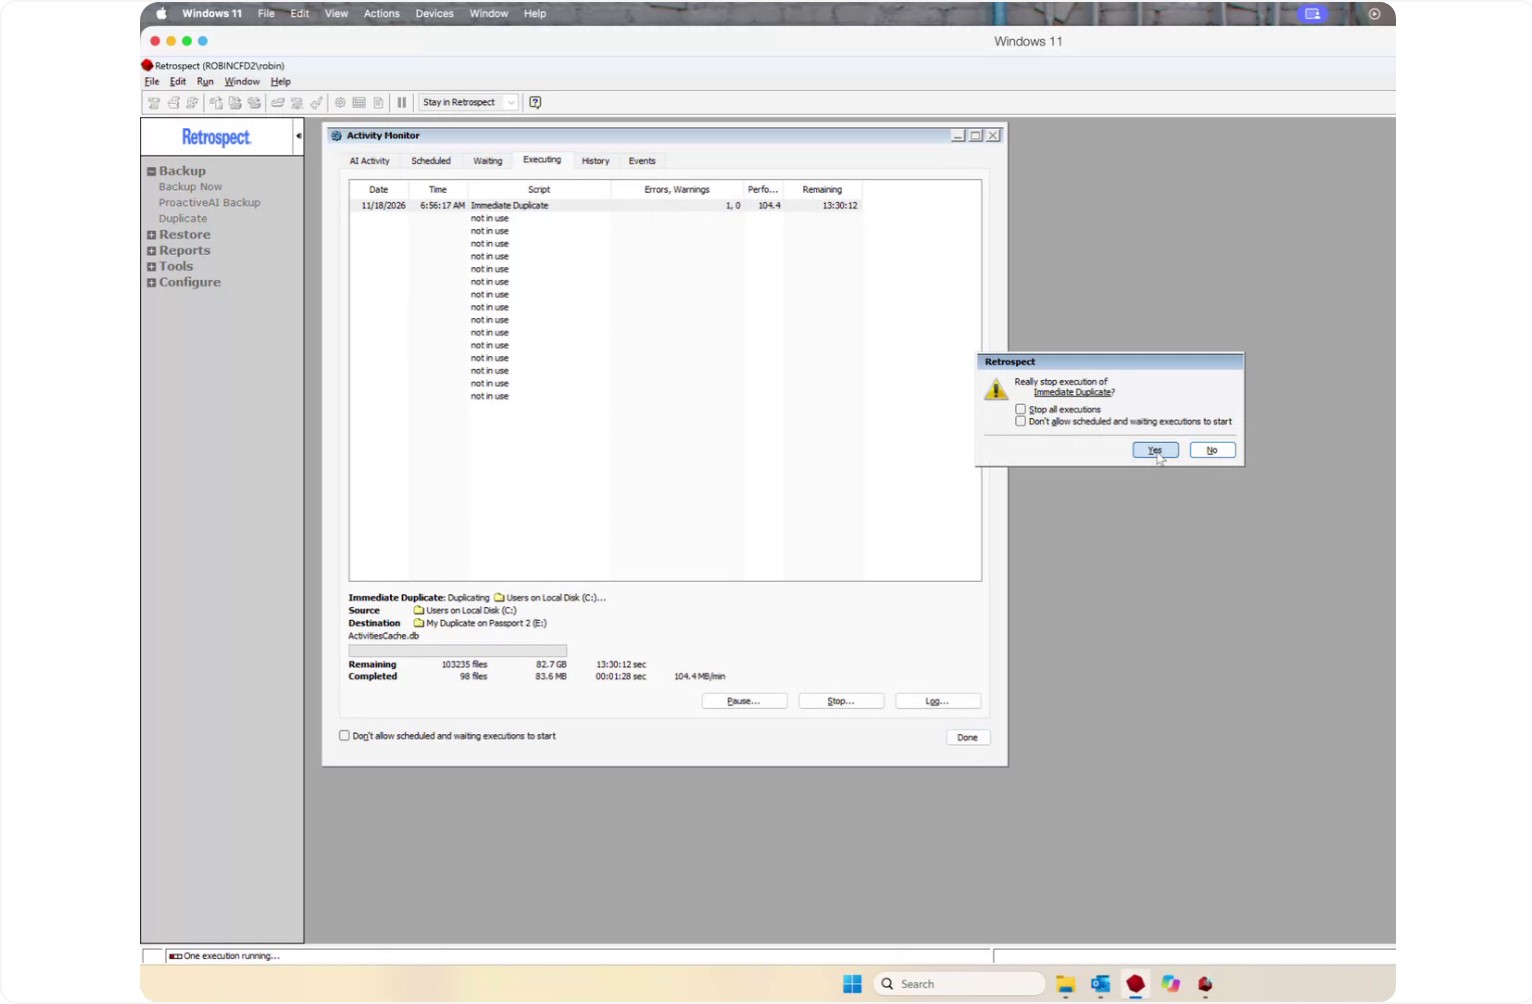
If needed, you can click Stop to halt the duplicate operation.
Step 6: Review and Re‑run Incremental Duplicates
After stopping or completing a duplicate, you can return to Duplicate on the far left.
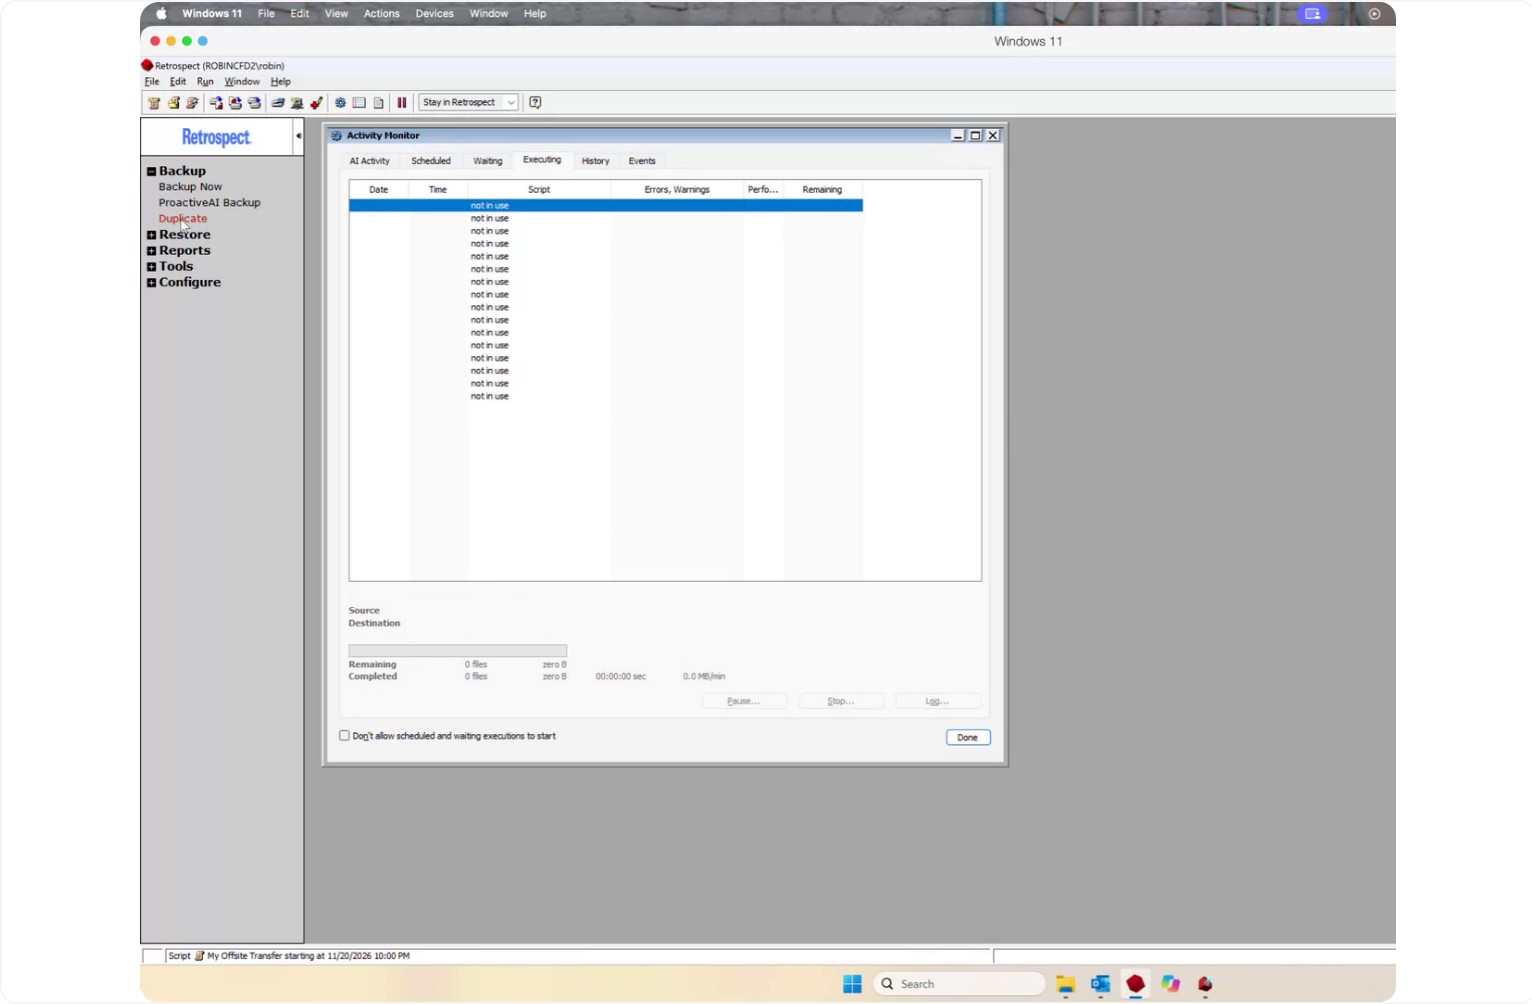
Retrospect will remember all previously used settings for the duplicate operation.
To see how Retrospect performs incremental copying:
- Go to Files Chosen.
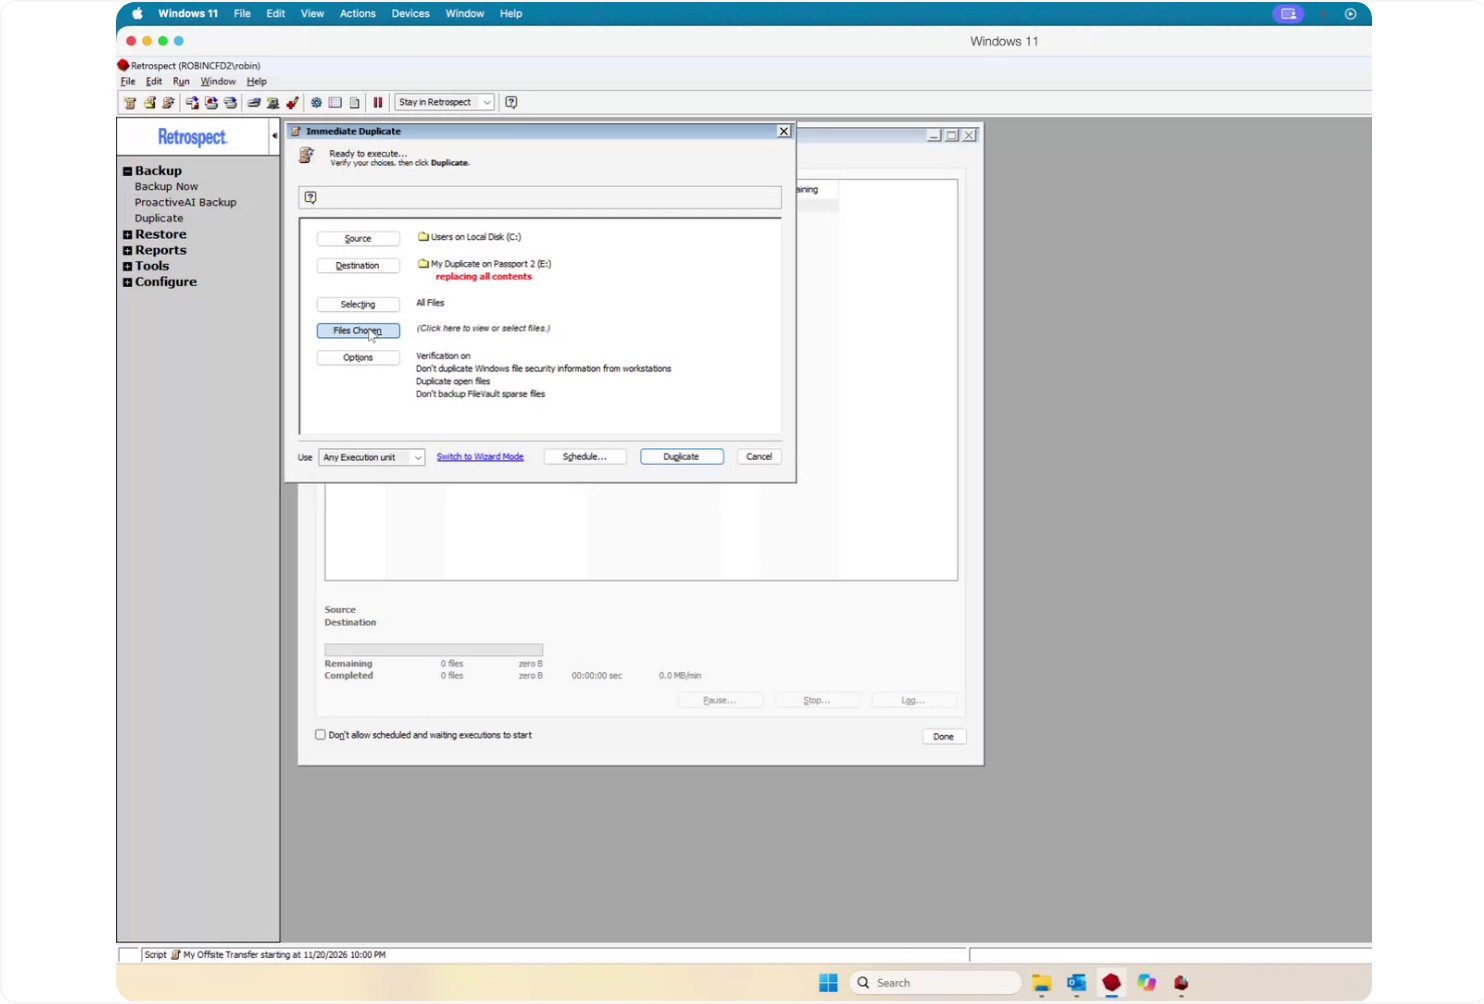
- Retrospect will browse the source disk and compare it to the destination disk.
- It will finish scanning the source drive, then scan the destination drive to compare the two.
After the comparison, Retrospect will display a window listing the files and folders on both the source and destination:
- Items with a diamond icon have already been copied and do not need to be copied again.
- The Immediate Backup Summaryshows:
- The total number of files selected.
- How many files will be overwritten because they have changed.
- How many files have already been copied and do not need to be recopied.
- How many additional files still need to be copied because they were not included in the previous duplicate operation.
This confirms that subsequent duplicates are incremental, copying only new or changed files based on your chosen replace option.