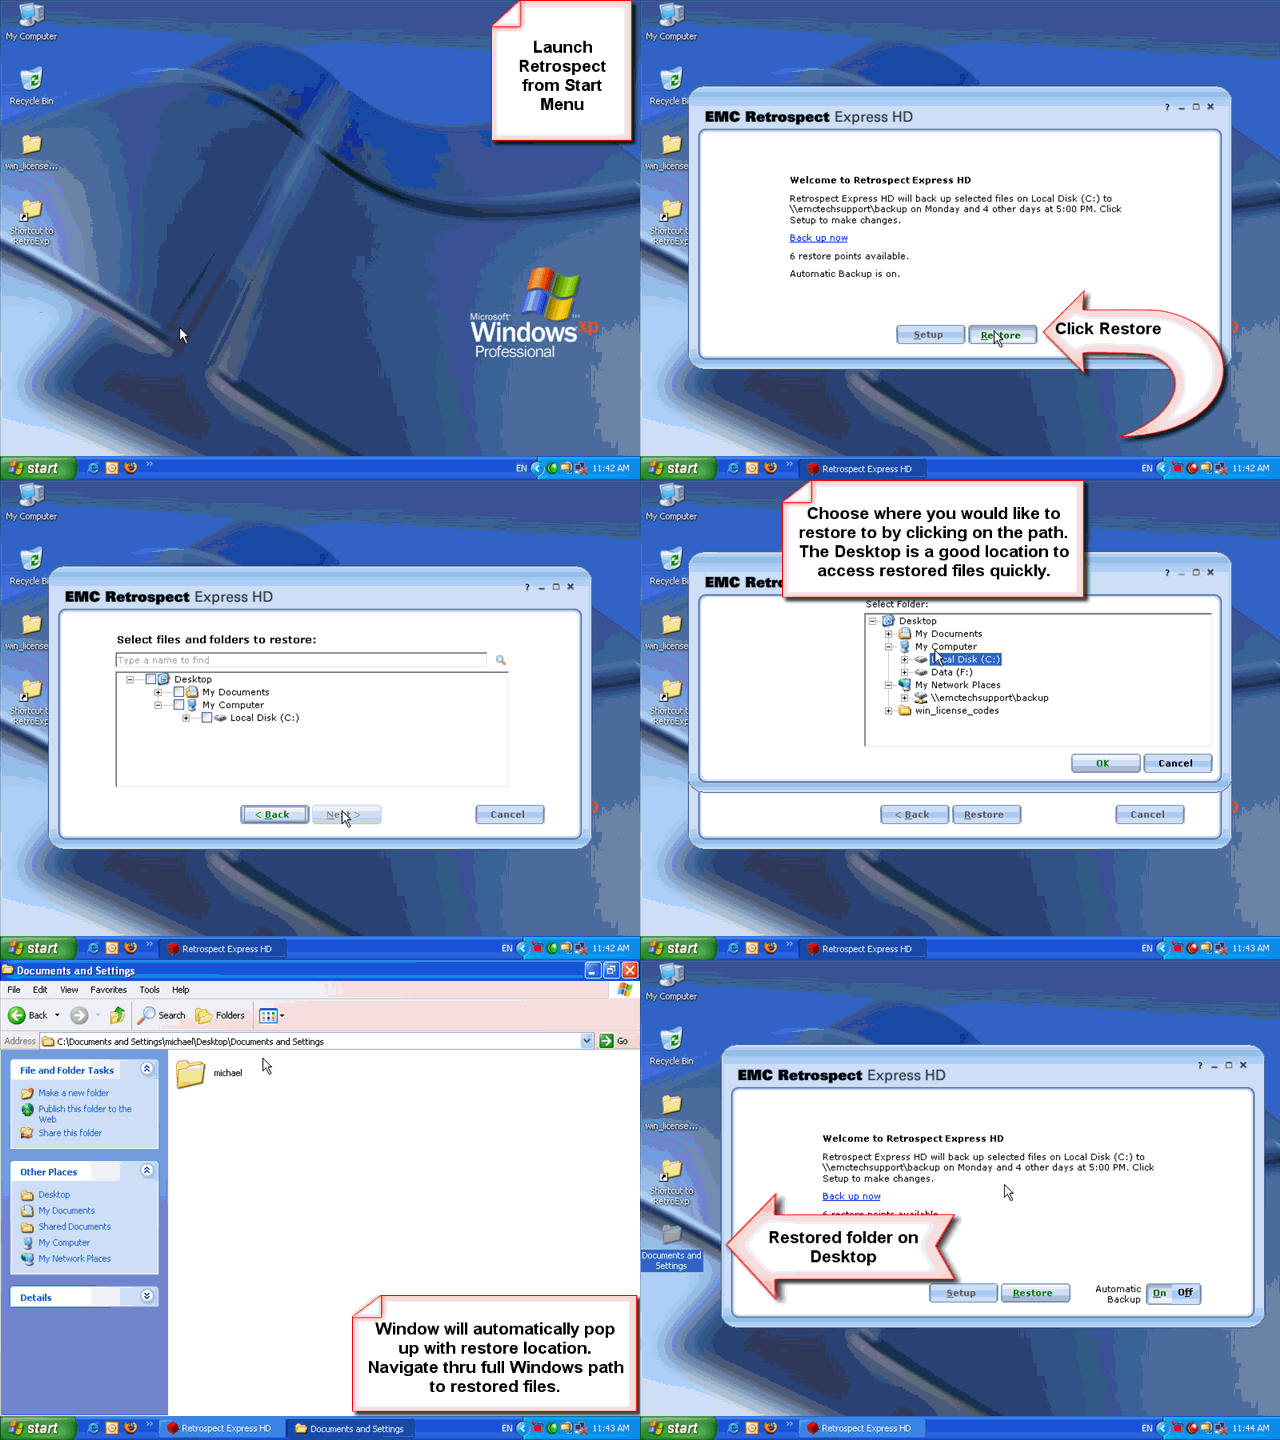
- Launch Retrospect HD by double-clicking the taskbar icon or using Start > Programs > EMC Retrospect > Retrospect HD 2.0.
- Choose Restore.
- To view and/or restore the files and folders in a restore point, select it from the list and click Next.
The restore point list includes all the available restore points starting with the most recent. You may have to scroll to see all the restore points.
You can use the calendar to help find a specific restore point. Every day that has at least one associated restore point is displayed in bold in the calendar. Clicking a bolded date in the calendar automatically scrolls to and selects the latest restore point from that date.
The restore point list provides some basic information about each restore point. It lists the date and time each was created, as well as the disk from which files and folders were backed up. Icons to the left of the date indicate the status of the restore point:
- A green circle means the backup was successful
- A yellow triangle means the backup succeeded with some errors
- A red triangle means the backup failed
Even restore points marked with yellow and red triangles may contain useful files that can be restored. Select the restore point and click Next to see what files and folders it includes.
Select the files to restore. This screen contains a Windows Explorer-like view of backed up files and folders. All files and folders that were backed up are displayed here. If a file or folder does not appear, it was not backed up. You can expand a folder by clicking the + sign. By default, no files or folders are selected to be restored. To restore a file or folder, select the check box next to its name. If you decide you don’t want to restore it, clear the check box. You can select as many files and folders as you want to restore.
Note: Selecting the check box for a folder selects all the disks, files, and subfolders it contains.
- After selecting the files and folders to restore, but before clicking Next, review your selections to make sure the files and folders you want are marked:
- A solid check mark indicates that a folder or file will be restored. For folders, a solid check mark means that all disks, subfolders, and files it contains will also be restored.
- A dimmed check mark indicates that a folder will not be restored, but it contains disks, files, or subfolders that will be restored.
- No check mark indicates that a folder or file will not be restored.

Last Update: February 14, 2012