Top Articles
Retrospect has a number of built-in tools to help with tracking down problems. Our support team might ask you to send them configuration files, turn on debug logging or increase the log level, edit a retro.ini setting. These instructions walk through how to do both. Do not modify the files unless our support team instructs you to.
Support Diagnostic Tool: Download for Mac | Available Soon for Windows
Note – These instructions apply to Retrospect for Mac 8.0 or higher and Retrospect for Windows 7.7 or higher.
- Configuration File
- Logging - File
- Logging - Mac Limit
- Logging - Log Level
- Logging - Size Limit
- retro.ini
- Instant Scan
- Grooming
- Proactive Backup
Configuration File
Retrospect keeps all of its information in a configuration file at the following locations:
Windows – C:\ProgramData\Retrospect\Config77.dat
Mac – /Library/Application Support/Retrospect/Config80.dat
These config files are compatible with Retrospect for Mac 8.0 or higher and Retrospect for Windows 7.7 or higher.
Logging - File
Retrospect maintains a global operations log file for all of its activities. If you encounter a problem, be sure to check the log first. The log is available in the application at Reports > Operations Log on Windows and at View > Log on Mac. The file is at the following locations:
Windows — C:\ProgramData\Retrospect\operations_log.utx
Mac — /Library/Application Support/Retrospect/operations_log.utx
In addition, the Retrospect Client logs to a file at the following locations:
Windows (pre-Vista) — C:\Documents and Settings\All Users\Application Data\Retrospect Client\retroclient.log
Windows (pre-Vista) — C:\Documents and Settings\All Users\Application Data\Retrospect Client\qtsystray.log
Windows — C:\ProgramData\Retrospect Client\retroclient.log
Windows — C:\ProgramData\Retrospect Client\qtsystray.log
Mac — /var/log/retroclient.log
Linux — /var/log/retroclient.log
# Retrospect 10 for Windows
Windows (pre-Vista) — C:\Documents and Settings\All Users\Application Data\Retrospect Client\qtcontrolpanel.log
Windows — C:\ProgramData\Retrospect Client\qtcontrolpanel.log
Logging - Mac Limit
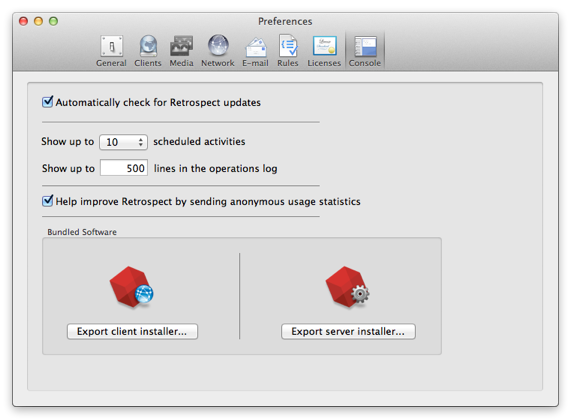
On the Mac, the Log window only shows the last 500 lines of the log by default, indicated at the top of the window. For instance, it might say [Showing 500 lines out of 21325]. To change this setting, open Settings > Console and change "Show up to __ lines in the operations log".
Logging - Log Level
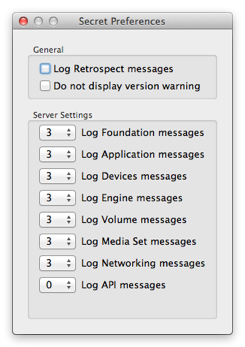
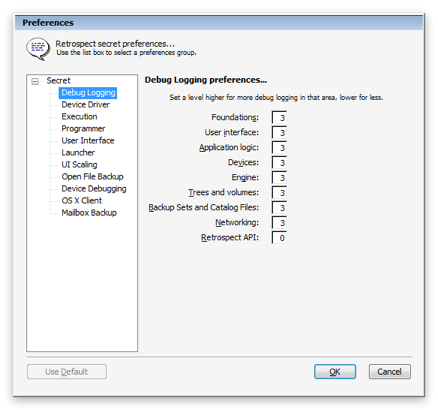
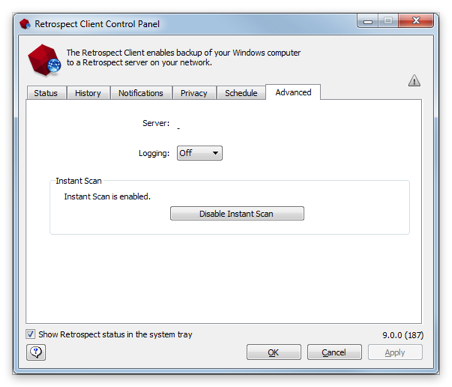
To increase the logging level or turn on debug logging for the server, open Secret Settings with one of the key combination below. For the client, follow the instructions below. Our support team will give you instructions about what options to change. The changes will be effective immediately; you do not need to restart the application.
Mac — Command-Option-Comma
Windows — CTRL-ALT-P-P
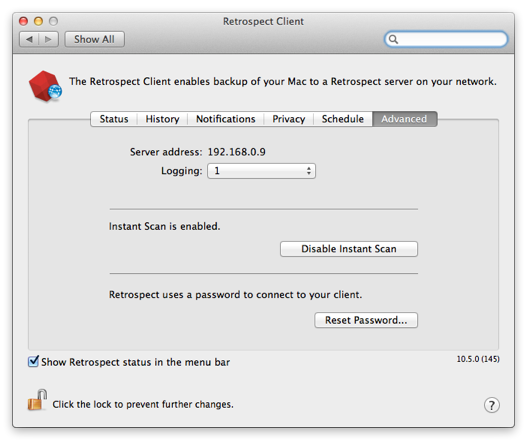
Mac Client — Open System Preferences. Hold down the command key and click on "Retrospect Client". Select "Advanced" tab.
Windows Client — Hold down the control key for three seconds. The "Advanced" tab will appear.
Logging - Size Limit
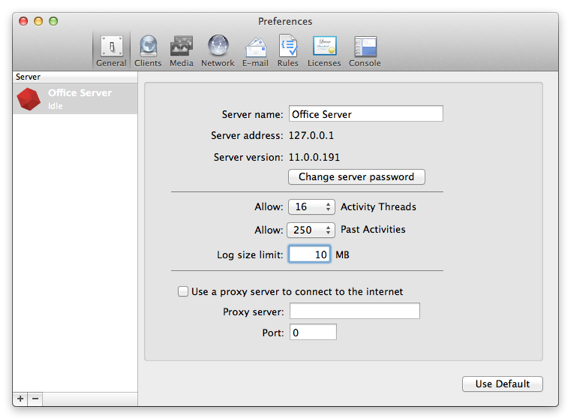
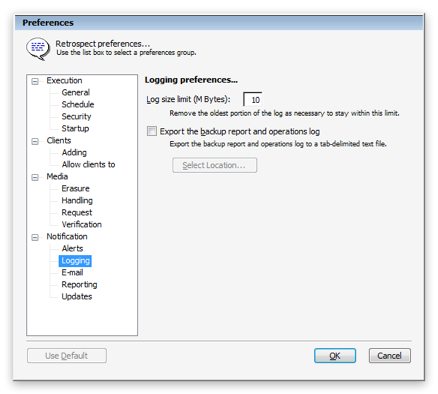
You can adjust the maximum file size of the log in Preferences.
Mac — Settings > General
Windows — Configure > Preferences > Notifications > Logging
retro.ini
Retrospect provides an options file for fine-grained control of the server called retro.ini, at the following location:
Windows — C:\ProgramData\Retrospect\retro.ini
Mac — /Library/Application Support/Retrospect/retro.ini
If you open the file, you will see the following options by default on Mac:
[Options]
SetUILogging=3
SetFoundationLogging=3
SetAppLogging=3
SetDevicesLogging=3
SetEngineLogging=3
SetVolumesLogging=3
SetBackupSetsLogging=3
SetNetworkingLogging=3
Our support team might ask you to change the log level here instead of through the application. Here are the steps:
- Turn off the server by either quitting the Windows application or using System Preferences on the Mac.
- Open retro.ini in Notepad or TextEdit.
- If our support team suggests turning on "device logging to 6", change SetDevicesLogging=3 to SetDevicesLogging=6.
- Save the changes to retro.ini.
- Turn on the server by either launching the Windows application or starting it through System Preferences > Retrospect on Mac.
- Be sure to change the setting back after you’ve reproduced the issue.
Instant Scan
Instant Scan has a separate set of files for configuration, logging, and options, at the following locations:
# Configuration Files
Windows — C:\ProgramData\RetroISA\ConfigISA.dat
Mac — /Library/Application Support/Retrospect/ConfigISA.dat
# Scan Files
Windows — C:\ProgramData\RetroISA\RetroISAScans\
Mac — /Library/Application Support/Retrospect/RetroISAScans/
# Log Files
Windows — C:\ProgramData\RetroISA\retroISA.utx
Mac — /Library/Application Support/Retrospect/retroISA.utx
# Option Files
Windows — C:\ProgramData\RetroISA\retro_isa.ini
Mac — /Library/Application Support/Retrospect/retro_isa.ini
Grooming
For grooming, messages are logged to the Operations Log and Execution Log. However, for detailed debugging information, you can enable a grooming log by creating a file with a specific name next to the catalog file for the set you’re grooming: "Media Set A.rbc.grm.log" if you are grooming "Media Set A". This log is limited to 1GB, and you do not need to shutdown the engine to create it.
- On Windows, navigate to the catalog’s folder and right-click to create a text document. Name it Media Set A.rbc.grm.log.
- On Mac, open Terminal, navigate to the catalog’s folder, and run touch "Media Set A.rbc.grm.log".
Proactive Backup
For diagnosing issues with proactive backup, you can enable a specific log for this feature to send to our support team. You will need to shutdown the engine before creating it.
- On Windows, navigate to the application’s data folder in "C:/ProgramData/Retrospect/" and right-click to create a text document. Name it proactive_backup_log.utx.
- On Mac, open Terminal, navigate to the catalog’s folder, and run touch "/Library/Application Support/Retrospect/proactive_backup_log.utx".
Last Update: January 13, 2023