Backup Set Types Visible to Users
The Retrospect Virtual Management Server supports a wide range of backup set types for backup and restore. This menu allows the administrator to select the backup set types to be displayed for backup users to choose from when they are creating a backup set on Retrospect Virtual Management Server or Retrospect Virtual Host Server. This feature is disabled by default.
- Turn on the
 switch on the right under the Backup Set Types Visible to Users section.
 - Click on the
 button.

- Select the Backup Set Type you wish to add from the drop-down menu as shown below.
- Click the
 button to add the selected backup set type.
 - If you have multiple backup set types to add, repeat steps 3 - 4 until all options have been selected.
- Click the
 and
and  buttons at the bottom of the page to confirm.
Default Values
This section allows administrator to define the default values for numerous setting items. The default values set under this setting menu will be applied to the backup sets directly. However, users can still override the default values during new backup set creation. As opposed to Preempted Values, which will be introduced later in this chapter, is a set of predefined values by the system administrator where backup users have no right to override the settings.
All setting items under the Default Values tab are disabled by default. Click the  switch on the right of each setting item and then follow the steps below for configuration.
General
This section defines the default values of some general configuration items. The following table explains each setting item under the General tab, with a brief description of what the setting is about and all the configurable items.
Name
Defines the default backup set name when backup users create a backup set. Multiple settings can be created in this menu if you wish to define different default backup set names for different backup modules. * What are the configurable items? Name – name of the setting item Applied Modules – modules to apply this setting to * *Backup Set Name – default backup set name to be displayed when a backup set is created for the selected module(s).
Lotus Domino
Defines the path to notes.ini. Please exercise extra caution when changing this setting because an accidental or incorrect change of this path may cause unpredictable impact on running the Lotus Domino. Refer to the link for further information on this setting. * What are the configurable items? Name – name of this setting item Path to notes.ini – path name of the Path to notes.ini
Lotus Notes
Defines the path to notes.ini . Please exercise extra caution when changing this setting because an accidental or incorrect change of this path may cause unpredictable impact on running the Lotus Notes. Refer to the link for further information on this setting. * What are the configurable items? Name – name of this setting item Path to notes.ini – path name of the Path to notes.ini
MySQL Server
Defines the default Login ID, Host name, Port and Path to mysqldump for MySQL server backup module * What are the configurable items? Name – name of this setting item Login ID – login ID for accessing the MySQL server Host – host name of the MySQL server Port – port number * *Path to mysqldump – path name to the mysqldump utility
Oracle Database Server
Defines the default Login ID, Host name, Port and SID for Oracle Database Server module * What are the configurable items? Name – name of this setting item Login ID – login ID for accessing the Oracle Database server Host – host name of the Oracle server Port – port number * *SID – the unique identifier to the database instance
VMware Host
Defines the default VMware version, host name, port number and SSH port for VMware backup module * What are the configurable items? Name – name of this setting item Version – VMware version Host – host name of the VMware host Port – port number * *SSH Port – SSH port number
Backup Schedule
Setting up the backup schedule allows backup sets to run automatically at the specified time. This section allows administrator to define the default backup schedule. The following table explains each setting item under the Backup Schedule tab, with a brief description of what the setting is about and all the configurable items.
Backup Schedule
- Name – name of the setting item
- Applied Modules – modules to apply this setting to
- Run scheduled backup for this backup set – to enable or disable the scheduled backup settings you set in this menu
Manage Schedule
- Name – name of the scheduler
- Type– frequency of running the scheduled backup
- Daily – to run the scheduled backup everyday
- Weekly – to run the scheduled backup on the selected days of a week
- Monthly – to run the scheduled backup on a specific day in a month, or on a specific day in a specific week.
- Custom – to run the scheduled backup on a specific day of your selection
- Start backup at – specify a specific time to run the scheduled backup based on the frequency set in the Type menu above.
- Stop – set the scheduled backup to stop either
- Full backup is completed regardless of how much time it takes OR After the backup has started for the set time (1-24 hr) regardless if the backup is done
- Run Retention Policy after backup – enable this feature if you wish the modified or deleted data after backup remains in the backup server for the set number of retention day
Destination
This section allows administrator to define the default backup destination for backup set. The following table explains each setting item under the Destination tab, with a brief description of what the setting is about and all the configurable items.
This setting defines the default backup destination when backup users create a backup set. Multiple settings can be created in this menu if you wish to define different default destinations for different backup modules.
Destination
- Name – name of the setting item
- Applied Modules – modules to apply this setting to
- Backup Mode –select the files transfer method during backup
- Sequential – backup files are sent to the backup destination one by one, one after another.
- Concurrent – multiple files are sent to the backup destination at the same time
- Maximum concurrent backup destinations (only if you have selected Concurrent as the Backup Mode) – select the maximum number of files allowed for uploading to the backup destination
- Predefined Destination – select the predefined destination you have configured in the Predefined Destinations Tab section.
In-File Delta
In-file delta technology is an advanced data block matching algorithm with the intelligence to pick up changes (delta) of file content between two files.
Using this algorithm, daily backup of large files over low-speed internet connection is made possible because it requires only the changes of information since the last backup to be sent over (assuming that the full backup of the file has been saved on the backup server already).
This section allows administrator to define the default In-File Delta type for backup set. The following table explains each setting item under the In-File Delta tab, with a brief description of what the setting is about and all the configurable items.
This setting defines the default in-file delta setting for backup set. Multiple settings can be created in this menu if you wish to define different default in-file delta settings for different backup modules.
- Incremental In-file delta: Incremental Delta will facilitate ease of backup. The delta is generated by comparing with the last uploaded full or delta file. Delta generated with this method is smaller and uses the least bandwidth. However, for restoration, the full file and all deltas up to the required point-in-time are required to be restored and merged.
- Differential In-file delta: Differential Delta will facilitate ease of restore. The delta is generated by comparing with the last uploaded full file only. Delta generated with this method will grow daily and uses more bandwidth. However, for restoration, the full file and a single delta is required to be restored and merged.
Destination * Name – name of the setting item * Applied Modules – modules to apply this setting to * Default Type – type of backup method (Incremental or Differential)
Advanced settings * In-File Delta block size – defines the size of delta block used when detecting changes between last full or delta file and the file to be backed up. In-file delta backup with small block size * Produce a smaller delta file due to a more precise comparison * Require more processing power on the client machine * Comparison may take longer to complete * Require more Java memory In-file delta backup with large block size: * Produce a larger delta file due to a less precise comparison * Require less processing power on the client machine * Comparison will complete faster * Require less Java memory
For most cases, the default setting Auto will select the optimal block size for each file (depending on the size of the file).
File size | Block size |
|---|---|
Smaller than 2GB | 4KB |
2GB – 8GB | 8KB |
Larger than 8GB | 16KB |
Only apply In-File Delta to files larger than – defines the minimum file size a file to apply the in-file delta setting. If the size of a file to be backed up is smaller than the set value, the in-file delta setting will not apply and the whole file will be uploaded to the backup server.
It is not necessary to perform In-file delta backup on small files because backing up the whole file does not take long. Backing up the whole file instead reduces the time required to restore the file.
Upload full file when either of these conditions is met – a backup of the full file will be perform if the following condition is met:
- Number of deltas is over – when the number of delta file exceeds the set value
- Delta ratio (delta file size / full file size) is over – this setting is to ensure that a full file backup is performed for file with significant changes, as it is preferable to upload a full file instead to reduce the time required to restore the file
Weekly variations for overriding default type – override the default in-file delta setting in the Default Type field on selected day(s) of a week
Yearly variations for overriding default type and weekly variations – override the default in-file delta setting in the Default Type field as well as the setting in the “Weekly variations for overriding default type” section on a selected day in a week based on either of the following selection
- Day of selected months in yearly variations - select a specific day in a month. On this specified day in the month defined above will the in-file delta variation setting override the default value.
Retention Policy
Retention policy defines the policies of persistent data management for meeting business data archival requirements. When a backup job is performed, for data that are modified or deleted on the client computer, their existing versions on the backup server (backup records) will be moved into retention area, while newly backed up files will be placed in the current data area.
Specifically, retention policy setting defines how long are the backup records kept in the retention area before they are deleted permanently from the backup server.
This section allows administrator to define the default Retention Policy for backup set. The following table explains each setting item under the Retention Policy tab, with a brief description of what the setting is about and all the configurable items.
This setting defines the default retention policy for backup sets when they are created. Multiple settings can be created in this menu if you wish to define different default retention policy for different backup modules.
Destination
- Name – name of the setting item
- Applied Modules – modules to apply this setting to
How to retain the files in the backup set, which have been deleted in the backup source – choose between Simple and Advanced setting, which is explained in details below.
Simple – enter a specific number of day or backup job number. The retained data will be removed from the backup destination permanently after the set number of day or set number of job is met.
Advanced – manage advanced retention policies by applying advanced settings
- Daily: The past number of days on which different versions of your files are retained
- Set the number of day(s) on which the old version of data will be stored
- Weekly: The days within a week on which different versions of your files are retained
- Select the day(s) in a week (Monday – Sunday) on which the old version of data will be stored
- The number of weeks to repeat the above selection
- Enter the number of week(s) for the above setting to repeat
- Monthly: The days within a month on which different versions of your files are retained
- Select a day in a month on which the old version of data will be stored. You can either set:
- An exact day (1-31) or The (First/Second/Third/Forth/Last) of (Monday -Sunday)
- The number of months to repeat the above selection
- Enter the number of month(s) for the above setting to repeat
- Quarterly: The day within a quarter on which different versions of your files are retained
- Select a day within a quarter on which the old version of data will be stored. You can either set:
- An exact day (1-31) or The (First/Second/Third/Forth/Last) of (Monday -Sunday)
- Months of quarter
- Select the desired combination of months of quarter
- (January, April, July, October)
- (February, May, August, November)
- (March, June, September, December)
- The number of quarters to repeat the above selection
- Enter the number of quarter(s) for the above setting to repeat
- Yearly: The day within a year on which different versions of your files are retained
- Select a day within a year on which the old version of data will be stored. You can set the day by using one of the following methods:
- Select an exact day (1 – 31) in an exact month (January – December)
- Select the (First/Second/Third/Forth/Last) of (Monday/Tuesday/Wednesday/Thursday/Friday/Saturday/Sunday/Weekday/Weekend) in an exact month (January – December)
- Select a day in a week (Monday – Sunday) in an exact week of a year (Week 1 - 53)
- The number of years to repeat the above selection
- Enter the number of year(s) for the above setting to repeat
- Custom: A specific day on which different versions of your files are retained
- Select a day on which the old version of data will be stored. You can set the day by using one of the following methods:
- Select an exact day (1 – 31) in an exact month (January – December)
- Select the (First/Second/Third/Forth/Last) of (Monday/Tuesday/Wednesday/Thursday/Friday/Saturday/Sunday/Weekday/Weekend) in an exact month (January – December)
- Select a day in a week (Monday – Sunday) in an exact week of a year (Week 1 - 53)
- Year
- Enter a specific year for the day set above to execute the retention policy
Command Line Tool
This section allows administrator to configure a Pre-Backup or Post-Backup command. Command such as batch file to stop and start an application before and after a backup job is completed, or other command such as to shut down the computer when a backup job is completed can be configured.
The following table explains each setting item under the Retention Policy tab, with a brief description of what the setting is about and all the configurable items.
This setting defines the default command line to execute before or after a backup is performed. Multiple settings can be created in this menu if you wish to define different default command line for different backup modules.
Destination
- Name – name of the setting item
- Applied Modules – modules to apply this setting to
- Pre-Backup Command Line Tool –configure the pre-backup command line
- Name – name of this command line setting.
- Working Directory – directory which the pre-backup command will run at.
- Command – Enter the pre-backup command to be run
- Post-Backup Command Line Tool –configure the post-backup command line
- Name – name of this command line setting.
- Working Directory – directory which the post-backup command will run at.
- Command – enter the post-backup command to be run
Reminder
This section allows administrator to enable the backup reminder feature where users will be reminded to run a backup job when they log off or shut down their computers. The reminder feature is only available on Windows platform.
The following table explains each setting item under the Reminder tab, with a brief description of what the setting is about and all the configurable items.
This setting defines whether the backup reminder is on for backup users when they log off or shut down their computers. Multiple settings can be created in this menu if you wish to define different settings for different backup modules.
Destination
- Name – name of the setting item
- Applied Modules – modules to apply this setting to
- Remind me to backup during Windows log off or shut down – turn on or off this feature
- Computer name – you can specify the computer’s name for this reminder to apply on
Bandwidth Control
This section allows administrator to limit the data transfer rate when performing backup and restore jobs.
The following table explains each setting item under the Bandwidth Control tab, with a brief description of what the setting is about and all the configurable items.
This setting defines the default settings on limiting the data transfer rate when performing backup and restore jobs. Multiple settings can be created in this menu if you wish to define different settings for different backup modules.
Destination
- Name – name of the setting item
- Applied Modules – modules to apply this setting to
- Limit the transfer rate when performing backup and restore tasks – click to turn on or off this feature
Mode
- Independent: Each backup and restore job has its assigned bandwidth
- Share: All backup and restore jobs are sharing the same assigned bandwidth
Existing bandwidth controls – configure the bandwidth control details
- Name: Name of the bandwidth control setting item
- Type:
- Always – apply the bandwidth control settings at all times
- Only within this period – configure a specific start time and end time on a day of a week for this bandwidth control setting to take place
- Maximum transfer rate |Enter the maximum transfer rate allowed, in the unit of Kbit/s, Mbit/s or Gbit/s.
IP Allowed for Restore
This section allows administrator to IP ranges that are allowed to perform restore. The following table explains each setting item under the IP Allowed for Restore tab, with a brief description of what the setting is about and all the configurable items.
This setting defines the default settings on IP allowed for restore. Multiple settings can be created in this menu if you wish to define different settings for different backup modules.
Destination
- Name – name of the setting item
- Applied Modules – modules to apply this setting to
- IP Allowed for Restore–configure the IP ranges allowed for restore
- From – restore allowed from this IP value
- To - restore allowed up to this IP value
Others
This section allows administrator to configure other default settings. The following table explains each setting item under the Others tab, with a brief description of what the setting is about and all the configurable items.
Temporary Directory
The temporary directory is used for various purposes, such as storage of temporary spooled file, remote file list, local file list, temporary delta file and other files of temporary nature.
Administrator can define the default location of the temporary directory. Multiple settings can be created in this menu if you wish to define different temporary directory locations for different backup modules.
- Name – name of the setting item
- Platform – the platform on which this setting will apply on
- Applied Modules – modules to apply this setting to
- Temporary directory for storing backup files – location of the temporary directory you wish to set.
- Remove temporary files after backup – the temporary files after backup if this option is selected
Archived Log Deletion
Administrator can define whether the archived log files will be deleted after backup by default .This feature is only applicable to Oracle Database Server Backup module.
- Name – name of the setting item
- Delete the archived logs after backup – turn on or off this feature
- Delete archived logs that are older than the following days – set the number of day(s) that the archived logs will be deleted when exceeding this number
Compressions
Compressing data before they are backed up brings faster backup and restore time and save storage space on the backup destination. Compression does not apply on Run direct backup sets for Hyper-V and VMware even this feature is on.
Administrator can define the default compression type for backup set. Multiple settings can be created in this menu if you wish to define different default compression types for different backup modules.
- Name – name of the setting item
- Applied Modules – modules to apply this setting to
- Select compression type – select the desired compression type among No Compression, Normal and Fast (Compressed size larger than normal)
Encryption
For better security reason, backup users can choose to encrypt their backup data with an algorithm, mode and key of their choice. Encryption does not apply on Run direct backup sets for Hyper-V and VMware even this feature is on.
Administrator can define the default encryption setting for backup set. Multiple settings can be created in this menu if you wish to define different default encryption settings for different backup modules.
- Name – name of the setting item
- Applied Modules – modules to apply this setting to
- Encrypt Backup Data – enable or disable this feature
- Default (Machine Generated Random) – the system will randomly generate an encryption key
- Custom – define your own algorithm, encryption key, method and key length.
Preempted Values
This section allows administrator to define the predefined values for backup users’ backup sets. The preempted values set under this setting menu will be applied to the backup sets directly. Backup users can add additional values on top of the preempted values when creating a backup set but CANNOT remove the preempted values preset by the system administrator.
All setting items under the Preempted Values tab are disabled by default. Click the  switch on the right of each setting item and then follow the steps below for configuration.

Mode
In all the setting items in the Preempted Values section, there is a Mode setting item that contains 3 options on how this preempted values are applied to user defined settings.
- Prepend – the preempted values will be applied as the first user defined settings
- Append – the preempted values will be applied as the last user defined settings
- Override – override all user defined settings
Note: In some preempted value settings, "Override" mode is set as default and cannot be modified, e.g. Reminder, as administrator should take full control of the policy settings. However, prepend and append mode are available for some non-administrator related features, such as backup schedule, where users defined settings can also be considered.
Backup Schedule
Setting up backup schedule allows backup sets to run automatically at the specified time. This section allows administrator to pre-define default backup schedule(s) for backup users. The following table explains each setting item under the Backup Schedule tab, with a brief description of what the setting is about and all the configurable items.
Schedule
Predefine backup schedule(s) for backup sets. Multiple settings can be created in this menu if you wish to pre-define different backup schedules for different backup modules. Within a backup schedule setting, multiple scheduled times can be added.
Backup Schedule
- Name – name of the setting item
- Applied Modules – modules to apply this setting to
- Run scheduled backup for this backup set – to enable or disable the scheduled backup settings you set in this menu
Manage Schedule
- Name – name of the scheduler
- Type– frequency of running the scheduled backup
- Daily – to run the scheduled backup everyday
- Weekly – to run the scheduled backup on the selected days of a week
- Monthly – to run the scheduled backup on a specific day in a month, or on a specific day in a specific week.
- Custom – to run the scheduled backup on a specific day of your selection
- Start backup at – specify a specific time to run the scheduled backup based on the frequency set in the Type menu above.
- Stop– set the scheduled backup to stop either
- Full backup is completed regardless of how much time it takes
- After the backup has started for the set time (1-24 hr) regardless if the backup is done Run Retention Policy after backup – enable this feature if you wish the modified or deleted data after backup remains in the backup server for the set number of retention day
Destination
This section allows administrator to predefine backup destination for backup sets. The following table explains each setting item under the Destination tab, with a brief description of what the setting is about and all the configurable items.
Pre-define backup destination when backup users create a backup set. Multiple settings can be created in this menu if you wish to define different default destinations for different backup modules.
Destination
- Name – name of the setting item
- Applied Modules – modules to apply this setting to
- Backup Mode – select the files transfer method during backup
- Sequential – backup files are sent to the backup destination one by one, one after another
- Concurrent – multiple files are sent to the backup destination at the same time
- Maximum concurrent backup destinations (only if you have selected Concurrent as the Backup Mode) – select the maximum number of files allowed for uploading to the backup destination
- Predefined Destination – select the predefined destination you have configured in the Predefined Destinations Tab section.
In-File Delta
In-file delta technology is an advanced data block matching algorithm with the intelligence to pick up changes (delta) of file content between two files.
Using this algorithm, daily backup of large files over low-speed internet connection is made possible because it requires only the changes of information since the last backup to be sent over (assuming that the full backup of the file has been saved on the backup server already).
This section allows administrator to predefine the In-File Delta settings for backup set. The following table explains each setting item under the In-File Delta tab, with a brief description of what the setting is about and all the configurable items.
Predefine In-File delta setting for backup set. Multiple settings can be created in this menu if you wish to pre-define different in-file delta settings for different backup modules.
What kind of in-file delta type are there?
- Incremental In-file delta: Incremental Delta will facilitate ease of backup. The delta is generated by comparing with the last uploaded full or delta file. Delta generated with this method is smaller and uses the least bandwidth. However, for restoration, the full file and all deltas up to the required point-in-time are required to be restored and merged.
- Differential In-file delta: Differential Delta will facilitate ease of restore. The delta is generated by comparing with the last uploaded full file only. Delta generated with this method will grow daily and uses more bandwidth. However, for restoration, the full file and a single delta is required to be restored and merged.
Destination
- Name – name of the setting item
- Applied Modules – modules to apply this setting to
- Default Type – type of backup method (Incremental or Differential)
Advanced settings
In-File Delta block size – defines the size of block used when detecting changes between last full or delta file and the file to be backed up. * *_In-file delta backup with small block size*_ Produce a smaller delta file due to a more precise comparison Require more processing power on the client machine Comparison may take longer to complete Require more Java memory * *_In-file delta backup with large block size:*_ Produce a larger delta file due to a less precise comparison Require less processing power on the client machine Comparison will complete faster Require less Java memory
For most cases, the default setting Auto will select the optimal block size for each file (depending on the size of the file). The Auto setting will set the block size according the following criteria:
File size | Block size |
|---|---|
Smaller than 2GB | 4KB |
2GB – 8GB | 8KB |
Larger than 8GB | 16KB |
Only apply In-File Delta to files larger than – defines the minimum file size a file to apply the in-file delta setting. If the size of a file to be backed up is smaller than the set value, the in-file delta setting will not apply and the whole file will be uploaded to the backup server. It is not necessary to perform In-file delta backup on small files because backing up the whole file does not take long. Backing up the whole file instead reduces the time required to restore the file.
Upload full file when either of these conditions is met – a backup of the full file will be perform if the following condition is met:
- Number of deltas is over – when the number of delta file exceeds the set value
- Delta ratio (delta file size / full file size) is over – this setting is to ensure that a full file backup is performed for file with significant changes, as it is preferable to upload a full file instead to reduce the time required to restore the file
Weekly variations for overriding default type – override the default in-file delta setting in the Default Type field on selected day(s) of a week
Yearly variations for overriding default type and weekly variations – override the default in-file delta setting in the Default Type field as well as the setting in the “Weekly variations for overriding default type” section on a selected day in a week based on either of the following selection * Day of selected months in yearly variations - select a specific day in a month. On this specified day in the month defined above will the in-file delta variation setting override the default value.
Retention Policy
Retention policy defines the policies of persistent data management for meeting business data archival requirements. When a backup job is performed, for data that are modified or deleted on the client computer, their existing versions on the backup server (backup records) will be moved into retention area, while newly backed up files will be placed in the current data area.
Specifically, retention policy setting defines how long are the backup records kept in the retention area before they are deleted permanently from the backup server.
This section allows administrator to pre-define the Retention Policy for backup set. The following table explains each setting item under the Retention Policy tab, with a brief description of what the setting is about and all the configurable items.
Pre-define the retention policy for backup sets when they are created. Multiple settings can be created in this menu if you wish to define different default retention policy for different backup modules.
Destination
- Name – name of the setting item
- Applied Modules – modules to apply this setting to
- How to retain the files in the backup set, which have been deleted in the backup source – choose between Simple and Advanced setting, which is explained in details below.
- Simple – enter a specific number of day or backup job number. The retained data will be removed from the storage destination permanently after the set number of day or set number of job is met.
- Advanced –manage advanced retention policies by applying advanced configurations
- Daily – The past number of days on which different versions of your files are retained – Set the number of day(s) on which the old version of data will be stored
- Weekly – The days within a week on which different versions of your files are retained– Select the day(s) in a week (Monday – Sunday) on which the old version of data will be stored
- The number of weeks to repeat the above selection
- Enter the number of week(s) for the above setting to repeat
- Monthly
- The days within a month on which different versions of your files are retained
- Select a day in a month on which the old version of data will be stored. You can either set: An exact day (1-31) or The (First/Second/Third/Forth/Last) of (Monday -Sunday)
- The number of months to repeat the above selection: Enter the number of month(s) for the above setting to repeat
- Quarterly – The day within a quarter on which different versions of your files are retained
- Select a day within a quarter on which the old version of data will be stored. You can either set: An exact day (1-31) or The (First/Second/Third/Forth/Last) of (Monday -Sunday)
- Months of quarter: Select the desired combination of months of quarter
- (January, April, July, October)
- (February, May, August, November)
- (March, June, September, December)
- The number of quarters to repeat the above selection: Enter the number of quarter(s) for the above setting to repeat
- Yearly – The day within a year on which different versions of your files are retained
- Select a day within a year on which the old version of data will be stored. You can set the day by using one of the following methods:
- Select an exact day (1 – 31) in an exact month (January – December)
- Select the (First/Second/Third/Forth/Last) of (Monday/Tuesday/Wednesday/Thursday/Friday/Saturday/Sunday/Weekday/Weekend) in an exact month (January – December)
- Select a day in a week (Monday – Sunday) in an exact week of a year (Week 1 - 53)
- The number of years to repeat the above selection: Enter the number of year(s) for the above setting to repeat
- Select a day within a year on which the old version of data will be stored. You can set the day by using one of the following methods:
- Custom – A specific day on which different versions of your files are retained
- Select a day on which the old version of data will be stored. You can set the day by using one of the following methods:
- Select an exact day (1 – 31) in an exact month (January – December)
- Select the (First/Second/Third/Forth/Last) of (Monday/Tuesday/Wednesday/Thursday/Friday/Saturday/Sunday/Weekday/Weekend) in an exact month (January – December)
- Select a day in a week (Monday – Sunday) in an exact week of a year (Week 1 - 53)
- Year: Enter a specific year for the day set above to execute the retention policy
- Select a day on which the old version of data will be stored. You can set the day by using one of the following methods:
Command Line Tool
This section allows administrator to configure a Pre-Backup or Post-Backup command. Command such as batch file to stop and start an application before and after a backup job is completed, or other command such as to shut down the computer when a backup job is completed can be configured.
The following table explains each setting item under the Retention Policy tab, with a brief description of what the setting is about and all the configurable items.
Predefine command line to execute before or after a backup is performed. Multiple settings can be created in this menu if you wish to pre-define different command line for different backup modules.
Destination
- Name – name of the setting item
- Applied Modules – modules to apply this setting to
- Pre-Backup Command Line Tool –configure the pre-backup command line
- Name – name of this command line setting.
- Working Directory – directory which the pre-backup command will run at.
- Command – Enter the pre-backup command to be run
- Post-Backup Command Line Tool –configure the post-backup command line
- Name – name of this command line setting.
- Working Directory – directory which the post-backup command will run at.
- Command – enter the post-backup command to be run
Reminder
This section allows administrator to enable the backup reminder feature where users will be reminded to run a backup job when they log off or shut down their computers. Reminder feature is only available on Windows platform.
The following table explains each setting item under the Reminder tab, with a brief description of what the setting is about and all the configurable items.
Pre-define to turn on the reminder so that backup users will be reminded to perform backup when they log off or shut down their computers. Multiple settings can be created in this menu if you wish to define different settings for different backup modules.
Destination
- Name – name of the setting item
- Applied Modules – modules to apply this setting to
- Remind me to backup during Windows log off or shut down –turn on or off this feature
- Computer name – you can specify the computer’s name for this reminder to enable on
Bandwidth Control
This section allows administrator to pre-define the limit for data transfer when performing backup and restore jobs.
The following table explains each setting item under the Bandwidth Control tab, with a brief description of what the setting is about and all the configurable items.
Pre-define the settings on limiting the data transfer rate when performing backup and restore jobs. Multiple settings can be created in this menu if you wish to pre-define different settings for different backup modules.
Destination
- Name – name of the setting item
- Applied Modules – modules to apply this setting to
- Limit the transfer rate when performing backup and restore tasks –click to turn on or off this feature
- Mode
- Independent: Each backup and restore job has its assigned bandwidth
- Share: All backup and restore jobs are sharing the same assigned bandwidth
- Existing bandwidth controls– configure the bandwidth control details
- Name: Name of the bandwidth control setting item
- Type
- Always – apply the bandwidth control settings at all times
- Only within this period – configure a specific start time and end time in a day of a week for this bandwidth control setting to take place
- Maximum transfer rate: Enter the maximum transfer rate allowed, in the unit of Kbit/s, Mbit/s or Gbit/s.
- Mode
IP Allowed for Restore
This section allows administrator to predefine IP ranges that are allowed to perform restore. The following table explains each setting item under the IP Allowed for Restore tab, with a brief description of what the setting is about and all the configurable items.
Pre-define the IP allowed for restore. Multiple settings can be created in this menu if you wish to pre-define different settings for different backup modules.
Destination
- Name – name of the setting item
- Applied Modules – modules to apply this setting to
- IP Allowed for Restore–configure the IP ranges allowed for restore
- From – restore allowed from this IP value
- To - restore allowed up to this IP value
Others
This section allows administrator to pre-define other configurations for backup sets. The following table explains each setting item under the Others tab, with a brief description of what the setting is about and all the configurable items.
Follow Link
Administrator can pre-define whether to turn on the Follow Link feature. When this feature is on, not only the symbolic link or junction point will be restored, the directories and files that the symbolic link or junction point links to will also be restored. This feature is only applicable to File Backup module.
- Name – name of the setting item
- Follow link of the backup files – check the box to enable this feature
Volume Shadow Copy
Enabling the Volume Shadow Copy option will allow backup of local files that are exclusively opened during the backup process (e.g. Outlook PST file).
Some requirements of the Volume Shadow Copy option include:
- Volume Shadow Copy can only be applied for local drive; exclusively opened file on network shared drive cannot be backed up even with the Volume Shadow Copy option enabled.
- Volume Shadow Copy is available on Windows platforms (e.g. Vista / 2008 / 2008 R2 / 2012 / 2012 R2 / 7 / 8 / 10).
- The user using the backup application must have administrative privileges to access the Volume Shadow Copy service on a computer.
- At least one of the partitions on the machine must be in NTFS format.
For more technical information on Volume Shadow Copy, please refer to the following page from Microsoft for details: http://technet.microsoft.com/en-us/library/cc785914(WS.10).aspx
Administrator can pre-define whether to turn on the Volume Shadow Copy feature by default .This feature is only applicable to File Backup module.
What are the configurable items?
- Name – name of the setting item
- Enable Windows’ Volume Shadow Copy for open file backup – check or uncheck to enable or disable this feature
File Permissions
By enabling this option, file permissions of the operating system files will be backed up. File permission defines, for example, the right to view or change a file by the system owner/group/individual.
Administrator can pre-define whether to turn on the backup of File Permissions by default .This feature is only applicable to File Backup module.
- Name – name of the setting item
- Backup files’ permissions – check or uncheck to enable or disable this feature
Archived Log Deletion
Administrator can pre-define whether the archived log files will be deleted after backup by default .This feature is only applicable to Oracle Database Server Backup module.
What are the configurable items?
- Name – name of the setting item
- Delete the archived logs after backup– turn on or off this feature
- Delete archived logs that are older than the following days – set the number of day(s) that the archived logs will be deleted when exceeding this number
Compressions
Compressing data before they are backed up brings faster backup and restore time and save storage space on the backup destination. Compression does not apply on Run direct backup sets for Hyper-V and VMware even this feature is on.
Administrator can pre-define the default compression type for backup set. Multiple settings can be created in this menu if you wish to define different default compression types for different backup modules.
What are the configurable items?
- Name – name of the setting item
- Applied Modules – modules to apply this setting to
- Select compression type – select the desired compression type among No Compression, Normal and Fast (Compressed size larger than normal)
Preempted Backup Sets
This section allows you predefine a backup set that will be run a default backup set for backup user with this policy group setting. Backup user CANNOT remove this preempted backup set from their backup job once it is preset by the system administrator.
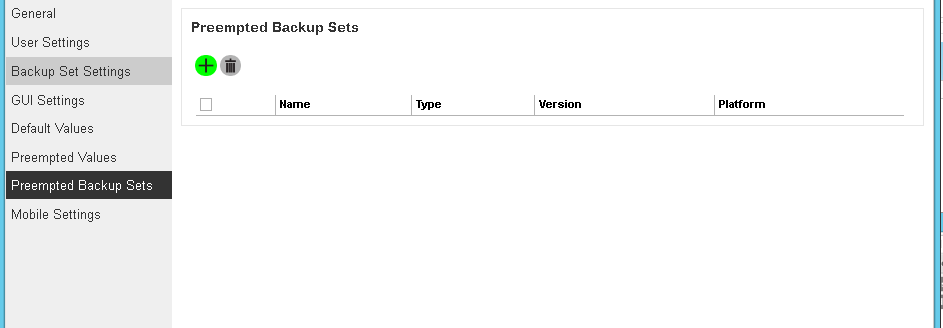
Create a preempted backup set
Follow the steps below to create a preempted backup set
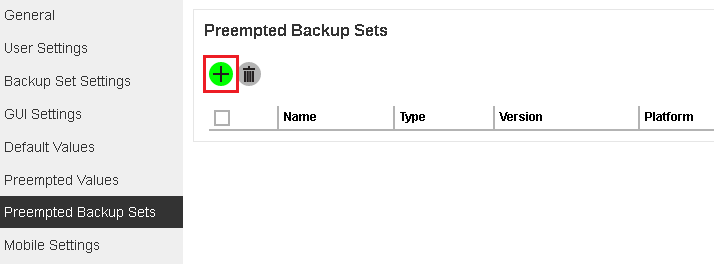
- Click the + icon under the Preempted Backup Sets section.
- Enter the Name of the new backup set, the Platform on which the backup set will run on, and select the backup set type from the Typedropdown box.
- Platform: Windows, Mac, Linux
- Backup Set Types: IBM Lotus Domino Backup, IBM Lotus Notes Backup, MS Exchange Server Backup, MS Exchange Mail Level Backup, MS SQL Server Backup, MS Hyper-V Backup, MySQL Backup, Oracle Database Server Backup, VMware Backup
In our example, the new backup set is called default-backup-set-name-2 which is a File Backup type that will be run on Windows.
Click the Next (→) button at the bottom right corner of the screen to continue.
- Specify the backup source for the new backup set. The selection items of this page varies depending on the backup set type you have chosen. Below is an example of creating a File Backup set.
- You can apply filters to the backup source, select other backup source or deselect backup source. Click to get redirected to the relevant section in the previous chapter for configurations details.
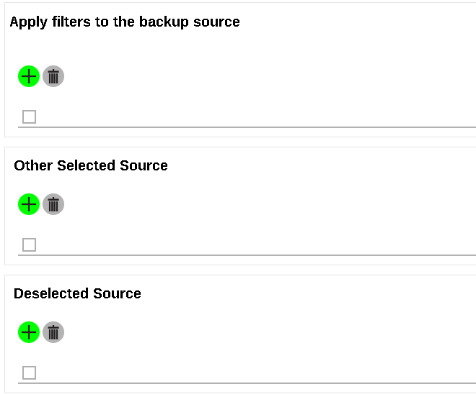
- Click the Next (→) button at the bottom right corner of the screen to continue.
- If necessary, add a Backup Schedule for this backup set by sliding the Run scheduled backup for this backup set option to the right and clicking the + button.
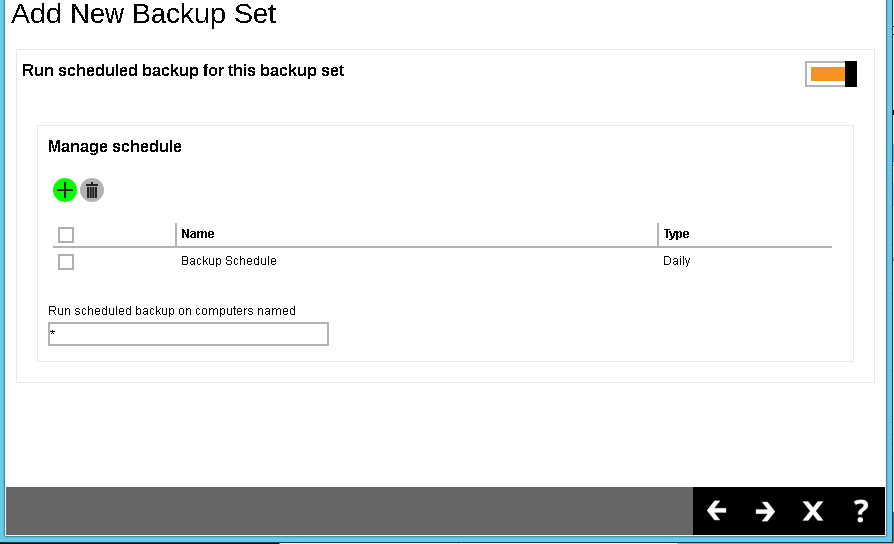
- Enter the information of the new backup schedule you want to add. Click the Add (+) button at the bottom right corner of the screen to continue.
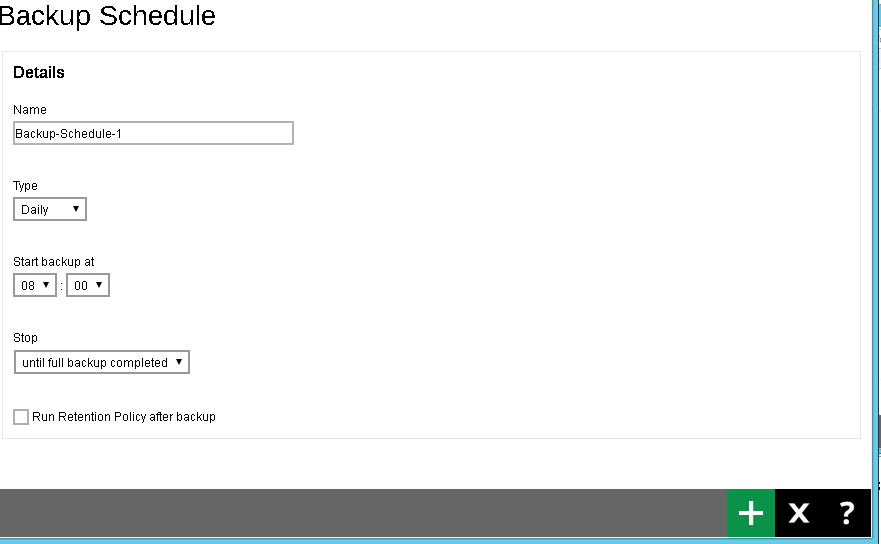
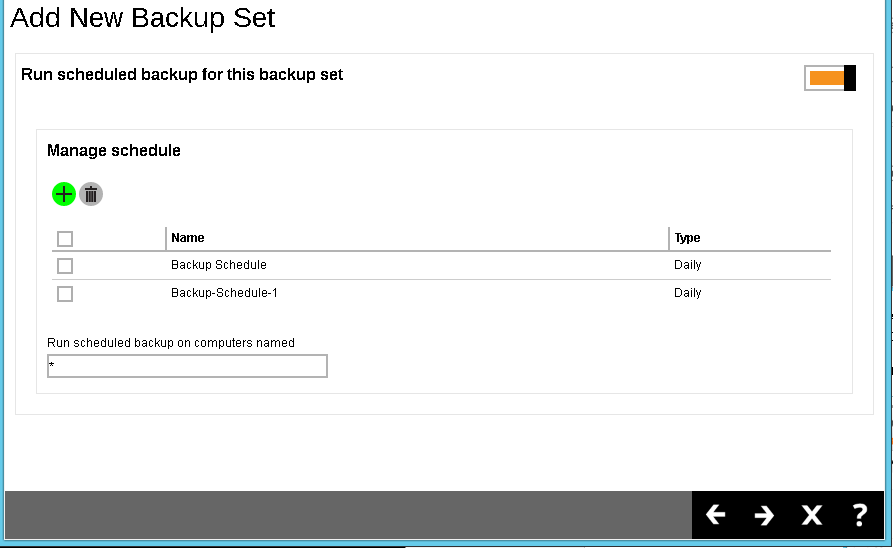
- The new backup schedule, Backup-Schedule-1 in our example, can be seen under the Manage schedule list.
Click the Next (→) button at the bottom right corner of the screen to continue.
- Add a new backup destination for this backup set.
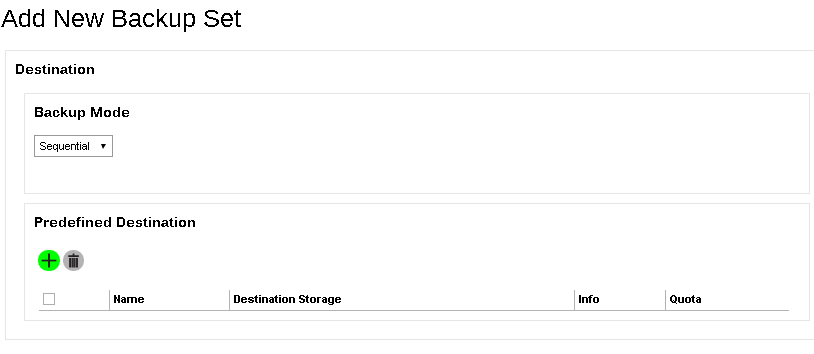
- From the Backup Mode dropdown box, select either Sequential or Concurrent. In our example, we select Sequential.
- Add a Predefined Destination set by your backup service provider by clicking the Add (+) button.
Check the box next to the predefined destination you want, then click Add (+) in the bottom right corner of the screen to continue.
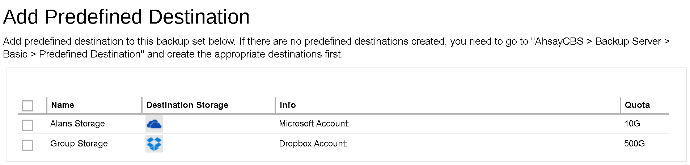
- The new predefined destination, Group Storage in our example, can be seen under the Predefined Destination list.
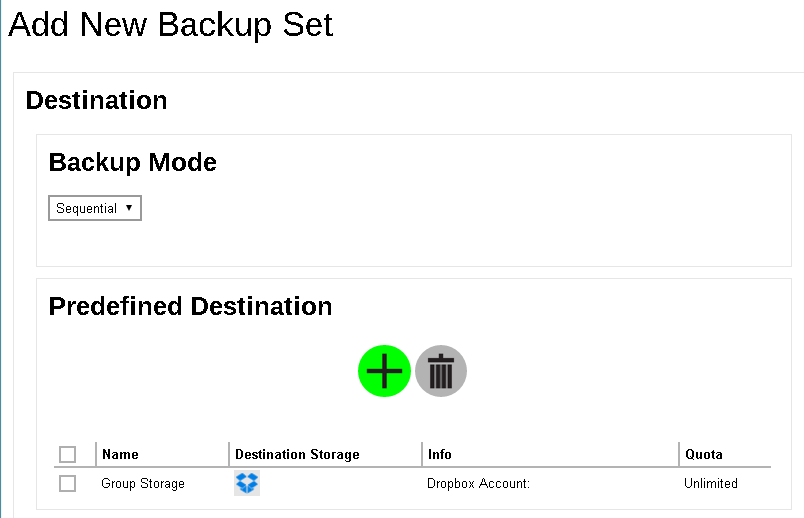
If you would like to choose other standard destination, you will have to configure in the client backup agent (Retrospect Virtual Host Server) after you finish creating the backup in Retrospect Virtual Management Server.
Click the Next (→) button at the bottom right corner of the screen to continue.
- Select to enable or disable to encrypt the backup data. If you choose to enable this feature, you can select either Default or Custom for the Encryption Type. Refer to Others section under the Default Values section for details on configuration.
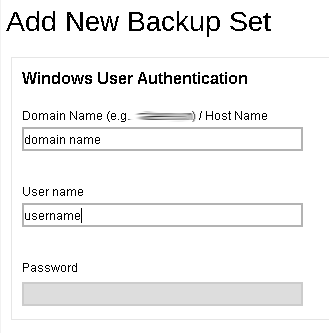
- Enter the Windows User Authentication information. This is needed for backup set with backup schedule and network shared drive selected as backup source. Enter the domain name and user name for Retrospect Virtual Host Server to access the network location.
Click the Add (+) button at the bottom right corner of the screen to continue.
- A new backup set called default-backup-set-name-2 is created and can be seen in the Preempted Backup Sets list. Click the Save button at the bottom right corner of the screen to save your changes.
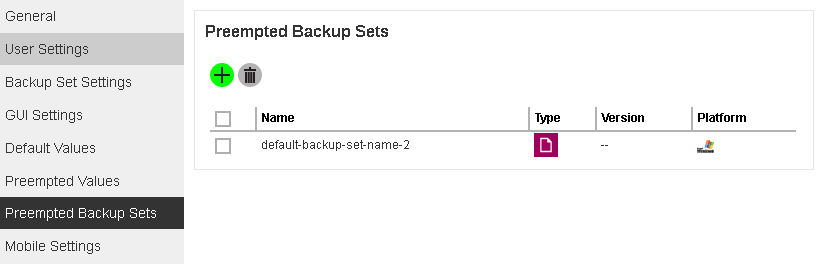
Important: If you do not click the Save button, your new backup set will not be saved.
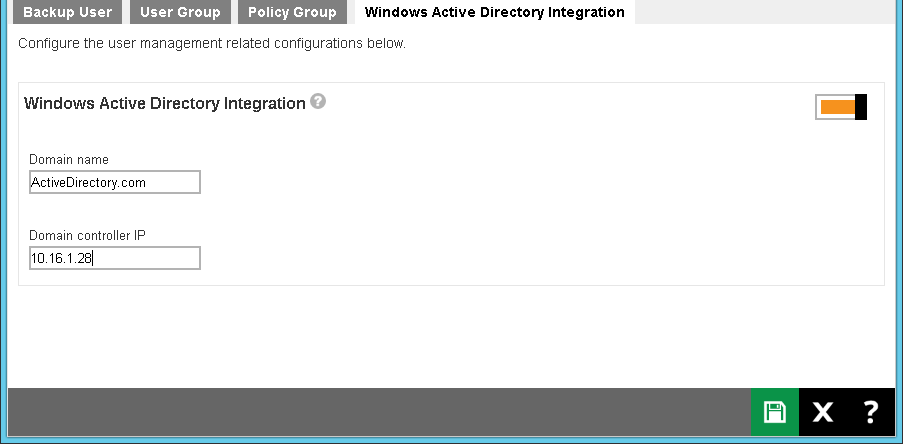
Manage Windows Active Directory Integration
The following shows the Windows Active Directory Integration tab under Backup / Restore > Users, Groups & Policies.
When this feature is enabled and Retrospect Virtual Management Server fails to authenticate a user logon using its own records, a user authentication will be dispatched to Windows Active Directory automatically. This means that if an AD is presented in the network, it is only required to create a user account once in the Windows Active Directory. The same user account can also be used on the Retrospect Virtual Management Server server. This is because Retrospect Virtual Management Server will create this user account automatically after authenticating this logon using AD. The user account created will be of the type Paid (unless the user logon using Retrospect Virtual Host Server).
To enable and configure the Manage Windows Active Directory Integration feature
- Click the
 switch on the right to turn on this feature.
 - Enter the Domain name and Domain controller IP of the machine where the active directory is hosted.
- Click the
 button at the bottom of the page to confirm.
Monitoring Activities
Set up a Read-only Admin Account for Operators
For daily monitoring on the Retrospect Virtual Management Server Console, you can assign your staff/operators with a read-only admin role account. This read-only admin role system account shares similar accessibility as its creator, except it has read- only permission. This feature is designed to help you with monitoring on the backup and restore jobs, Live Activities on the Retrospect Virtual Management Server server, Administration logs and Reporting etc.
Follow the steps below to create a system user with read-only admin role:
- Click on the Basic icon under the System Settings section on the Retrospect Virtual Management Server main page.
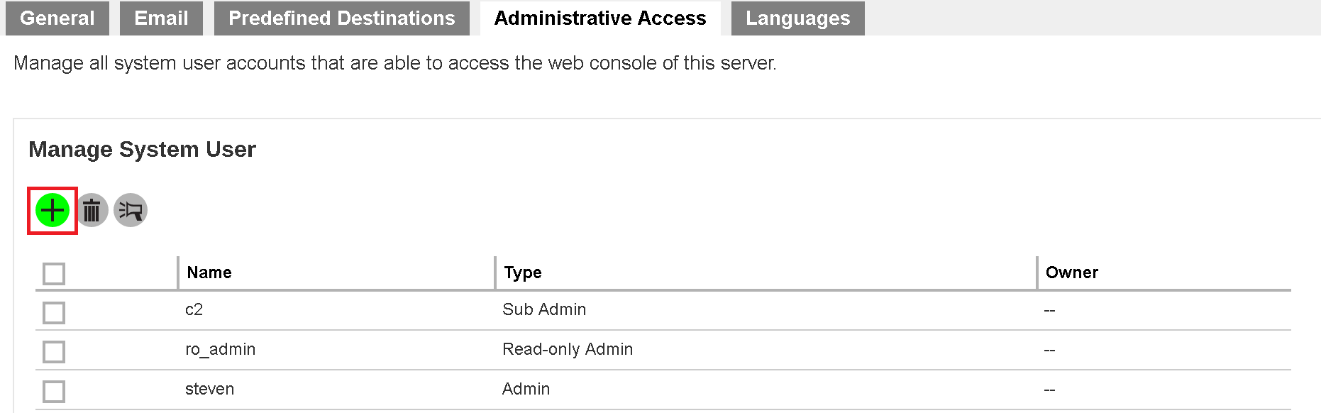
- Navigate to the Administrative Access tab, then click on the
 button under Manage System User to create a new system user.
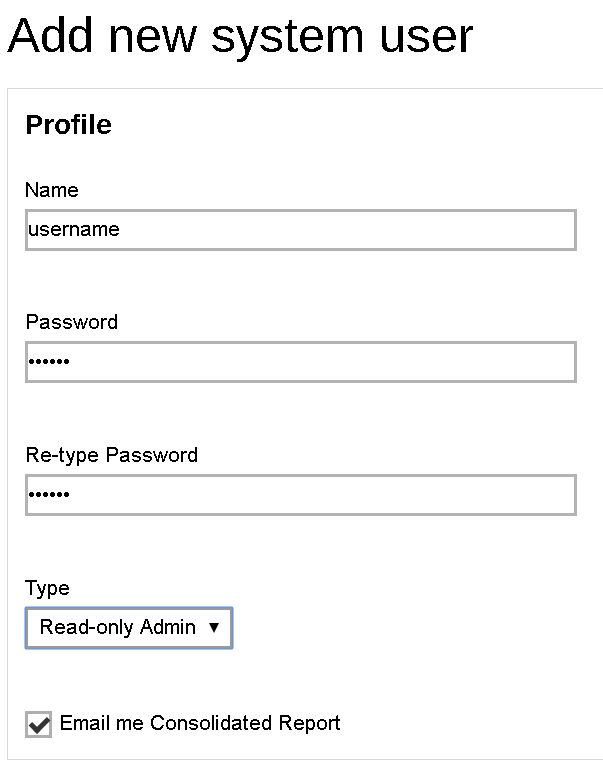
- Fill in the details of the system user profile on the page as shown below. Make sure you have selected Read-only Admin under the Type field.
- Click the
 button then the
  button at the bottom of the page to confirm. The system user with read-only admin role has been added.
Dashboard

The dashboard is a one-stop overview providing important information that the system administrator should have attention to, for example, system errors/warnings, the system health conditions and real-time activities of the system. With this information, system administrator can quickly identify the potential issues that might pose thread to the Retrospect Virtual Management Server system and therefore can react accordingly to fix the issues. Below is a summary of the information that the dashboard section provides.
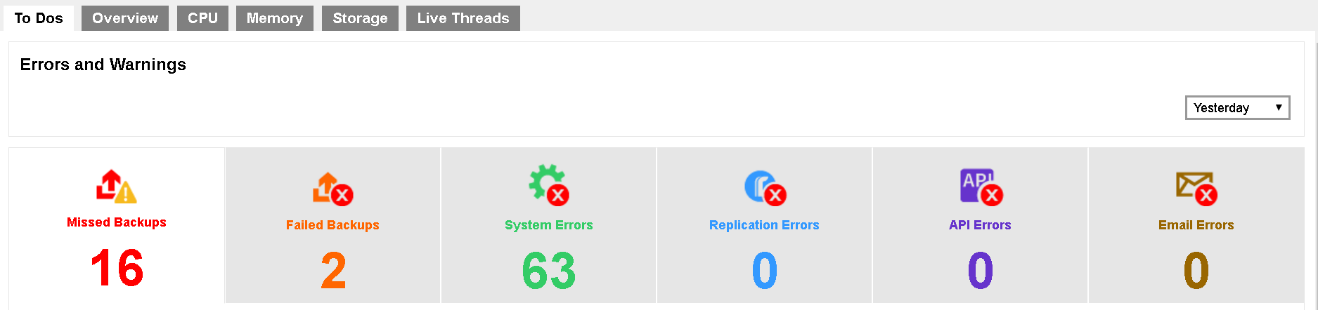
To Dos
It contains system announcement, errors and warning such as “Missed Backups”, “Failed Backups”, “System Errors”, “API Errors” and “Email Errors”. Administrator or operators can base on these messages to take corresponding actions.
Viewing options
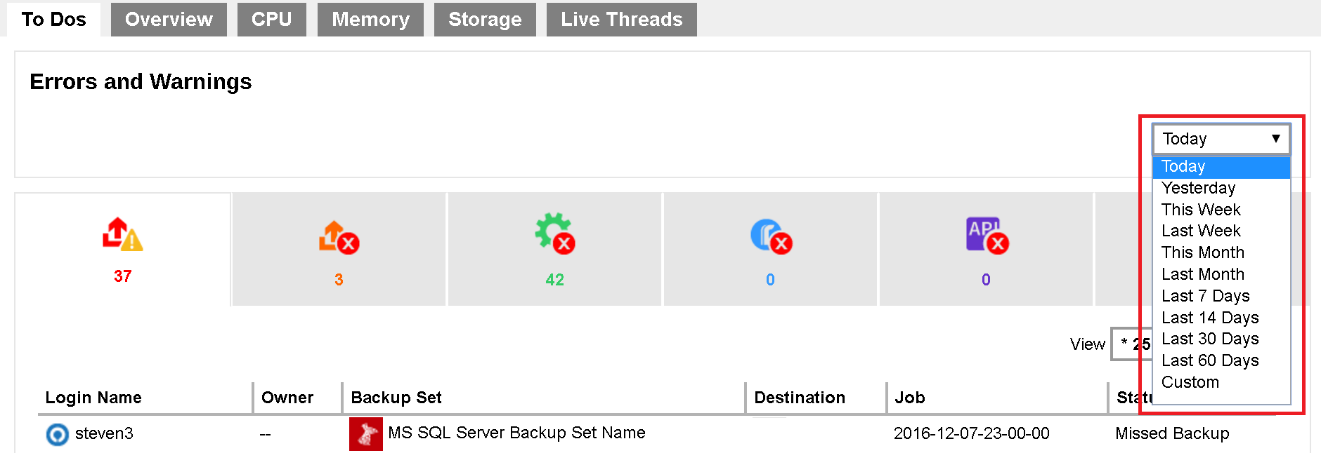
- Selectable Logs Period
You can select to display the log entries of the errors and warnings from a period of time you selected. Click the drop-down menu on the right under the Errors and Warnings section to select the desired period of time.
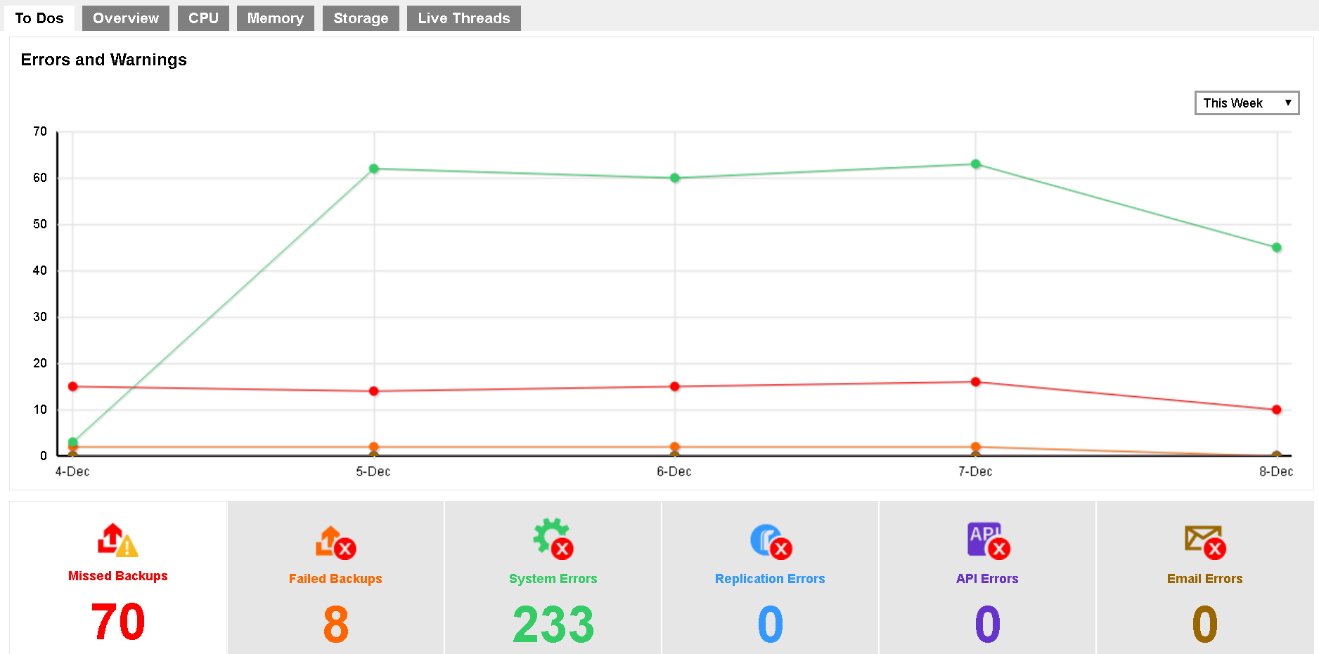
Besides selecting Today and Yesterday from the above mentioned drop-down menu, you will see a chart illustrating the number of errors for different types of errors/warning within the selected period of time.
In the chart below, for example, the vertical axis denotes the number of errors/warnings while the horizontal axis denotes the date. The lines on the chart in different colors correspond to the different types of errors/warnings as shown in the number counter below the chart in their respective colors.
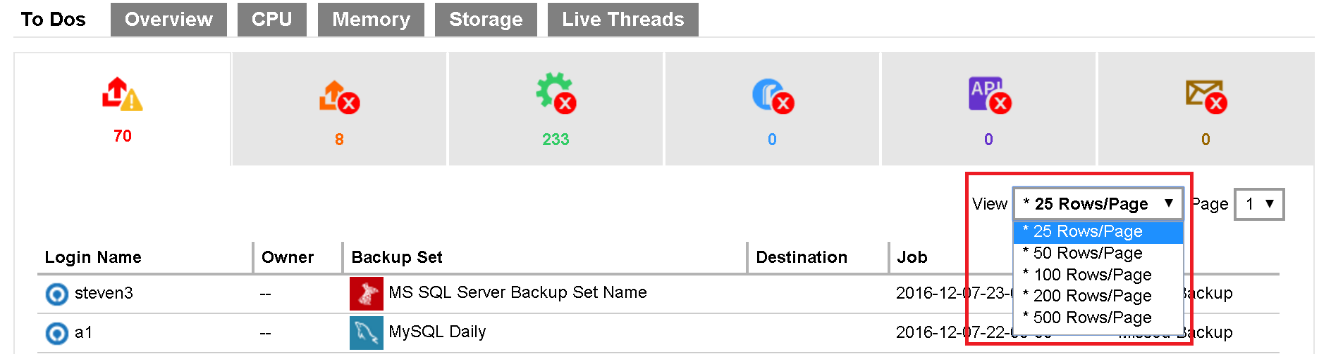
- Selectable Number of Row per Page
You can also select the number of rows (i.e. the number of entries) to display on each page. Click on the drop-down menu as shown in the screen shot below to select the desired setting.
Missed Backups
This page shows all details on all missed backups from all backup users using this Retrospect Virtual Management Server server. Missed backup refers to backup jobs that were failed to perform according to the set backup schedules. Any backup jobs failed to perform backup 6 hours after the scheduled backup time is considered as missed backup.

- Login Name: Login name of the backup user
- Owner: Ownership of the backup account
- Backup Set: Name of the backup set that has missed the scheduled backup
- Destination: Backup destination of the missed backup
- Job: Date and time when the backup job was classified as a missed backup
- Status: Status of the missed backup job
Failed Backups
This page shows all details on all failed backups from all backup users using this Retrospect Virtual Management Server server. Failed backup refers to backup jobs that are not performed successfully. The backup failure could be caused by various reasons, such as storage capacity on the backup destination, Internet connection between the client backup agent and the Retrospect Virtual Management Server server/backup destination, user interruption during backup, etc.

- Login Name: Login name of the backup user
- Owner: Ownership of the backup account
- Backup Set: Name of the backup set that failed to back up
- Destination: Backup destination of the failed backup
- Job: Date and time when the backup job failed to back up
- Status: Status of the failed backup job
System Errors
This page shows all details of system errors related to backup/restore for this Retrospect Virtual Management Server server. System errors include, for example, fail login attempt, login authentication failed, etc.
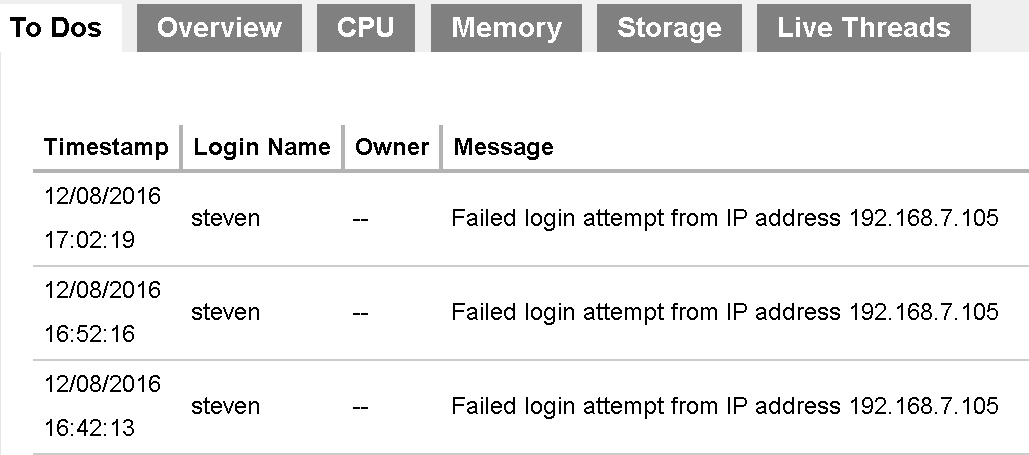
- Timestamp: Date and time when the system error recorded
- Login Name: Name of backup user in relation to the system error
- Owner: Ownership of the backup account
- Message: Message showing the system errors in details
API Errors
This page shows all details of API errors for this Retrospect Virtual Management Server server.
- Timestamp: Date and time when the API error recorded
- Login Name: Name of backup user in relation to the API error
- Owner: Ownership of the backup account
- Message: Message displaying the API errors in details
Email Errors
This page shows all details of email errors for this Retrospect Virtual Management Server server. Email errors could be caused by invalid email entered by the backup users, storage capacity of the backup user’s email account, etc.
- Timestamp: Date and time when the Email error recorded
- Login Name: Name of backup user in relation to the Email error
- Owner: Ownership of the backup account
- Message: Message displaying the Email errors in details
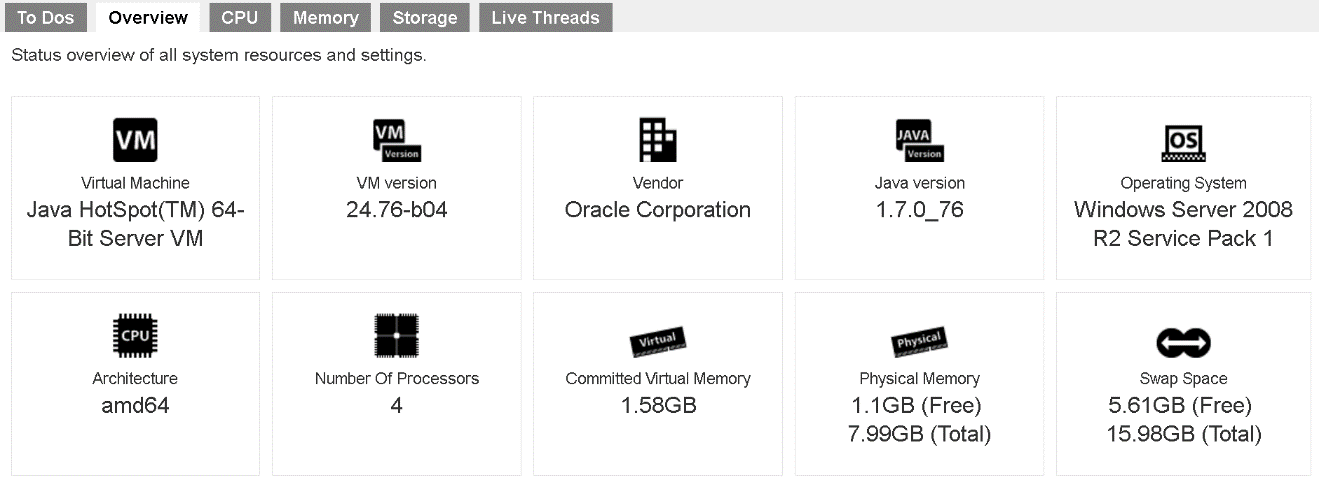
Overview
This is an overview of the system resource and system settings. These are useful information for administrator or support staff to collect machine information. This information include “Java virtual machine”, “Java VM version”, “vendor of the Java”, “Java version”, “Operating System”, “CPU Architecture”, “Number of Processors”, “Committed Virtual Memory”, “Physical Memory”, and “Swap Space”.
In addition, a list of system settings such as “VM Arguments”, “Class Path”, “Library Path”, “Boot Class Path” and “System Properties” are shown for reference.
CPU
In the CPU page, you can see the current CPU utilization, the percentage that system and application occupied
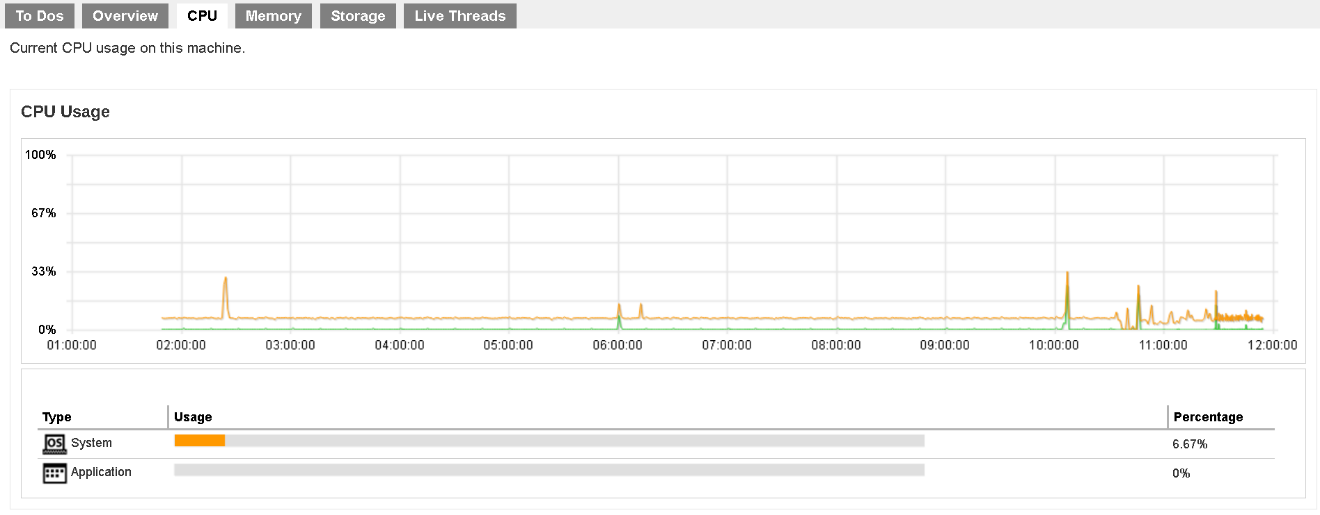
There are two parts of information from this page.
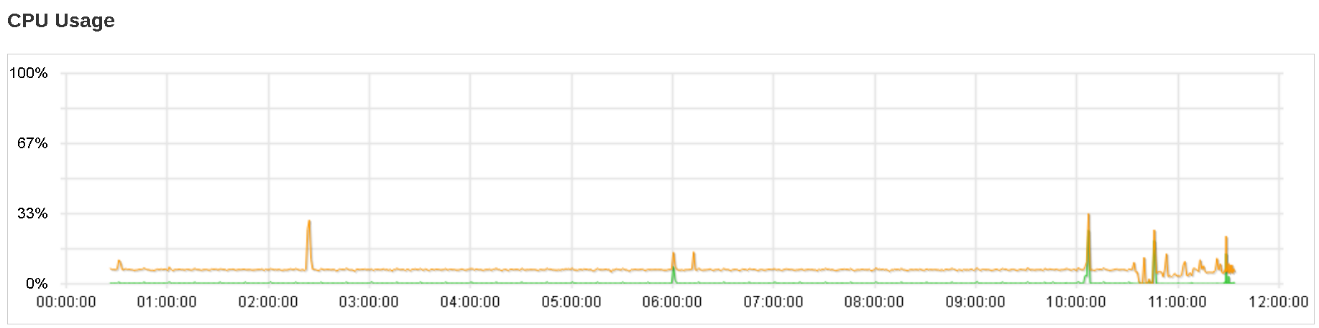
CPU Usage Chart
The CPU Usage shows the daily usage of the machine’s CPU where the Retrospect Virtual Management Server is installed, with the vertical axis denotes and CPU utilization rate while the Y axis denotes the time.
Usage Distribution
This chart shows the CPU usage distribution in percentage on System and Application.

Memory
This is a graphical view of the memory pool/managers usage on this machine.
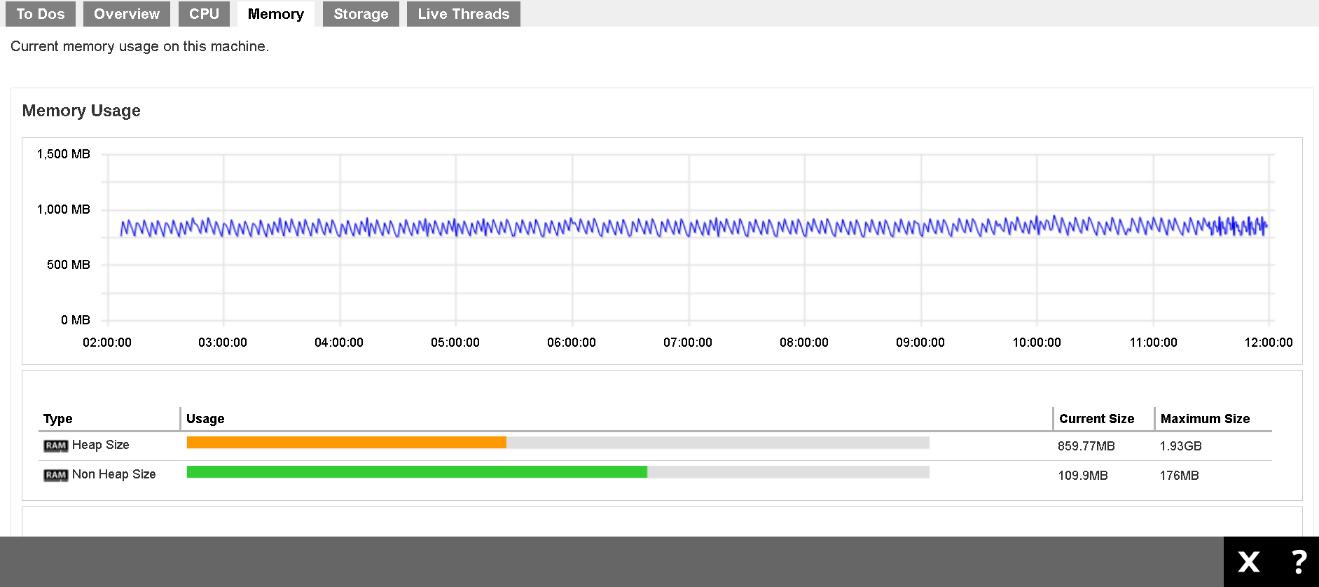
- Heap memory: The heap memory is the runtime data area from which the Java VM allocates memory for all class instances and arrays.
- Non-heap memory: Non-heap memory includes a method area shared among all threads and memory required for the internal processing or optimization for the Java VM.
- Par Eden Space: The pool from which memory is initially allocated for most objects.
- Par Survivor Space: The pool containing objects that have survived the garbage collection of the Eden space.
- CMS Old Gen: The pool containing objects that have existed for some time in the survivor space.
- Code Cache: The HotSpot Java VM also includes a code cache, containing memory that is used for compilation and storage of native code.
- CMS Perm Gen: The pool containing all the reflective data of the virtual machine itself, such as class and method objects. With Java VMs that use class data sharing, this generation is divided into read-only and read-write areas.
- Reference: Oracle JConsole documentation
Storage
This is a local storage and predefined destination usage overview.
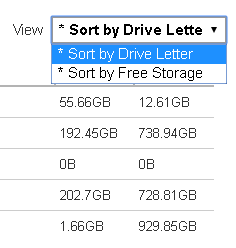
- Disk Usage
Under the Disk Usage section, it shows all the drives on the machine where the Retrospect Virtual Management Server is installed. You can see the capacity used (Used) and capacity remain (Free) for each drive.
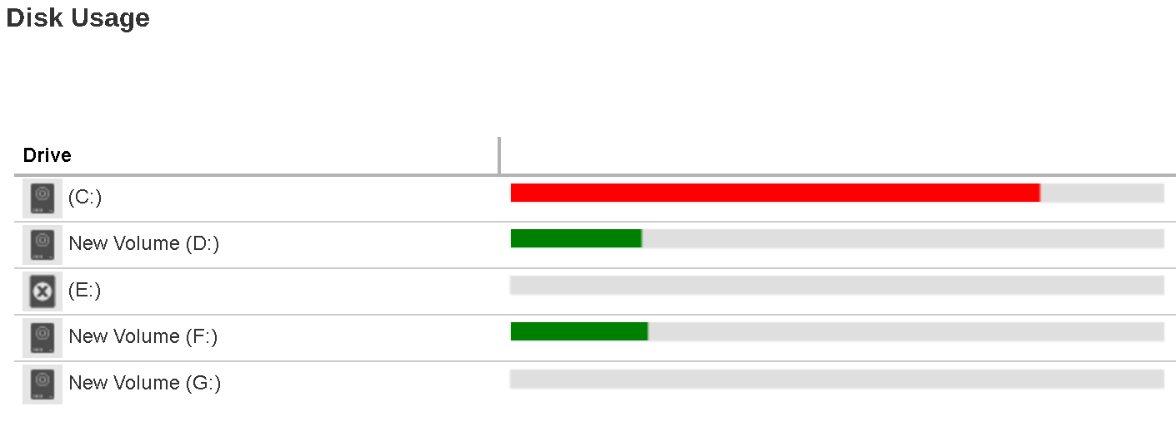
You can select to view the entries in the Disk Usage section by sorting the Drive Letter or Free Storage
- Predefined Destination Usage
Under the Predefined Destination Usage section, it shows all the predefined destinations that you have added under the System Settings > Basics > Predefined Destination.
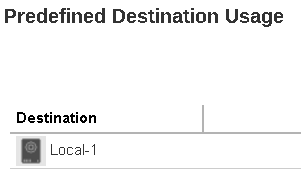
You can select to view the predefined destination entries by sorting the Destination Name or Free Storage.

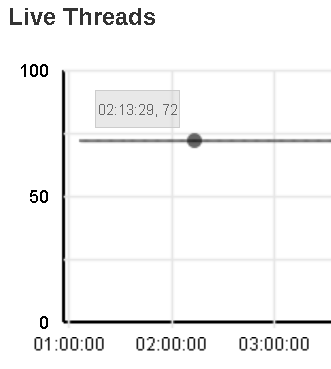
Live Threads
This page shows all live threads that are running on this machine.

- Live Threads: Active process threads
- Peak: The largest number of live threads record in the above period
- Daemon Threads: Threads that are handled in the background
- Total Threads Started: The total number of started threads
You can use mouse over at aby point of the curve to obtain the number of live threads at the particular time.
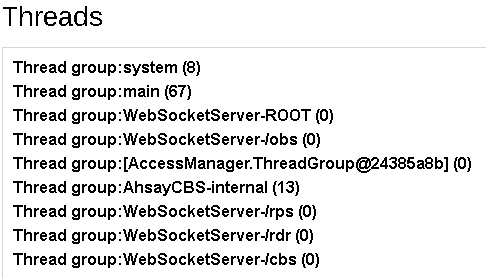
If you click on the Details button below the Live Threads icon, you will see a breakdown of all live threads that are running on this machine. It is shown as thread groups for developers or administrators reference.

Live Activities

You can check on recent backup and restore status with the progress monitor in percentage.
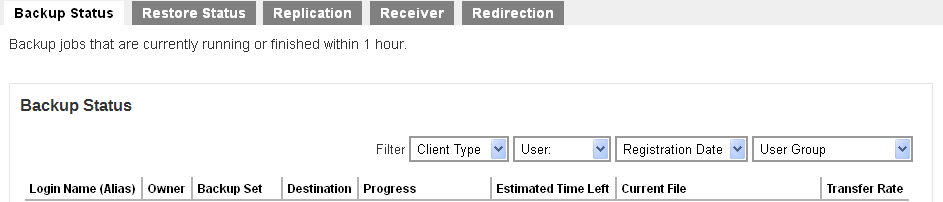
Backup Status
This section shows a list of backup job(s) that is currently running or has finished within the past 1 hour.
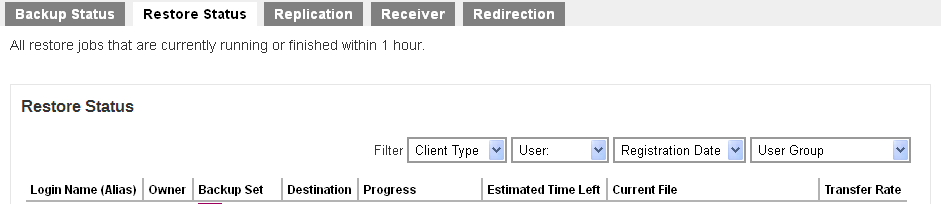
Restore Status
This section shows a list of restore job(s) that is currently running or has finished within the past 1 hour.
Administration Logs
You can check on the SNMP logs, list of notifications/announcements/alerts, and activities log (system logs) and audit trails.
SMTP Log
You can see a list of SNMP log message in this page. You need to enable the SNMP log in Settings → Advanced → Logging → Enable SNMP Service, and need to download the MIB definition file and pass to your SNMP machine.
Message History
This page contains a list of notifications, announcements and alerts.
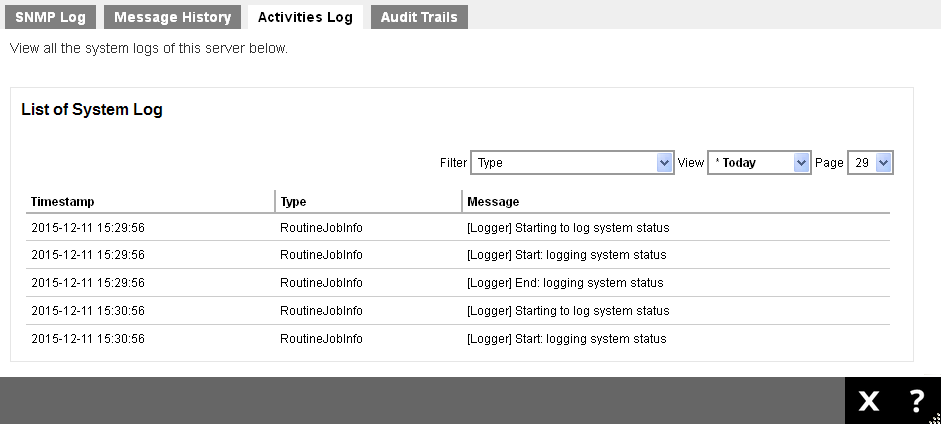
Activities Log
In this page, you will see a list of activities/system logs generated by the system events, or other user activities.
Audit Trails
In this page, you can see the activity logs of all users on this server.
Backup / Restore Logs
You can check on a list of backup and restore jobs, backup errors, backup set logs, and activities logs.
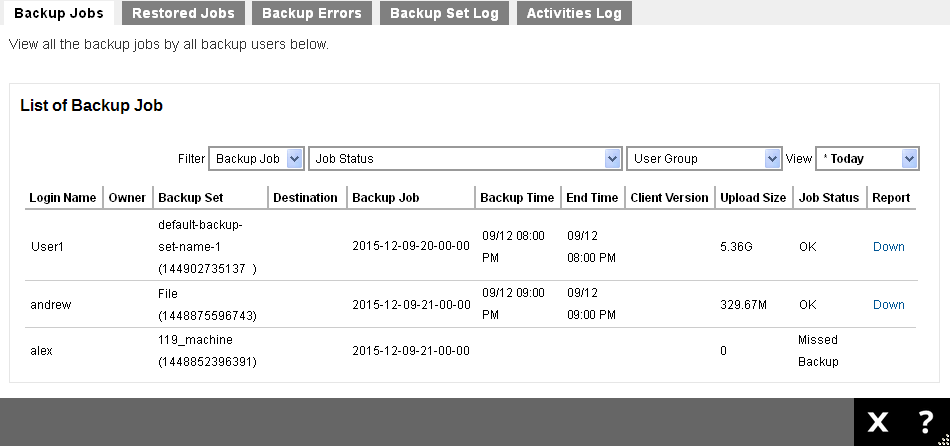
Backup Jobs
Here is summary of the backup jobs.
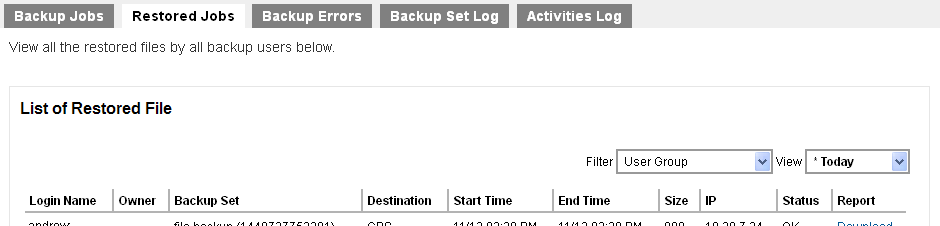
Restored Jobs
Here is a summary of the restored jobs.
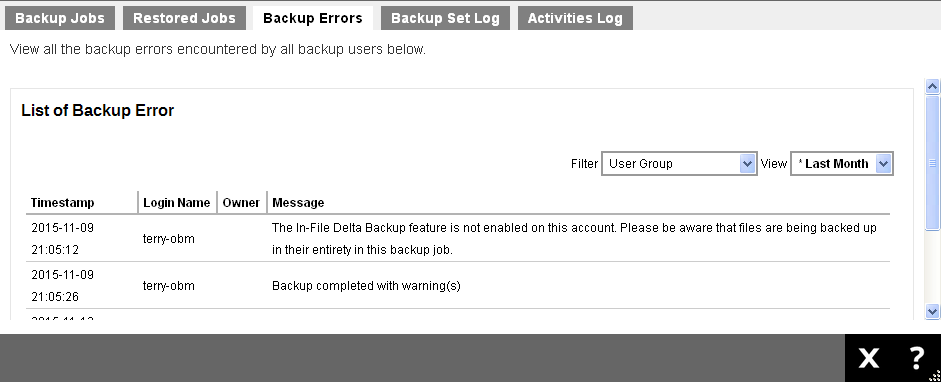
Backup Errors
Here is a summary of the backup errors encountered by all backup users.
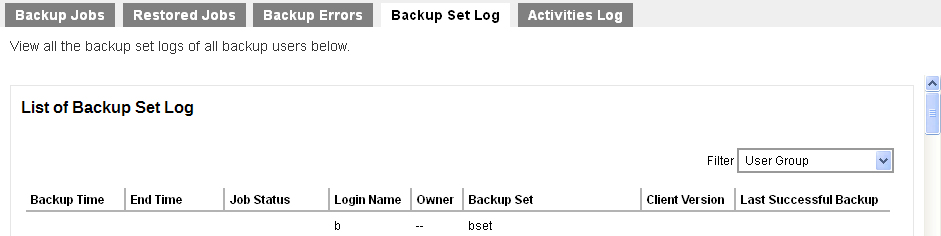
Backup Set Log
Here is a summary of backup set logs of all the backup users.
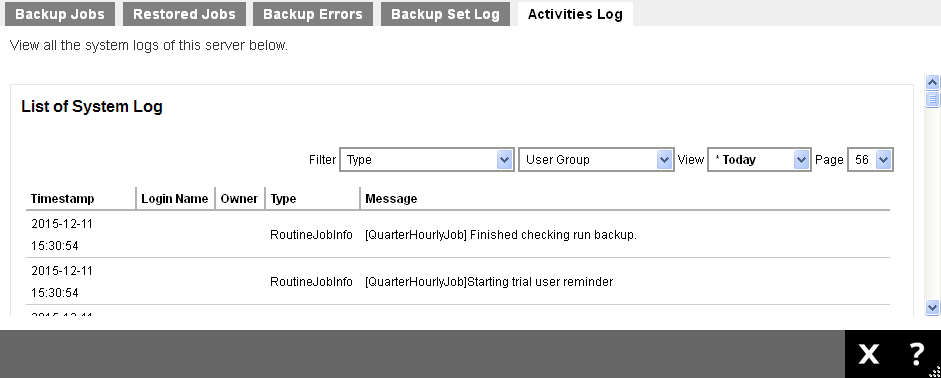
Activities Log
Here is a list of user backup/restore related system activities logs.
Appendix
Error Code 1011 and 1012
Internal Error 1011
This error could occur when one of the following conditions is true:
- The license key has been used on more than one machine.
- Change of network card of the server machine or moving the Retrospect Virtual Management Server system to a new server.
Solution:
In the cases where the license key was used on a second server for testing purposes, please use an evaluation key instead.
Alternatively, please shutdown the Retrospect Virtual Management Server service on the second server, and then contact our Support Engineer with your "License Name" and "License Key", and we shall update the license server to allow your key to be used again.
In the cases where the network card of the server machine is changed, or an Retrospect Virtual Management Server relocation has been performed. Please also contact our Support Engineer with your "License Name" and "License Key", and we shall update the license server to allow your key to be used again.
Please also verify if the machine in concern contain any software that would create virtual MAC address, for example, VPN software. If yes, please disable them such software, and notify us again.
Internal Error 1012
Internal Error 1012 can occurs when one of the following conditions is true:
- The license key has been used on more than one machine.
- Change of the MAC address, local / remote IP address, or local port that Retrospect Virtual Management Server is installed on.
Solution:
Persistent 1012 license errors can occur if your Retrospect Virtual Management Server server is operating in a network environment where network traffic is routed to the Internet via multiple external IP addresses. For example, network load balancing is implemented using, i.e. a dual WAN router, Round Robin routing, or network card with multiple external IP.
System Job
Here is a summary of the system jobs on the Retrospect Virtual Management Server. For the daily job, it is scheduled at 06:00, while others will be performed hourly and quarter-hourly.
Quarter-hourly Job
Job Name | Description | |
|---|---|---|
Low Disk Space Alert | When the disk space of the user home or system home is over 80%, email will be sent to administrator. Once the alert email is sent, email will not be sent within the next hour. | ✔ |
Inactive Backup Set Report | Email users when backup set has not been run for a number of days. (The number of days can be set in policy group.) | ✔ |
Settings Change Report | When user’s profile or backup set settings is changed, Email will be sent to user. | ✔ |
Restore Job Report | Send restore job report to user. | ✔ |
Backup Job Report | Send backup job report to user. | ✔ |
Remove Deleted Backup Set | This job scans removed backup sets from the storage. | ✘ |
Hourly Job
Job Name | Description | |
|---|---|---|
Missed Backup Report | Email will be sent if scheduled backup job has not been started after 6 hours. | ✔ |
Remove Migrated v6 Data | (Version 7.7 or later) When v6 backup data has completely migrated to v7 format, this job will remove the old v6 backup data. | ✘ |
License Check | License validation check. | ✘ |
Daily Job
Job Name | Description | |
|---|---|---|
Backup Quota Reminder Report | It will send report to user when the backup quota is over 80% or backup quota is full. | ✔ |
Trial User Reminder Job | It will send report to trial users when trial users are going to expire or to those expired trial users. | ✔ |
Low Destination Space Reminder | It will send disk space reminder email to administrator. It monitors the local and cloud storages such as Amazon Cloud Drive, Google Drive, OneDrive and OneDrive for Business. | ✔ |
Configuration Archival | Perform Retrospect Virtual Management Server system configuration, user profile, and runtime settings to our cloud. | ✘ |
Remove Trial User | Expired trial users will be removed by this job. | ✘ |
Logs Removal | This job removes expired log entries such as backup error, backup job, CDP backup job, advertisement log and system logs etc. | ✘ |
Meter license usage | Upload meter license usage to our cloud. | ✘ |
Daily User Report
If the user group your account belongs to has the Daily User Report selected in the Policy Group setting, you will receive a daily user report generated by the Retrospect Virtual Management Server system.
The daily user report is an interactive report to provide you with detailed information activities, statistics, problems or issues that your account is associated with.
There are two major types of reports you can find from the email, the Backup/Restore Report and the Daily User Report.
To access the Backup/Restore report
Download individual Backup or Restore report
- The content in the email shows a list of Backup and Restore jobs performed associated with your user. Simply click on the Download link in the individual backup or restore job item as highlighted in the screen shot below.
- You will be prompted to enter the password of your backup user account as shown below. Click on the Download button after entering the password.
- The Backup or Restore report in .zip format will be download.
Download Backup and Restore reports at once
- All backup reports and restore reports are grouped separate .zip attachments and are named as BackupReports.zip and RestoreReports.zip respectively.
- Unzip the downloaded file and you will find all the backup or restore reports.
To access the Consolidated Report
- Click on the attachment DailyUserReport.html from the email to download the file.
- Launch the file with your Internet browser and you will see a screen similar to this.
About the Daily User Report
The daily user report has 4 major sections which are PROBLEMS, ISSUES, ACTIVITIES and STATISTICS.
All unsuccessful activities including system jobs, backup jobs, and restore are recorded under the PROBLEMS section. There are 5 tabs under this category.
- System: This page shows the consolidated data for system job errors with the following details. All same type of system job error will be grouped as one entry.
No. | Sequential number of report item |
|---|---|
Events | Type of system job error |
Start Time | Start time of the first occurrence of the particular type of system job error |
End Time | End time of the last occurrence of the particular type of system job error |
Total No. of Occurrence | Number of occurrence of the particular type of system job error |
- Backup
This page shows all the unsuccessful backup jobs with the following details.
User | Name of the backup user |
|---|---|
Backup Sets | Name of the failed backup set |
Start Time | Start time of the failed backup job (in backup server’s time zone) |
End Time | End time of the failed backup job (in backup server’s time zone) |
Job Status | Status of the failed backup job, e.g. Missed Backup |
Job@Destinations | Backup time in client time zone |
Total No. of Errors | Total number of backup error for the particular backup set |
Last Successful Backup | Time of the last successful backup job for the particular backup set |
- Restore
This page shows all the unsuccessful restore jobs with the following details.
User | Name of the backup user |
|---|---|
Backup Sets | Name of the failed backup set |
Start Time | Start time of the failed restore job (in backup server’s time zone) |
End Time | End time of the failed restore job (in backup server’s time zone) |
Job Status | Status of the failed restore job, e.g. User interrupted |
Job@Destinations | Restore time in client backup agent’s time zone |
Total No. of Errors | Total number of restore error for the particular backup set |
- System / Security
This page shows the consolidated data for system or security issues with the following details.
Event | Type of system / security issues |
|---|---|
Users | Name of the backup user for the particular type of system/security issue |
Start Time | Start time of the first occurrence of the particular type of system/security issue |
End Time | End time of the last occurrence of the particular type of system/security issue |
No. of Occurrence | Number of occurrence of the particular type of system/security of a backup user |
Remote IP Address | IP address where Client Agent Application is installed |
User Agent | Type of the Client Agent Application (Retrospect Virtual Host Server) |
- Users
This page shows a list of backup users whose account’s storage quota is 90% or above full.
Event | Type of the issue |
|---|---|
Type | User’s subscription status, whether it is a paid or trial user |
User | Name of the backup user |
Used/Quota (%) | Storage used / Storage Quota (Utilization rate) |
Last Login | Last login time of user |
Registration Date | Backup account’s registration date and time |
Last Backup | Date and time of the last backup job performed |
Days Left |
- Backup Sets
This page shows a list of missed scheduled backup and backup sets that have not been backed up for 14 days or more.
Events | Type of the issue |
|---|---|
Users | Name of the backup user |
Backup Set | Name of the backup set |
Destination | Location of the backup destination |
Creation Date | Date and time when the backup set was created |
Last Backup Job | Number of day when a backup job was last performed |
Last Successful Backup | Time of the last successful backup job for the particular backup set |
- Backup Jobs
This page shows a list of all backup jobs activities.
Users | Name of the backup user |
|---|---|
Backup Set | Name of the backup set |
Destinations | Location of the backup destination |
IP Address | IP address where User Agent Application is installed |
Backup Duration | Start time / End time of the backup and duration of the backup |
Backup Status | Status of the backup job |
Backup Size | No. of files [Compressed size / Uncompressed size] |
- Restore Jobs
This page shows a list of all restore jobs activities.
Users | Name of the backup user |
|---|---|
Backup Set | Name of the backup set |
Destinations | Location of the restore destination |
IP Address | IP address where User Agent Application is installed |
Start Time | Start time of the restore job |
End Time | End time of the restore job |
Restore Duration | Duration of the restore job |
Restore Status | Status of the restore job |
Restore Size | Number of files restored (Downloaded size) |
- Setting Changes
This page shows a list of the settings changed by backup users.
Users | Name of the backup user |
|---|---|
Field | The field that has been changed |
Old Value | Old Value before the change |
New Value | New Value after the change |
Time of Changes | Time of the changes made |
IP Address | IP Address of the machine which initiated the changes |
- Users This page shows a list of statistics data regarding the backup user account.
Users | Name of the backup user |
|---|---|
Alias | Another name of the backup user |
Registration Date | Date and time when the backup account was registered |
Last Backup | Number of day when a backup job was last performed with the particular user account |
Last Login | Date and time when user logged in to the particular account |
Data Size | Total size of backup data (Compressed size/Uncompressed size) |
Retention Size | Total size of data in retention area (Compressed size/Uncompressed size) |
Yesterday’s Upload | Total size of backup uploaded by the particular backup user yesterday |
Standard Quota | Storage quota set for the particular backup user |
Total Backup (No. of Files/Size) | Total backup performed by this user |
Total Restore (No. of Files/Size) | Total restore performed by this user |
- Data Transfer
This page shows a list of statistics data regarding data transfer for backup jobs and restore jobs.
Users | Name of the backup user |
|---|---|
Backup Set | Name of the backup set |
Destinations | Backup Destination of the particular backup set |
IP Address | IP address of the client backup agent running the backup / restore |
Start Time | Start time of the particular backup / restore |
End Time | End time of the particular backup / restore |
Backup Duration / Restore Duration | Duration of the backup / restore for the particular backup / restore |
Backup Status / Restore Status | Status of the particular backup / restore job |
Backup Size / Restore Size | Backup size / Restore size |
- Disk Storage Usage
This page shows a list of statistics data regarding disk storage usage.
Destination | Backup destination used by the backup user |
|---|---|
Data Size | Size of data backed up to the particular backup destination |
Retention Size | Size of retention area on the particular backup destination |
No. of Backup Sets | Number of backup set(s) on the particular backup destination |
Since | The data and time when the particular backup destination was created |
Daily Report Viewing Option
There are two viewing options for the daily report, namely the WEB VIEW and PRINT VIEW, which can be altered by click the corresponding icon at the top right corner.
The WEB VIEW is an interactive style report where data is presented under different categories while user navigates through the report.
The PRINT VIEW is a one-page report listing all the data from the different categories from the WEB VIEW report.