Managing Backup/Restore
Backup / Restore Basic Configuration
To manage your Retrospect Virtual Management Server backup/restore basic configurations, simply click the Basic icon under Backup / Restore from your Retrospect Virtual Management Server environment.
You can perform the following configurations for Backup/Restore:
- Configure user home directories.
- Configure free trial settings.
- Configure backup data migration settings.
- Define maximum number of concurrent VMs permitted to be started using Run Direct on Retrospect Virtual Management Server.
There are four tabs under basic backup/restore configurations, each of which is described below.
User Home
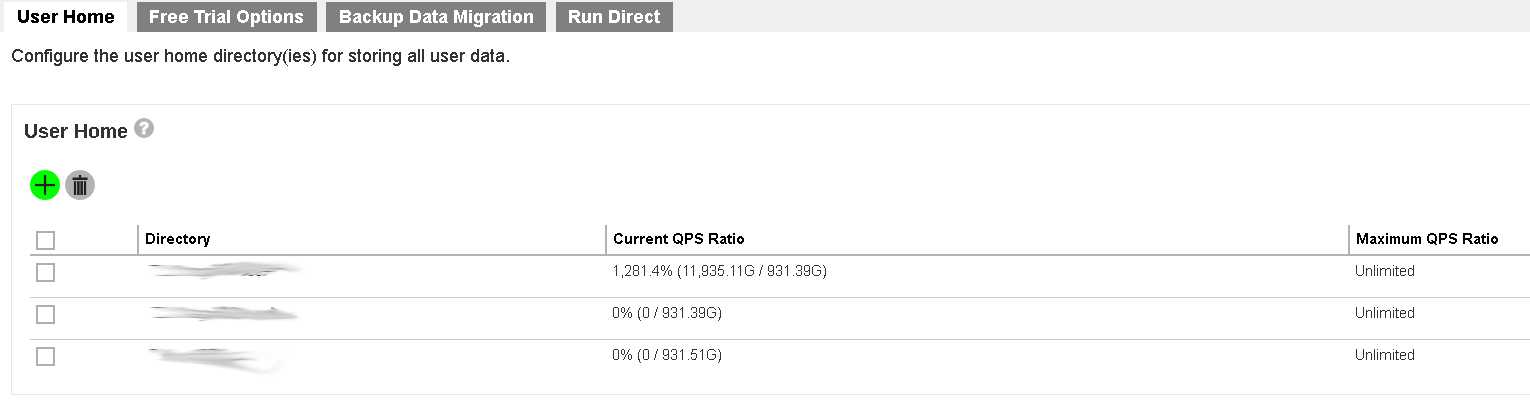
The following shows the User Home tab under Backup / Restore > Basic. It is used for configuring the user home directories for storing all the user data.
If you click on the user home directory, the following appears:
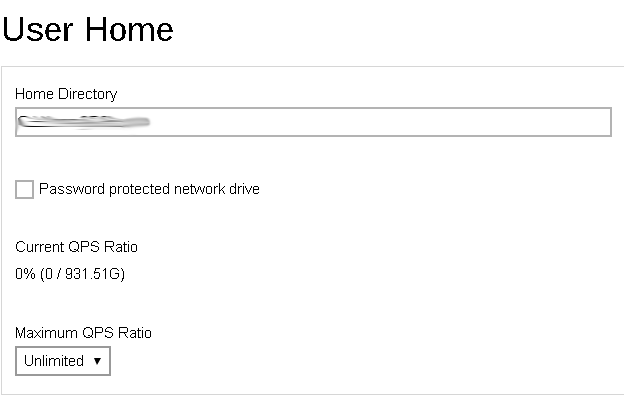
Enter the Home Directory path and check the box next to Password protected network drive if your user home drive is on a network drive.
QPS Ratio (Quota - Partition Size Ratio) is the ratio (in percentage) of the sum of all user quotas within a user home divided by the total size of the partition of the user home. You can see the Current QPS Ratio displayed in the form of a percentage. You can select the Maximum QPS Ratio from the dropdown list.
If the QPS ratio of a user home exceeds the Maximum QPS ratio after adding a user, the user will be added to the next available user home. Unlimited means that the QPS ratio is not checked and new users can be added to that user home. Not Used means that new users are never added to that user home.
After you have entered the desired information, click the Check (✔) at the bottom right hand corner of the page to exit the Home Directory details page. Then click the green Save button at the user home page to save your changes.
Free Trial Options
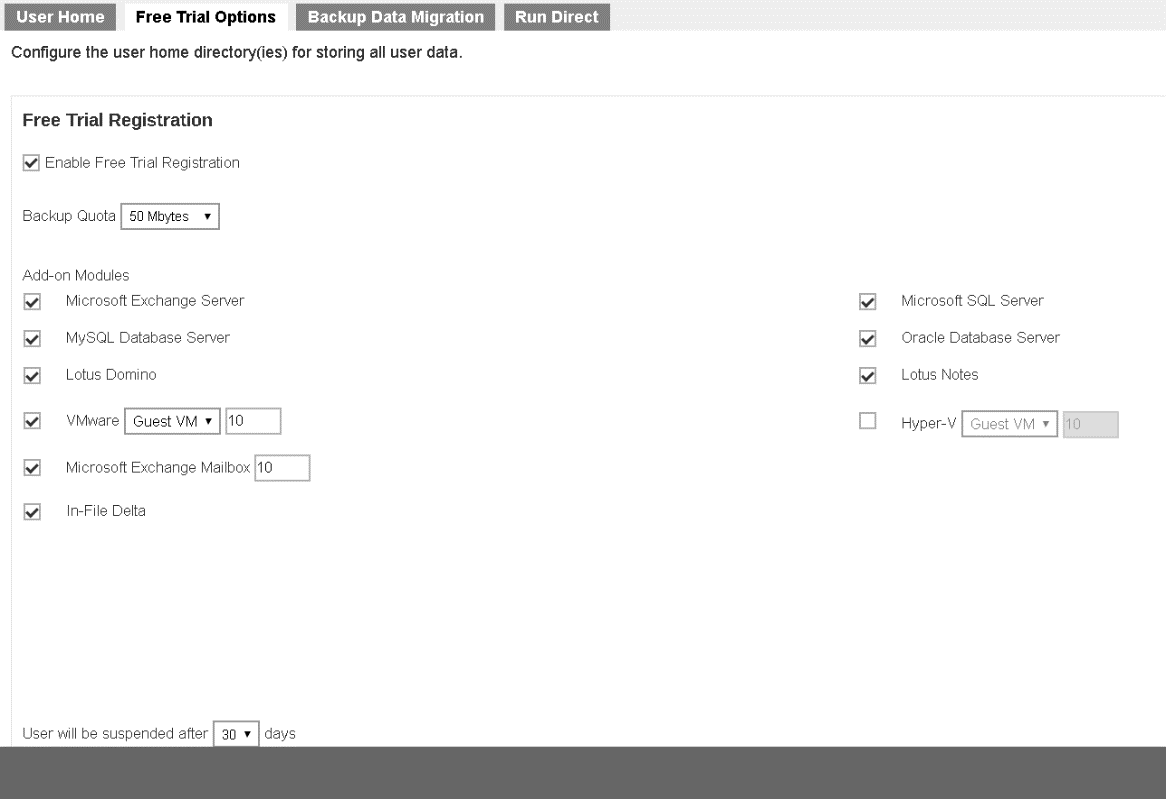
The following shows the Free Trial Options tab under Backup / Restore > Basic. It defines various free trial settings available in Retrospect Virtual Management Server:
Trial users do not count towards the maximum number of users allowed within Retrospect Virtual Management Server under the paid software license, therefore it is possible to have an unlimited number of trial users within Retrospect Virtual Management Server. However, each trial user is limited to a maximum backup quota of 100GB for a period of 90 days. After expiration of the trial period, the backup quota will reset to a maximum of 500MB automatically.
To allow users to create a trial backup account from Retrospect Virtual Host Server, please enable the Enable Free Trial Registration option at the top of the page. If this feature is unchecked, the option to register for a trial account will not be available to end users.
The Backup Quota defines the maximum backup quota of trial backup accounts upon registration.
The Add-on Modules option defines whether you want to allow trial users to have different add-on modules.
The User will be suspended after <xx> days option defines the number of days after which the trial users will be suspended. In our example, the period is 30 days.
The Remove User <xx> days after registration option defines whether you want to remove trial backup users for certain number of days after registration. For example, you can use this option to tell Retrospect Virtual Management Server to remove trial backup users from the system automatically after backup users have registered for 60 days.
Run Direct
The following shows the Run Direct tab under Backup / Restore > Basic. It defines the maximum number of virtual machines started by Run Direct on Retrospect Virtual Management Server. Simply enter the number of virtual machine and click the green Save button to save your changes.

Manage Backup Users
To manage your Retrospect Virtual Management Server users, groups, and policies, simply click the Users, Groups & Policies icon under Backup / Restore from your Retrospect Virtual Management Server environment.

There are 4 tabs under managing users, groups, and policies, each of which is described below.
Backup User Tab
A backup account contains user’s account information, client type, backup modules and backup set settings, etc. A backup user account can be created by administrator or registered via the backup client application by the end user as a trial account (if this option is enabled).
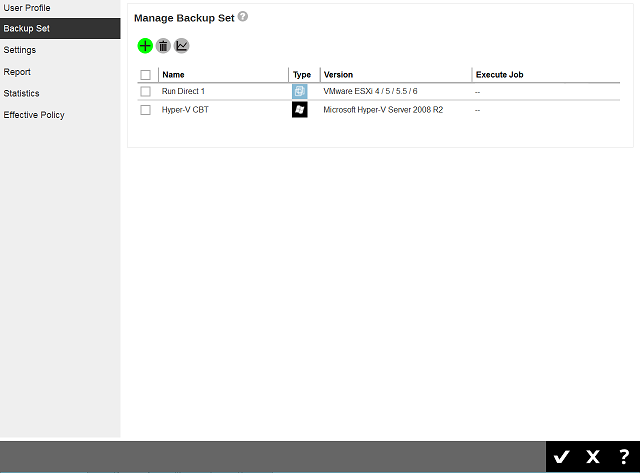
The following screen shows the Backup User tab under Backup / Restore > Users, Groups & Policies. You can create a new user account on this tab.

If Retrospect Virtual Management Server is deployed for internal use, as a system administrator, you need to determine the following when you create a backup account:
- Backup client type, whether it is Retrospect Virtual Host Server
- Backup destination
If you are a Managed Service Provider (MSP) or reseller you may require to take into consideration the following items when you create a backup user account:
- Types of users, whether it is Paid or Trial
- Backup client type, whether it is Retrospect Virtual Host Server. Also the modules subscribed by the client.
- The backup destination and the subscribed quota
Create a New Backup User
To create a new backup user, do the following:
- Click the Create (+) button as highlighted below.
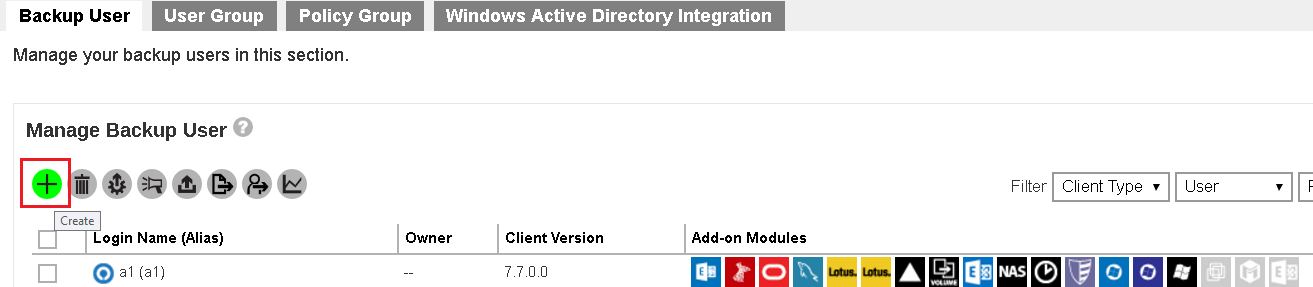
- The Add New User page appears.
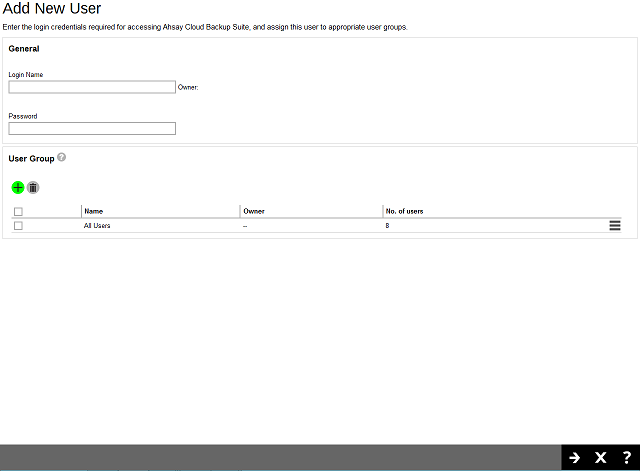
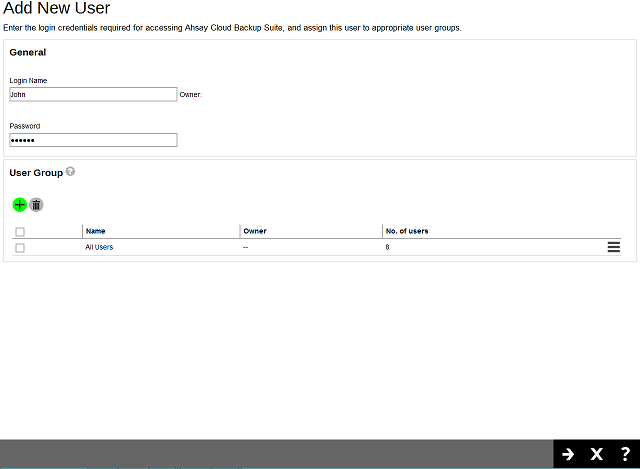
- Enter the Login Name, Password, and select the User Group by checking the desired user group. Click the Right Arrow (→) at the bottom of the page to proceed.
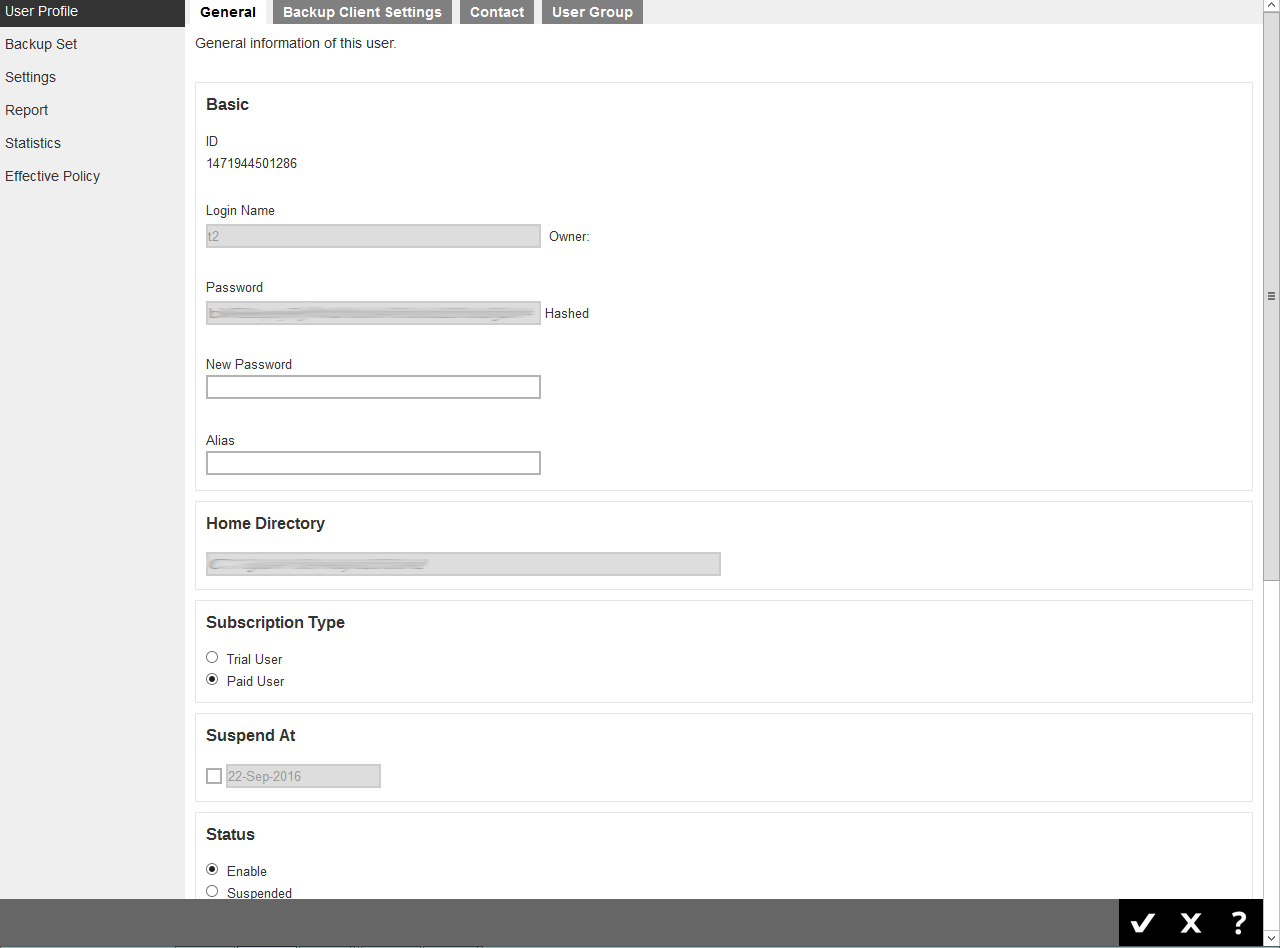
- Enter the following information that appears on this page.
- Alias: Another name of the backup user.
- Home Directory: You can select Auto assigned or Manually assigned user home path. The user backup data will be stored here.
- Subscription Type: There are 2 subscription types: Trial User and Paid User. Trial users can only have a maximum backup quota of 100GB within the trial period. Trial users are subject to automatic removal as defined by the l*Free Trial Options* tab under Backup / Restore > Basic. The automatic removal option can be disabled.
- Suspend At: A scheduled date to suspend this user. For trial users, the suspension date is based on the settings in the Free Trial Options tab under Backup / Restore > Basic.
- Status: There are 3 types of status for a user account: Enabled, Suspended, and Locked. Under normal circumstances, administrator may change the Enable or Suspended status of a user. The Locked status is referring to account lockout rules that are set inside the policy group, refer to the Managing Policy Groups section for more details. For example, if a user has 3 consecutive unsuccessful login attempts in 30 minutes, the user account will be locked out.
- Upload Encryption Key: Once you enabled the encryption recovery option, the encryption key file is uploaded to the backup server. In case the user forgot the encryption key, you can still contact us to have it recovered. The recovered encryption key will be sent directly to the email address registered on the user account. Refer to the Encryption key section for further details.
- Language: Preferred language for all email reports of the backup user.
- Timezone: Time zone of the backup user.
- Notes: A field for administrators to add notes for the backup user.
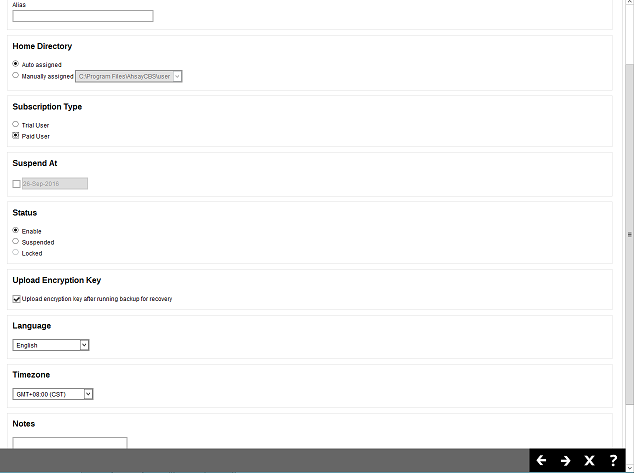
Click the Right Arrow (→) at the bottom of the page to proceed when you are done with the settings.
- Enter the following information that appears on this page.
- Add-on Modules: You can select which add-on module to enable for the backup user. Some add-on modules has a text field after its name. For example, the number after Microsoft Exchange Mailbox defines the number of Exchange mailboxes that are allowed to be backed up under this user account.
- Quota: Backup Quota of the account. Refer to the User Settings Tab section for details.
- Client host limit: This is to limit the maximum number of hosts allowed in a client’s backup account, i.e. the number of devices that they can install Retrospect Virtual Host Server on. Refer to the User Settings Tab section for details.
- Run Direct: Set the maximum number of VMs for VM Run Direct restore on Retrospect Virtual Management Server for this user. Refer to the Run Direct section for details.
Click the Right Arrow (→) at the bottom of the page to proceed when you are done with the settings.
- This page allows you to add contact person information for this user. Click the + button to add new contact information.
- Enter the contact information such as Name, Email, Address, etc. In our example, the name of the contact is john.
Click the + icon at the bottom right hand corner of the page to proceed when you are done with the settings.
- A new contact called is added.
- Click the + icon at the bottom right corner of the page to confirm. The newly added user appears on the Backup User tab as shown below.
- Click the green Save button at the bottom right corner of the page to confirm.
Managing Backup Users
After you have created a backup user in previous section, you can perform the following operation for your users such as:
- Customize backup users profile settings
- Customize subscribed modules
- Create backup sets
- View backup/restore reports
- View usage statistics
- Manage the policies applied to a user
- Update client software via the auto update agent
- Send broadcast message to users
- Export usage to a CSV file
- Export users
- Rebuild storage statistic
Accessing the Backup User
Click the login name of the backup user account you want to manage from the Backup User tab.

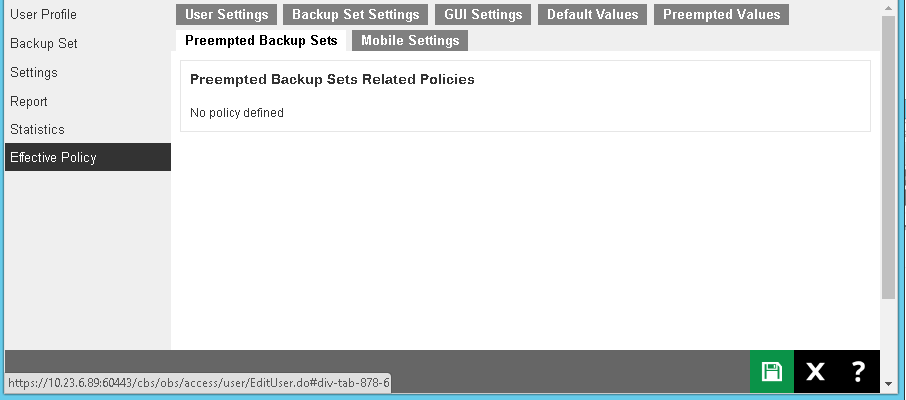
The backup user account opens. You will see 6 tabs (User Profile, Backup Set, Settings, Report, Statistics, Effective Policy), each of which is described in detail below.
User Profile
The User Profile tab contains user backup account settings information, subscribed modules, backup quota, subscription type, contact information and user group information. It is located under Users, Groups & Policies > Backup User. It is sub divided into four tabs, as described below.
General Tab
- New Password - Change or reset the password for this user, in case if they forgot the current password.
- Alias – Update the alias for this user.
- Subscription Type – Change the type from Trial User to a Paid User, for example after a user subscribes to backup service after a trial.
- Suspend At – Scheduled date to suspend this user’s account.
- Status – Suspend or enable locked accounts
- Upload Encryption Key – Enable or disable the “Upload Encryption Key” feature.
- Language - Preferred language for all email reports of the backup user.
- Timezone – Update the time zone of the backup user.
- Notes – Add or update notes about this user.
Backup Client Settings Tab
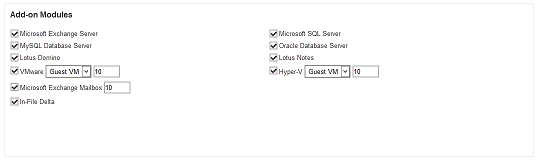
- Add-on Modules– Below is a short summary of the add-on modules available for both Retrospect Virtual Host Server
- Microsoft Exchange Server: Backup and restore of Microsoft Exchange Server.
- Microsoft SQL Server: Backup and restore of Microsoft SQL Server.
- MySQL Database Server: Backup and restore of MySQL Database Server.
- Oracle Database Server: Backup and restore of Oracle Database Server on Windows platforms.
- Lotus Domino: Backup and restore of Lotus Domino.
- Lotus Notes: Backup and restore of Lotus Notes.
- VMware: Backup and restore of VMware guest VMs.
- Hyper-V: Backup and restore of Hyper-V guest VMs.
- Microsoft Exchange Mailbox: Backup and restore of Microsoft Exchange Mailboxes.
- In-File Delta: When enabled only the changes since the last backup job is backed up.
- Quota - backup quota reserved on the Backup Server. The backup quota of a VMware VDDK backup set should be set to a value that is higher than the provision size. Even if the backup only upload the actual usage, if the quota is smaller than the provision size, the backup would fail with quota exceed.
- Per Destination – It refers to the backup storage quota on each cloud backup destination defined by the administrator. If no backup quota is assigned for that destination, the general quota will be used.
- Client Host Limit - Set the maximum number of host machine or devices the backup user can install Retrospect Virtual Host Server on.
- Run Direct – Set the maximum number of VMs for VM Run Direct restore on Retrospect Virtual Management Server for this user.
Contact Tab
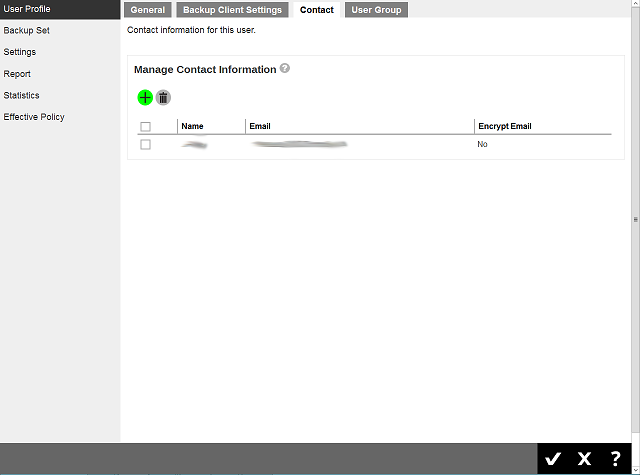
You can configure the client contact here for them to receive backup reports.
User Group Tab
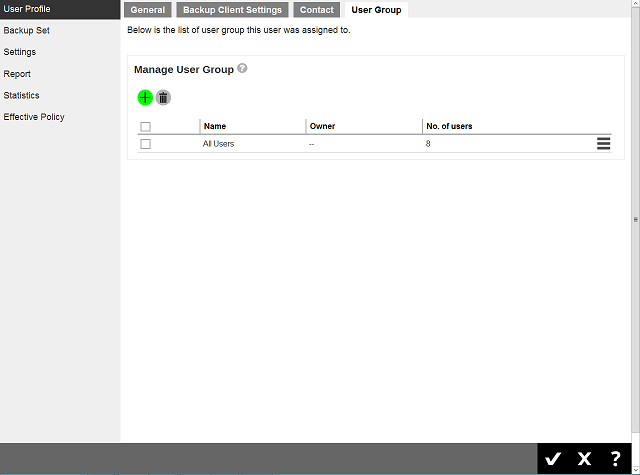
You can assign the user to an existing/assigned user group. When you drag the user group with the side button, it will affect the sequence of the policy rules that will apply to the user.
Backup Set
This menu is used to create backup set for this user account. In some cases, you may need to create backup sets first before you install a backup client on the client machine, or it may be an alternative for administrator to create/modify a backup set for Linux users with no graphical interface, or there may be access restrictions for administrator to access the backup machine again after the backup client installed.
The following shows the Backup Set tab under Users, Groups & Policies > Backup User.
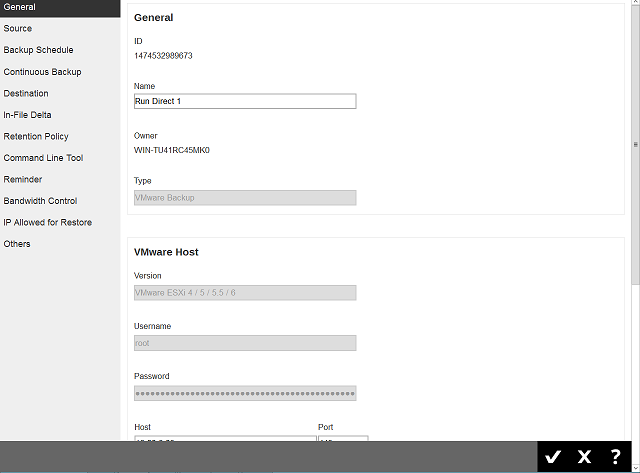
Accessing the Backup Set
Click the backup set name of the user account you want to manage from the Backup Set tab. It is sub divided into the following tabs:
- General
- Source
- Backup Schedule
- Continuous Backup
- Destination
- In-File Delta
- Retention Policy
- Command Line Tool
- Reminder
- Bandwidth Control
- IP Allowed for Restore
- Others
Settings
The Settings tab allows user to backup client to log the backup events to the Windows event log. This feature is supported on Retrospect Virtual Host Server clients installed on Windows platform only.
Windows event log
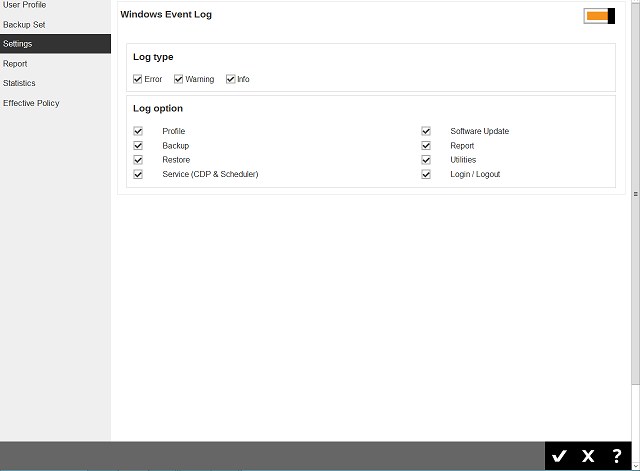
- Log type – There are 3 log types: Error, Warning and Info. Select any of the 3 log types, they will be logged in the Windows event log.
- Log option - Select the desired log option to be captured in the Windows event log. Currently there are 8 different log options: Profile, Backup, Restore, Service (CDP & Scheduler), Software Update, Report, Utilities, Login/Logout.
The backup/restore events are logged in the Windows event log and can be view from the Windows Event Viewer.
Report
The Report tab allows you to check the backup report and restore report for the backup user.
Click the Download report button at the bottom of the Backup Report page to download the complete report in PDF format. The report contains the following information in details.
- Backup Job Summary
- Backup Set Settings
- Backup Logs
- Backup Files
Statistics
The Statistics tab allows you to generate a graph of storage statistics for the user by modifying a few factors such as the backup destination, backup set and the period of the backup. The statistics shows the storage capacity of different backup sets on different dates.
- Usage: The following options are configurable for generating statistics in your desirable view.
- Selection a destination – select the backup destination of your choice
- Select a backup set – you can choose a specific backup set or all backup sets
- Period – select the period of time during which backups were performed
Effective Policy
The Effective Policy tab allows you to manage different policies. You must add your Retrospect Virtual Management Server user account to the policy group you want before you can see the effective policy for your user account. The Effective Policy tab is located under Users, Groups & Policies > Backup User. It is subdivided into 7 tabs, each of which is described below.
- User Settings Tab: You can see the effective policy on user settings for this user on the User Settings tab.
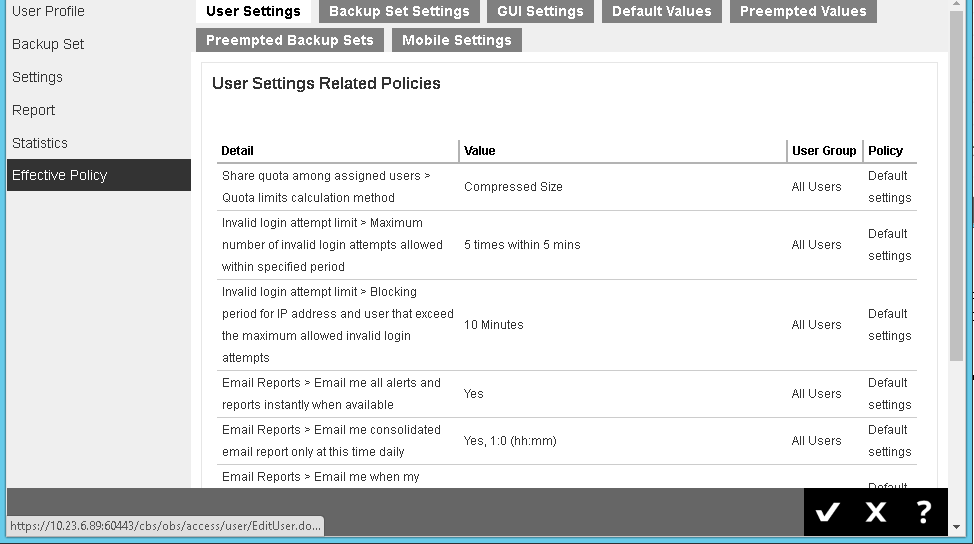
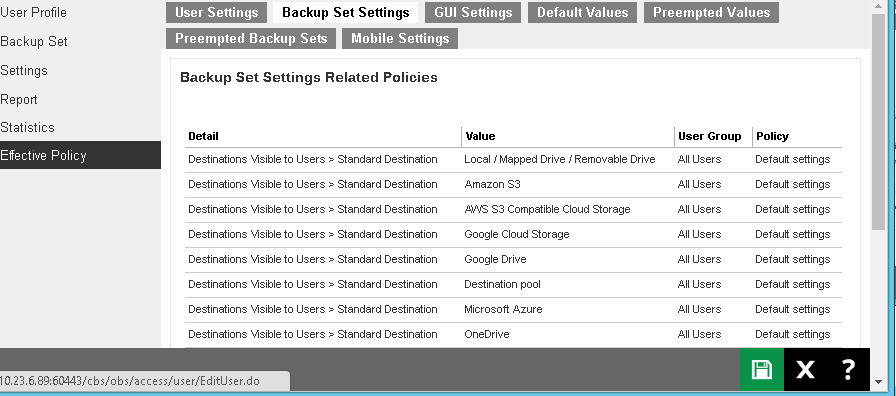
- Backup Set Settings Tab: You can see the effective policy on backup set settings for this user on the Backup Set Settings tab.
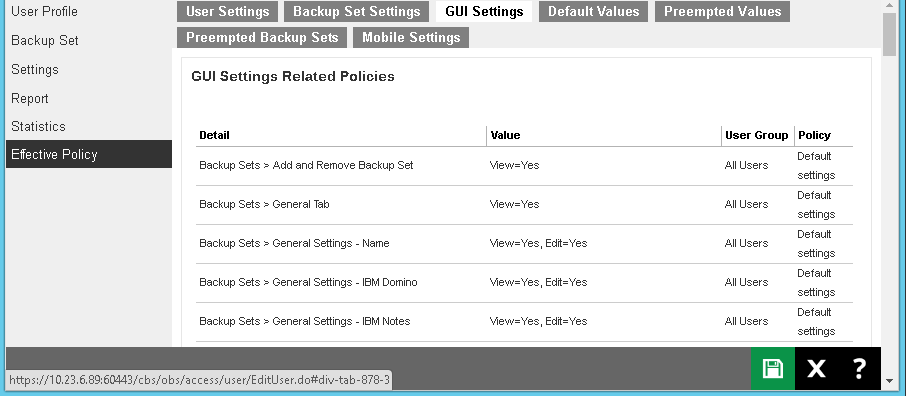
- GUI Settings Tab: You can see the effective policy on Retrospect Virtual Host Server GUI settings for this user on the GUI Settings tab.
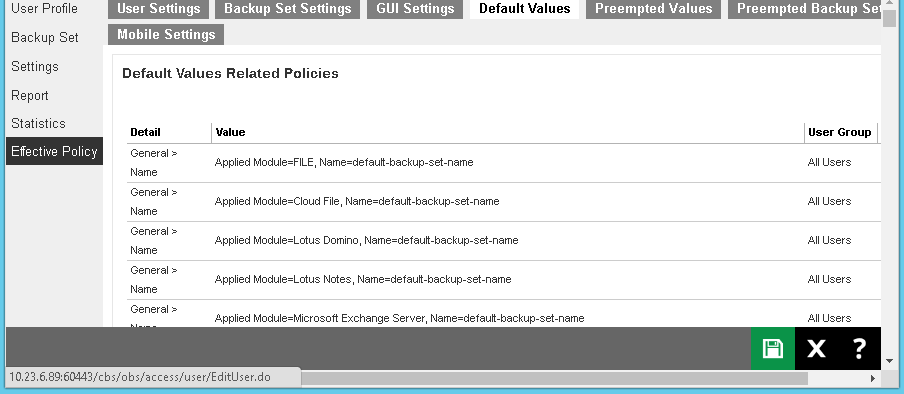
- Default Values Tab: You can see the effective policy on default values for this user on the Default Values tab.
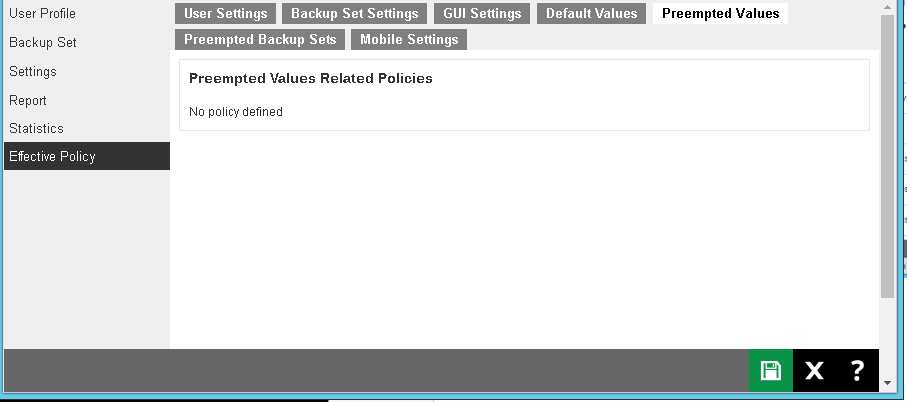
- Preempted Values Tab: You can see the effective policy on preempted values for this user on the Preempted Values tab.
- Preempted Backup Sets Tab: You can see the effective policy on preempted backup sets for this user on the Preempted Backup Sets tab.
Delete Backup User
To delete an existing user, select the user you want to delete, then click the Delete button as shown below. You will be prompted to confirm deleting the selected user, click OK to confirm.
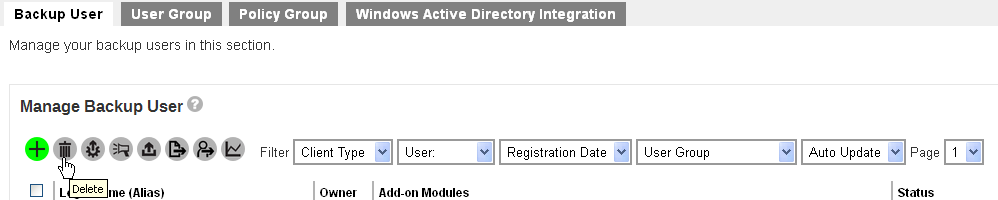
Warning: When you remove a backup user account, all the backup sets and backup data, as well as the backup user profile on the Retrospect Virtual Management Server will be removed.
Auto Update
The Auto Update operation relies on Auto Update function on the Retrospect Virtual Host Server. No new updates will be delivered to the backup machine if the backup machine is stopped, or the backup service on the backup machine is stopped.
For every 720 minutes or whenever the backup client service restarts, Retrospect Virtual Host Server will check with your Retrospect Virtual Management Server for any available updates. If any auto update instructions were found on the Retrospect Virtual Management Server, the update progress will be started.
To perform an auto update, select the desired user then click Auto Update as shown below.

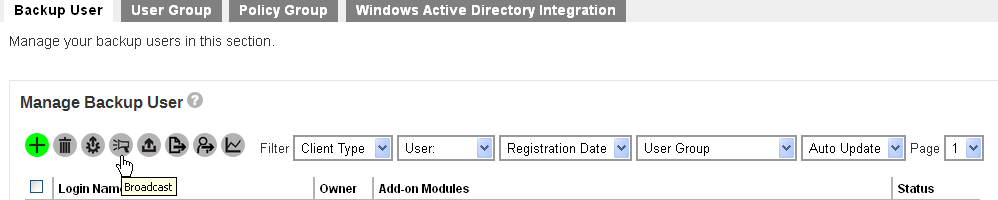
Broadcast
After you selected a list of users for broadcast, you will be able to send broadcast message to the selected users. This is useful when you need to send announcement such as server maintenance, applied latest patch or some promotion offers to your users.
To broadcast a message to users, select the desired users then click the Broadcast button as shown below. Edit the broadcast message then click the Send button at the bottom right corner to send the message.
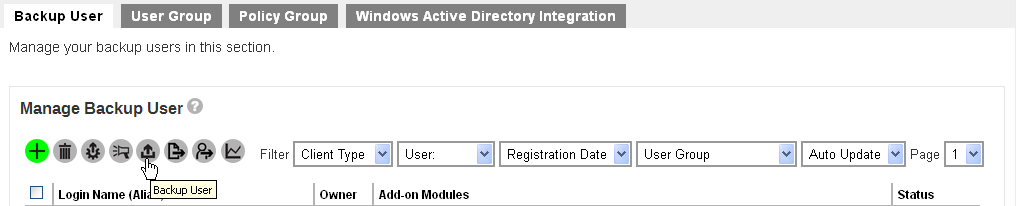
Backup User
You can select user(s) and trigger their backup machines to run the backup set(s). Select the desired backup user then click the Backup User button as shown below. Select the backup set you would like to start a backup on, then click the Run Backup button at the bottom right corner to trigger a backup.
The backup will start shortly and you can monitor the progress using the Live Activities feature. Refer to Backup Status for further details.
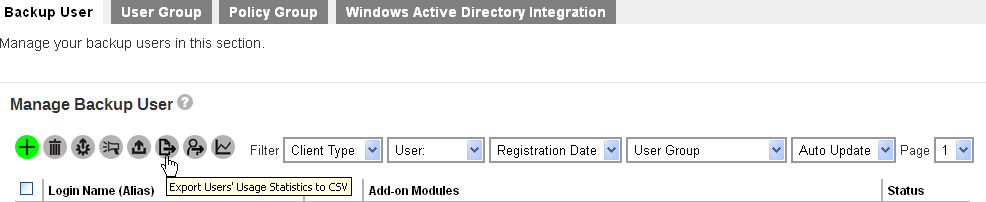
Export Users’ Usage Statistics to CSV File
You can export the usage of your selected user(s) to a CSV (Comma Separated Value) file. This format can be imported into spreadsheets or other program/database for further analysis or billing purpose.
To export usage of users to CSV, select the desired user then click the Export Users’ Usage Statistics to CSV button as shown below. You will see a .csv file being downloaded.
Export Users
This function handles export users to a file, import users from a file, and export user’s home directory to another user home.
You may use this function to migrate a user from an Retrospect Virtual Management Server to another Retrospect Virtual Management Server, migrate a user from the user home to another user home on the same machine. This function is limited to system user with admin role.
Select the desired user then click the Export Users button as shown below.

The following screen appears:
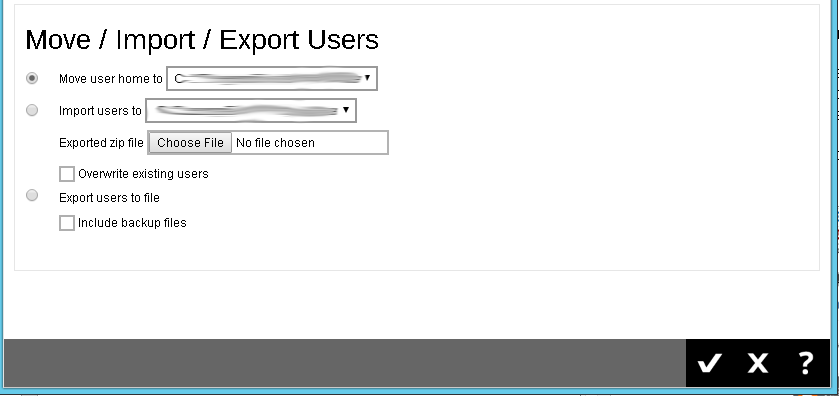
- Move user home to – Export user from a user home to another user home.
- Import users to – Import a previous exported user zip file into the user home.
- Export users to file – Export user profile and backup files to a zip file format.
Note: Please schedule a time with your users when you need to migrate their user home to another user home/Retrospect Virtual Management Server. It is better to suspend the user, stop any running backup, and close the client interface before you perform the user export.
Since the move of a user from a user home to another user home would export the whole user profile and the backup data from a user to another user home. When moving a user account with large backup sets, it is expected to wait for a long period of time. So, it is suggested to perform 1 user export at a time, and during the export, please do not restart service or server. In case of power failure or server shutdown, the move user’s process would become fail.
Example: Case 1
Migrate users from one user home in D: drive to another user home in F: drive within the same Retrospect Virtual Management Server.
Assumptions:
- The selected users in the user homes have small amount of backup files.
- These users are located in D:\u001 . F:\u001 is the destination user home.
Steps:
- Login to the Retrospect Virtual Management Server by going to Backup/Restore > Users, Groups & Policies.
- Select the user(s) that you need to migrate.
- Click the Export Users button.
- Make sure the radio button of Move user home to is turned on and select the dropdown box next to it. Choose the F:\u001.
- Click the Check (✔) button to proceed.
Example: Case 2
Export a user (including data) from one Retrospect Virtual Management Server and import to another Retrospect Virtual Management Server.
Suggestions:
- Perform 1 user at a time.
- Suspend this user before the export.
Assumptions:
- The user that needs to be export is located in Retrospect Virtual Management Server1, while the destination backup server is Retrospect Virtual Management Server2.
- When import the user into Retrospect Virtual Management Server2, make sure the username does not exist in any user home(s) in Retrospect Virtual Management Server2.
Steps:
- Login to the Retrospect Virtual Management Server1 by going to Backup/Restore > Users, Groups & Policies.
- Select the user that you need to export.
- Click the Export Users button.
- Click on the Export users to file radio button and click on the Included backup files check box.
- Click on the OK button to proceed. The system will prompt you to save the file (users.zip) in your local machine. You need to have enough disk space to save the zip file. If the user account has large backup sets, it is expected to wait for a long period of time.
- Login to the Retrospect Virtual Management Server2 by going to Backup/Restore > Users, Groups & Policies.
- Click the Export Users button.
- Click on the Import users to radio button and select the destination user home on the Retrospect Virtual Management Server2.
- Click on the Browse button under the Import users to radio button. Select your previous exported zip file (users.zip). If the overwrite option is selected, the user account on the Retrospect Virtual Management Server2 which has the same user name in the users.zip will be overwritten.
- Check the newly imported user in the Backup User page.
Manage User Groups
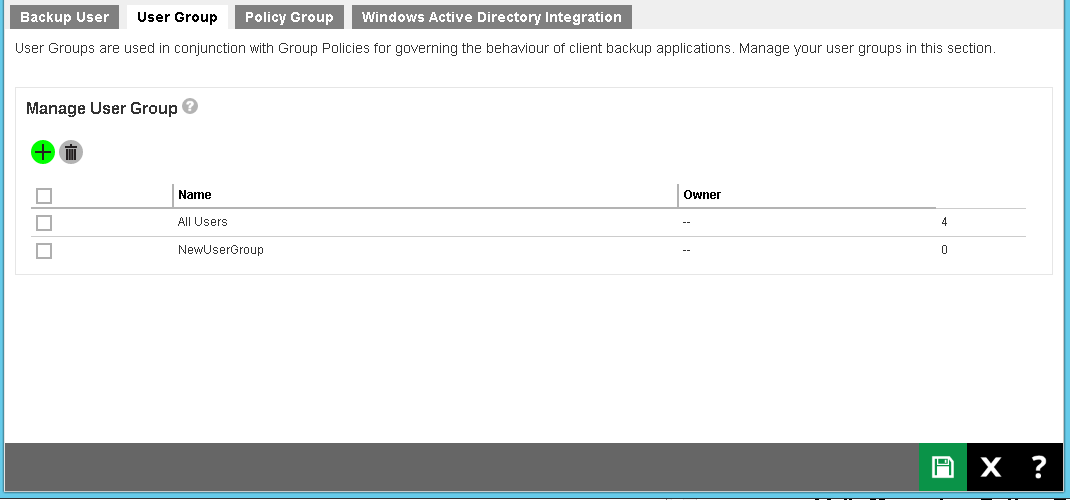
User Group is used in conjunction with Group Policies (see the next chapter Manage Policy Groups for details) for governing the behavior of client backup agent and the Retrospect Virtual Management Server.
The following shows the User Group tab under Backup / Restore > Users, Groups & Policies.

The default user group
By default, the user group named All Users has been created. All backup users will be put under the All Users user group by default after the user account has been created. When you click on one of the user groups, you will be able to see the followings:
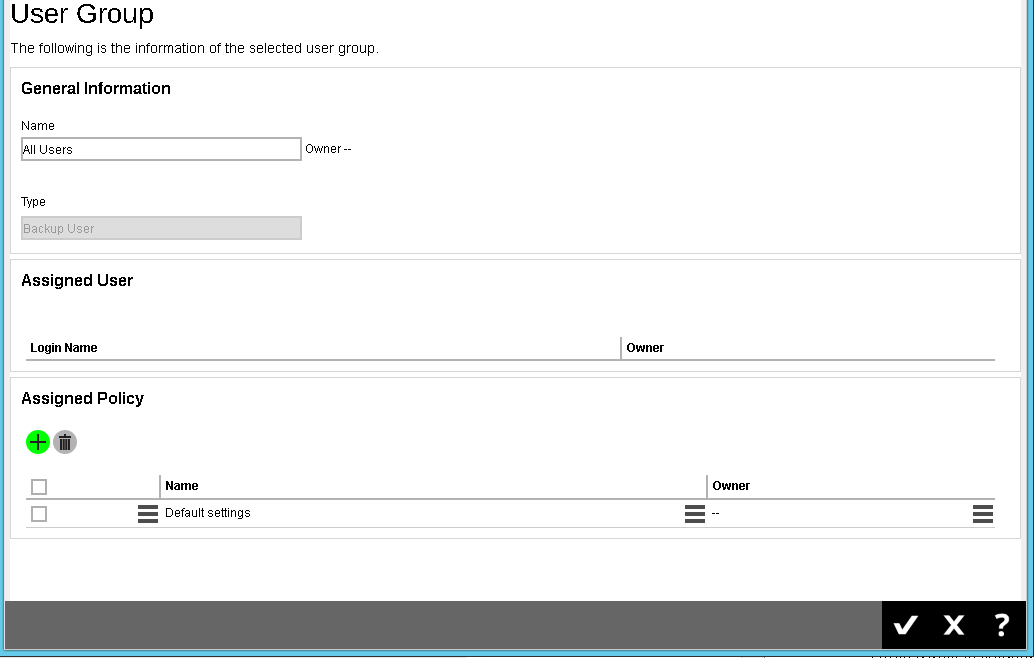
- General Information – It shows the information of the user group, ownership, etc.
- Assigned User – A list of users assigned to the group.
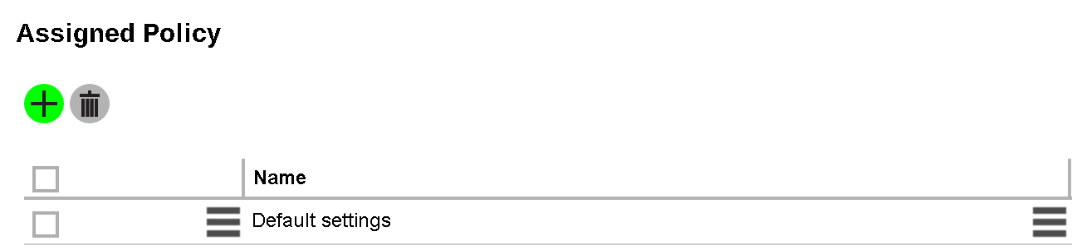
- Assigned Policy – It shows a list of assigned polices to the user group. As the order of the policy would affect the actual applied to the user group, i.e. the policy on the top would probably overwrite the policy at the bottom of the list. If you want to arrange the order of the policies, you can simply drag the policy up and down.
For the All Users user group, it has a predefined policy called Default settings.
To add backup user to a user group
Backup user cannot be added to a user group in this menu. To do so, you can either:
Add a user to a user group when you first create the user account, refer to Create a New Backup User for further instructions.
-OR-
You can add user a to a user group after the account has been created, refer to User Profile for further instructions.
To add a new policy group to a user group
Follow the steps below to either add an additional policy group to the default user group (All Users) OR add a policy group to a newly created user group.
- Click the user group which you wish to add a policy group to.
- Click the
 button under the Assigned Policy section.
- You will see a list of policy groups available for selection.
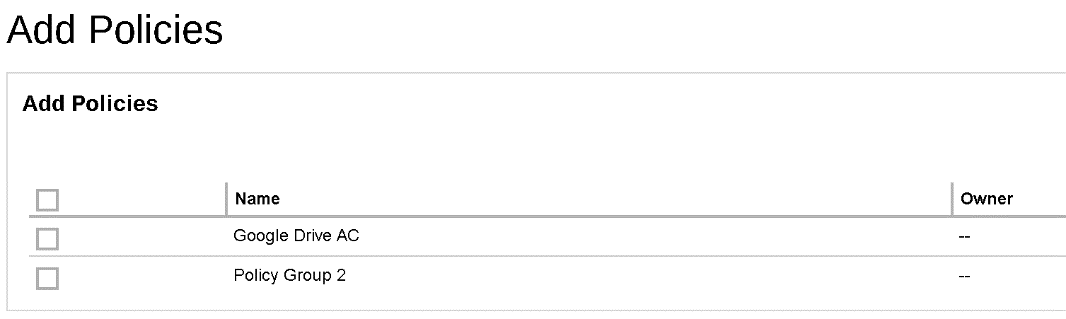
- Select the desired policy group to add, then click the
 button, and
  button then the
  button at the bottom of the page to confirm.
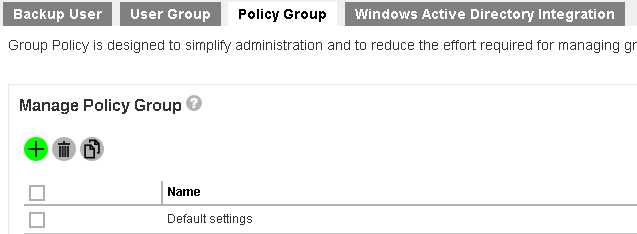
Manage Policy Groups
Policy Group is designed to simplify administration and to reduce the effort required for managing groups of backup users, e.g. security settings and backup set settings. It allows administrator to tailor features and services for different user groups. On a fresh Retrospect Virtual Management Server installation, there is a Default settings policy group and it is assigned to the All users user group.
The following shows the Policy Group tab under Backup / Restore > Users, Groups & Policies.
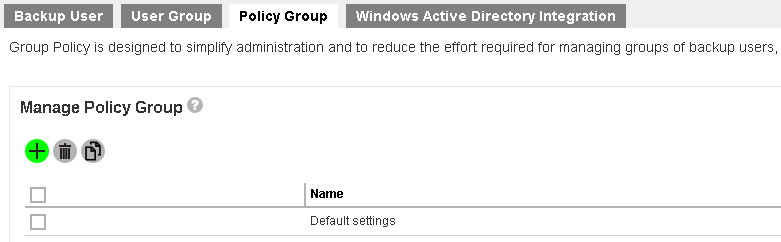
Warning: As all the default settings are stored inside this policy group, if you change the settings in this policy group, it would affect all users in your Retrospect Virtual Management Server.
In case you need to work on the policy settings for a group of user base on the default policy group settings, you can consider the followings:
- Duplicate the Default settings policy group. Refer to the steps in To duplicate a policy group for details.
- Create a user group for your selected users and apply the duplicated policy group to this new user group. Refer to the steps in To create a new policy group for details.
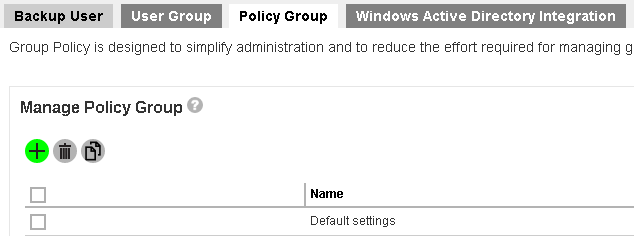
To create a new policy group
Follow the steps below to create a new policy group.
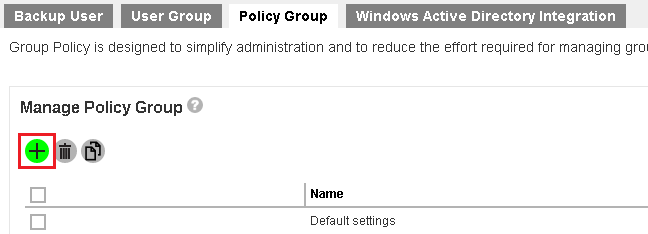
- Click the
 button under the Manage Policy Group section.
- Enter a name for the policy group.
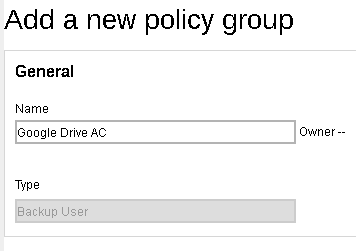
- Click the
 button and then the
  button at the bottom of the page to confirm.
 - Go back to the Policy Group tab under Backup / Restore > Users, Groups & Policies, and you should be able to see the policy group name you have just created.

- Click on the policy group for configuration. The configuration items are subdivided into 8 sections, each of which is described in the To configure a policy group section below.
To modify a policy group
After a policy group has been created, you can modify its settings by following the steps below.
- Navigate to the Policy Group tab under Backup / Restore > Users, Groups & Policies.

- Click on the policy group you wish to modify, then follow the steps in the To configure a policy group section below for further instructions on modifying the configurations.
To delete a policy group
Follow the steps below to delete a policy group.
- Navigate to the Policy Group tab under Backup / Restore > Users, Groups & Policies.
- Mark the checkbox of the policy group you wish to delete, then click on the
 button as highlighted in the screen shot below.
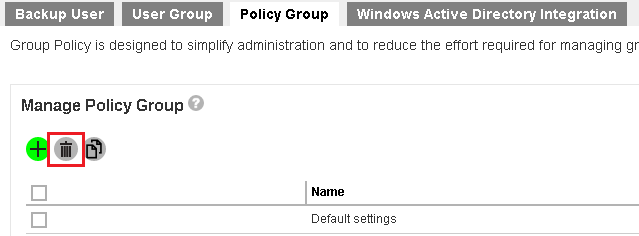
- Click the
 button at the bottom of the page to confirm.
To duplicate a policy group
Follow the steps below to duplicate an existing policy group. This is useful when you wish to apply the same configurations from a policy group to a group of users.
- Navigate to the Policy Group tab under Backup / Restore > Users, Groups & Policies.

- Mark the checkbox of the policy group you wish to duplicate, then click on the
 button as highlighted in the screen shot below.
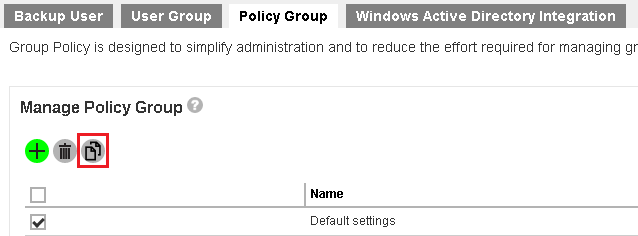
- You will immediately see the policy group is being duplicated, with the suffix “Clone at YYYY-MM-DD HH:MM:SS” in the duplicated group policy’s name.
- If you need to configure the duplicated policy group, follow the steps in the To configure a policy group section below for details.
To configure a policy group
This is the general settings of the policy group page, and the user group is a list of user group which is a list of user groups which has applied this policy.
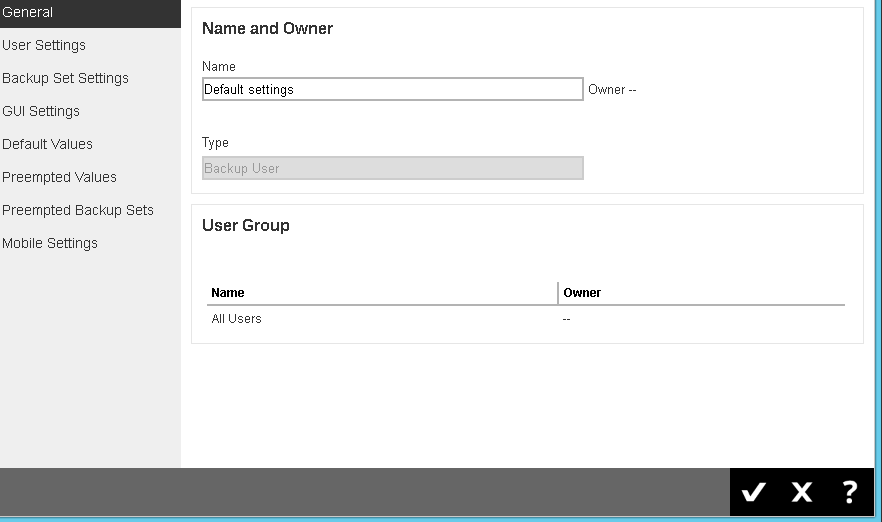
- Name – the name of the policy group. The name is configurable.
- Type – predefined as Backup User
- User Group – displays the user group(s) with this policy group applied.
If you have changed the policy group name, click the  button then the
  button at the bottom of the page to confirm.
To add backup user to a policy group
Backup users cannot be added to a policy group directly in this setting menu. To do so, you have to:
- Add the user to a user group first by following the steps in either case below:
- Add a user to a user group when you first create the user account, refer to Create a New Backup User for further instructions.
- You can add user a to a user group after the account has been created, refer to User Profile for further instructions.
- Assign the desired policy group to the user group by following the steps in To add a new policy group to a user group.
User Settings
This section allows you to manage user settings such as Quota, Invalid Login Attempt Limit, Password, Email Reports, Encryption Key, Client Host limit, Run Direct VM Limit and Advertisement.
Quota
Administrators can set a group storage quota to a user group.
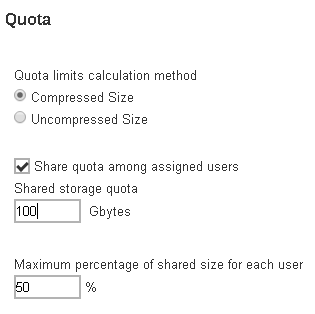
The following items can be set:
- Quota limits calculation method - this defines if the quota limit is calculated by Compressed Size or Uncompressed Size.
- Share quota among assigned users – when this feature is enabled, the set storage quota will be shared by all users within the user group and you can configure the following two settings.
- Share storage quota – this defines the storage quota allowed for the user group.
- Maximum percentage of shared size for each user - defines the maximum percentage of shared storage allowed for each user. For example, setting 50% means all users in the user group can occupy up to 50% of the assigned storage quota. If 100GB is the assigned storage, each user can store up to 50GB of the assigned storage quota. If the value is set to 100%, all users can fully utilize the storage until the assigned storage quota is full.
Important: The shared storage quota is allocated to users on a first-come-first-serve basis. If the shared storage quota remains unchanged when the number of backup user grows or there is a change on the maximum percentage of shared size for each user, it may cause issue like the one mentioned below.
Example
Settings: The shared storage quota is 100GB shared by 2 users with a maximum percentage of 50% of each user. In other words, each user is entitled to a maximum of 50GB of storage.
Current usage: Now, one of the users has used up 45GB of capacity
New setting: The maximum percentage of shared size for each user has adjusted to 30%.
Impact: In that case, that backup user has exceeded the new maximum percentage allowed for each user, which is 30GB. The backed up data will remain on the backup destination but that user will no longer be allowed to perform any new backup.
Best Practice: System administrator should consider upgrading the shared storage quota as the number of backup users in the user group grows or there is a change on the maximum percentage of shared size for each user
Invalid Login Attempt Limit
This setting allows administrator to apply conditions for the number of invalid login attempt allowed to the user group. The following conditions can be set after you turned on the  switch on the right.
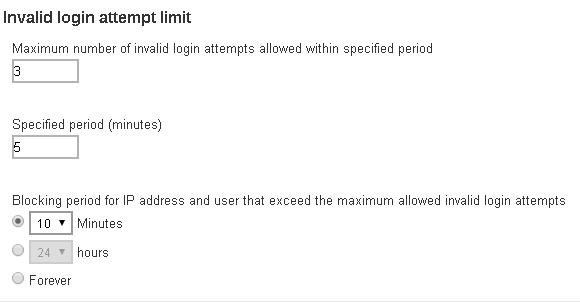
- Maximum number of invalid login attempts allowed within specified period – this defines the maximum number of attempt allowed for invalid login within the set period time. The backup user account will be blocked after the set number of invalid login attempts have been reached.
- Specified period (minutes) – this defines the period of time during which the set maximum number of invalid login attempt is allowed before the invalid login counter resets.
- Blocking period for IP address and user that exceed the maximum allowed invalid login attempts – this defines the period of time during when the IP address and user that has exceeded the invalid login attempts will be blocked from logging in again.
Example:
If the following settings are applied:
- Maximum number of invalid login attempts allowed - 3
- Specific period – 5 minutes
- Blocking period for IP address and user that exceed the maximum allowed invalid login attempts – 10 minutes
That means backup user can only enter a maximum of 3 times of invalid login within 5 minutes since the first attempt. If invalid login is made for the 4th time within that 5 minutes duration, the user account will be blocked for 10 minutes.
Password
This setting allows administrator to set up the password policy. The following items can be set after you turned on the  switch on the right.
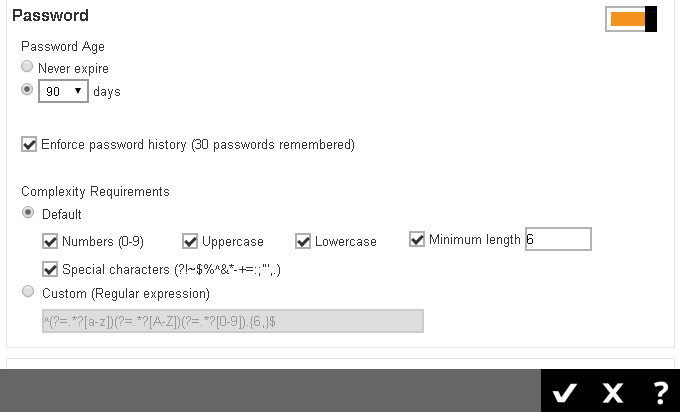
- Password Age – defines the period of time when the login password of a backup user account expires. When the set period of time is reached, backup users will have to change their passwords before they can continue using the Retrospect Virtual Management Server.
- Enforce password history (30 passwords remembered) – when this feature is enabled, the last 30 login passwords of each user are recorded and cannot be used again when users are changing a new password.
- Complexity Requirements – you can customize the complexity requirements for the password to provide better protection for the users. Under the Default option, the selected item(s) will be the mandatory element(s) when backup users create their passwords.
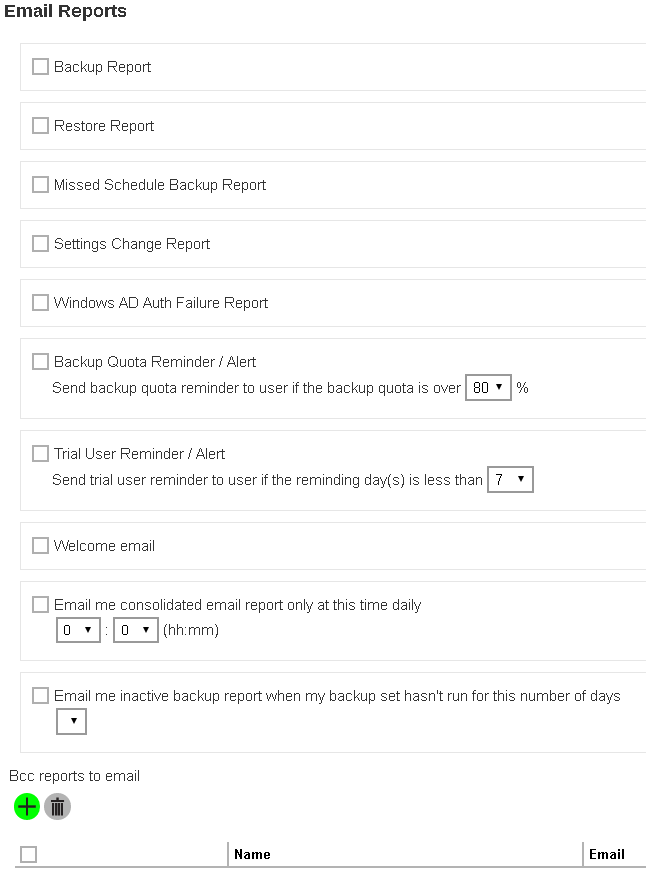
Email Reports
This menu allows administrator to select what email reports to be sent to the users of a user group. Turn on the  switch on the right then select the desired email report(s) to send. By default, no email report is selected after you turned on this feature.
The table below lists out all types of email reports, together with explanation on what the email report is about, when it will be sent, what action backup user should take, and sample screen shot of the email and report. You can also add email recipients in the Bcc reports to email section so that the email reports will be sent to them as well.
Backup Report
- What is this email about: A full backup report in PDF format, showing the Backup Job Summary (backup size, backup source and destination, etc.), Backup Logs, Backup Set Settings, Backup Files, etc.)
- When will you receive it: Backup Report is generated and sent to backup user every 15 mins (every :00, :15, :30 and :45 of an hour)
Depending on the backup size and backup finish time, the actual report sending time may be longer than 15 mins.
Restore Report
- What is this email about: A full report in PDF format, showing the Restore Job Summary, Restore Logs and Restore Files
- When will you receive it: Restore Report is generated and sent to backup user every 15 mins (every :00, :15, :30 and :45 of an hour)
Depending on the restore size and restore finish time, the actual report sending time may be longer than 15 mins.
Missed scheduled backup reminder
- What is this email about: A reminder to alert the backup user about a scheduled backup failure.
- When will you receive it: Any backups that are failed to start 6 hours after the scheduled backup time will be considered as missed schedule backup.
The report is generated and sent to backup users at the next :00 after it’s classified as missed scheduled backup (6 hours after backup failure)
Common causes for missed scheduled backups:
Server Side Issues
- The Retrospect Virtual Management Server service is unresponsive
- License error
- Out of Java memory / threads
- Out of space on Retrospect Virtual Management Server user home drive
- Retrospect Virtual Management Server service is not started
- Retrospect Virtual Management Server server is powered down
- SSL certificate expired
- The time zone on the Retrospect Virtual Host Server account user profile on Retrospect Virtual Management Server is set incorrectly. This will cause the scheduled backup time to run either later or earlier than the actual scheduled time but will trigger a missed backup notification.
- There is no backup schedule configured for the affected backup set(s) or the schedule date and/or time is incorrect.
Client Side Issues
- The Retrospect Virtual Host Server client machine was switched off, hanged or running in power saving mode.
- The date/time, time zone, or locale on Retrospect Virtual Host Server client machine is set incorrectly.
- A backup set and backup schedule was created on Retrospect Virtual Management Server but Retrospect Virtual Host Server client was not installed on the client machine or was uninstalled.
- If the Retrospect Virtual Host Server runs on Windows machine, ensure the login credentials in the Windows User Authentication is correct or is kept updated.
User settings changed alert
- What is this email about: A summary report showing the user settings that have been changed in details, with the old values and new values of the changed settings shown
- When will you receive it: User Settings Changed Alert Report is generated and sent to backup user every 15 mins (every :00, :15, :30 and :45 of an hour)
Active Directory authentication failure report
- What is this email about: A reminder to alert the backup user about a backup failure due to the incorrect Active Directory authentication.
- When will you receive it: Shortly after the active directory authentication failure occurred
Backup Quota Reminder / Alert
- What is this email about: A reminder to alert backup users about the backup quota has exceeded the set percentage. User can configure the percentage where the reminder/alert email is triggered when it is reached. By default, this percentage is preset as 80% when this feature is enabled.
- When will you receive it: The backup quota reminder / alert email is generated and sent to backup user at 6:00am daily.
Trial User Reminder / Alert
- What is this email about: A reminder to alert trial backup users their account is about to expire in the set number of days. Be default, the preset value of this setting is 7 when this feature is enabled.
- When will you receive it: The trial user reminder / alert email is generated and sent to backup user at 6:00am daily.
Daily User Report
This appears as: "Email me consolidated email report only at this time daily)".
- What is this email about: A consolidated report in PDF format, showing the following categories of information:
- PROBLEMS – errors for System / Backup / Restore
- ISSUES – potential issues that may cause problems on System/Security, Users or Backup Sets
- ACTIVITIES – all Backup Jobs / Restore Jobs / Setting Changes performed
- STATISTICS – statistics on User Account / Data Transfer / Disk Storage Usage
- When will you receive it: The daily user report is generated and sent to backup user at the time defined by the system administrator in this menu
Inactive Backup Report
This appears as: "Email me inactive backup report when my backup set hasn’t run for this number of days)".
- What is this email about: A report showing all backup sets under this backup user account that have not been run in the set number of day.
- When will you receive it: Inactive Backup Report is generated and sent to backup user every 15 mins (every :00, :15, :30 and :45 of an hour)
Bcc reports to email
You can add email recipients in this section so that they will receive a blind carbon copy (bcc) of the email reports as well.
- Click the
 button under the Bcc reports to email section.
- Enter the name of the recipient, email address and other details if necessary.

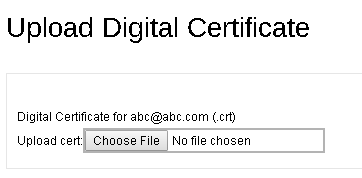
- If you wish to encrypt the email, mark the Encrypt Email checkbox. You will be re-directed to another page to upload the Digital Certificate. Click the Choose File button to upload the digital certificate, then click the tick button at the bottom of the page to confirm.
- Click the green + button at the bottom of the page when you are done with the settings.
- Click the tick OK button, then the green Save button at the bottom of the page to confirm the setting.
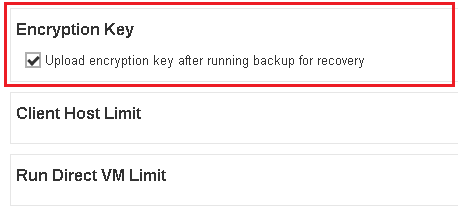
Encryption Key
Once you enabled the encryption recovery option. The encryption key file will be uploaded to the Backup Server. In case user has forgotten the encryption key, you can still contact us to recover the key.
Turn on the  switch on the right and then make sure the check box Uploaded encryption key after running backup for recovery is checked for this feature to work.
Client Host Limit
The administrator is able to set the maximum number of host machine for a backup users account.
Turn on the  switch on the right and then enter the Maximum number of host as shown below.

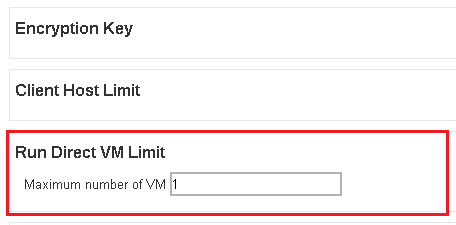
Run Direct VM Limit
Since version 7.9, administrator is able to set the maximum number of VM for Run Direct restore.
Turn on the  switch on the right and then enter the Run Direct VM Limit as shown below.
Backup Set Settings
This section allows administrator to set up backup exclusion and backup destination visible to users. It has 3 sub-sections.
Destinations Visible to Users
There are two kinds of destinations backup users can choose from when creating a backup set, they are the Predefined Destination and Standard Destination. Only the destinations selected in this menu will be available for backup users to choose from when they are creating a backup set. This feature is disabled by default.
Below is a brief explanation on the differences between the Predefined Destination and Standard Destination.
Predefined Destination vs Standard Destination
- Predefined Destination - the storage, belongs to the backup service provider, Retrospect Virtual Management Server will use for storing users’ backup data. The predefined destination can be a single storage destination on the local drive where Retrospect Virtual Management Server is installed, mapped drive, cloud storage or FTP server, or a destination pool with a mix of storage options mentioned above. Either case, it is the storage provided by the backup service provider. Before you can select a predefined destination in this menu, it must first be configured under the System Settings > Backup > Predefined Destinations. Refer to Predefined Destinations Tab for details on configuration.
- Standard Destination – except for the Retrospect Virtual Management Server storage option, all other storage options under the Standard Destination belong to the backup users, whether it could be a single storage destination on the mapped drive, cloud storage or FTP server, or a destination pool with a mix of storage options mentioned above. Unlike predefined destination, standard destination storage belongs to the backup users themselves and therefore they can alter the storage options, combinations and storage size anytime they want.
To configure the Predefined Destination
- Turn on the
 switch on the right under the Destinations Visible to Users section.
 - Click on the
 button under the Predefined Destination section.

- Select the desired destination option, which has been defined in the System Settings > Backup > Predefined Destinations menu, by checking the box on the desired destination item.
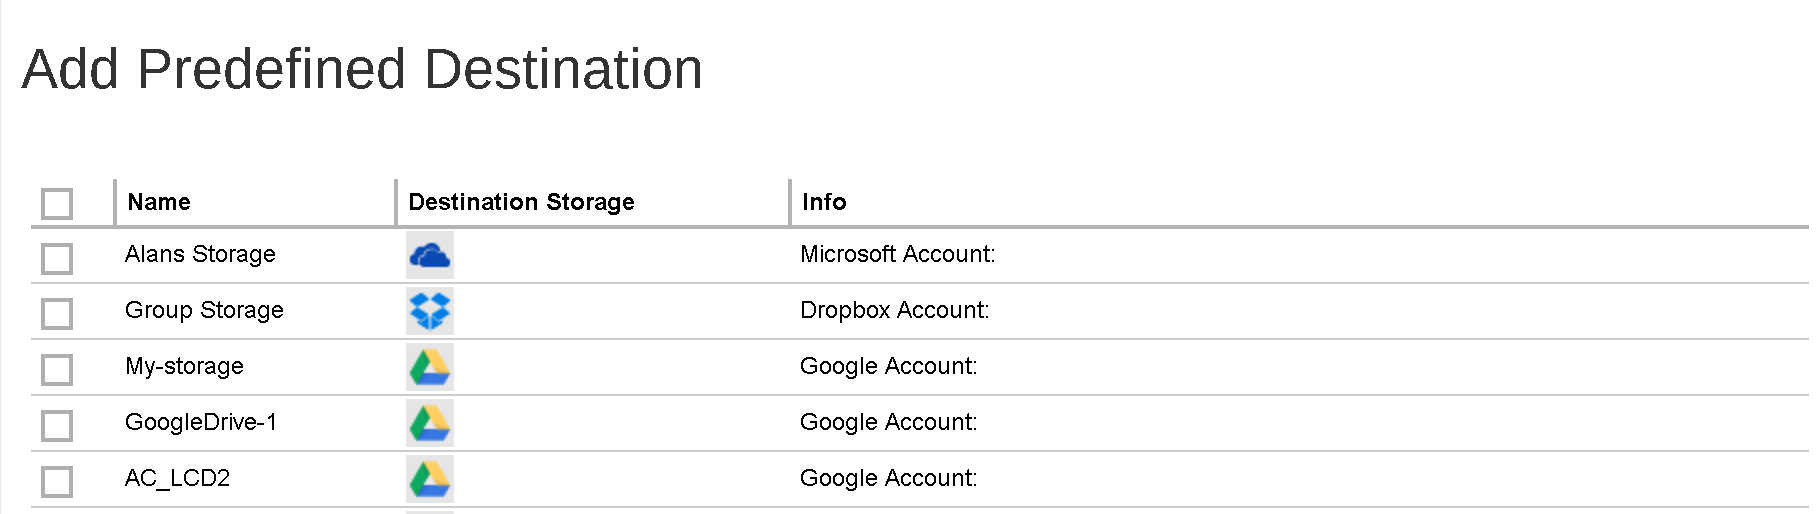
- Click the
 button to confirm adding the predefined destination.
 - If you have multiple predefined destinations to add, repeat steps 3 -4 until all desired destinations have been selected.
- Click the
 and
and  buttons at the bottom of the page to confirm.
To configure the Standard Destination
- Turn on the
 switch on the right under the Destinations Visible to Users section.
 - Click on the
 button under the Standard Destination section.

- Select the desired storage option from the drop-down menu as shown below.
- Click the
 button to add the selected standard destination storage.
 - If you have multiple destination storages to add, repeat steps 3 – 4 until all desired storages have been selected.
- Click the
 and
and  buttons at the bottom of the page to confirm.
 - You will see the newly added destination shown on the list as shown.