System Settings
Basic Backup Server Configuration
To manage your Retrospect Virtual Management Server basic backup server configurations, simply click the Basic icon under System Settings from your Retrospect Virtual Management Server environment.

You can perform the following basic configurations on your Backup Server:
- Manage general setup for Retrospect Virtual Management Server
- Manage email settings and general email reports
- Define destinations to store backup
- Manage Administrator accounts
- Customize languages
There are 5 tabs under basic server configurations, each of which is described below.
General
The following shows the General tab under System Settings > Basic. It is used for general setup of Retrospect Virtual Management Server. There are several groups of settings under the General tab, and they are described below.
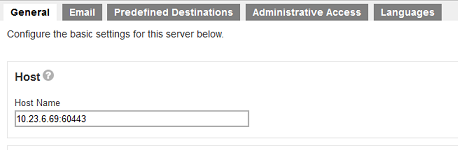
Host
This is the host name of your Retrospect Virtual Management Server. You can enter the domain name of your Retrospect Virtual Management Server in the format:
<www.mybackup.com:port_number>
-OR-
<IP:port number>
IMPORTANT: The host name will be the access link for your users to get access to the Retrospect Virtual Management Server. Since the host name will be used in various locations, such as welcome email, as a reference point for the users to access the Retrospect Virtual Management Server, it is important that you ensure the host name is accessible by users from external network environment.
System Home
This is the system home location of your Retrospect Virtual Management Server. This path is set to your installation home by default.
Listening to non-standard TCP/IP Port
If you like to run your own web server, or some other services using port 80 and 443. On your Retrospect Virtual Management Server server, you can change the listening TCP/IP port of Retrospect Virtual Management Server from port 80 and 443 to some other port numbers such as port 8080 and 8443, you can modify the connector settings from the Retrospect Virtual Management Server Console → System Settings → Basic → General → Connectors, and modify your new port in the connector settings.
Listening to a single IP address
If the backup server has more than one network interface installed or has more than one IP address bind to a single network interface, you can configure Retrospect Virtual Management Server to use only a single IP address for backup services (by default the TCP port of all IP addresses available within the system are used and open). This has the benefits of sparing other IP addresses for other applications, e.g. Apache Web Server or Microsoft Internet Information Server (IIS). You can modify the connector setting from the Retrospect Virtual Management Server Console → System Settings → Basic → General → Connectors, and modify the IP address in the connector settings.
Warning: Do not remove the last HTTPS connector in the Retrospect Virtual Management Server. If you remove the last HTTPS connector, you will not be able to login Retrospect Virtual Management Server again.
Restricting access to system page by IP address
For better security, you can restrict access to the Retrospect Virtual Management Server Console by IP addresses. To do so, please add IP restriction in your Retrospect Virtual Management Server Console → System Settings → Advanced → Runtime Options → IP Restriction. You can enter a range of IPs or a specific IP in the restrict IP settings.
Installation a trusted SSL certificate
Default installation of Retrospect Virtual Management Server enables SSL (Secure Socket Layer) support using a dummy certificate. For your own security, you are advised to replace the pre-installed dummy SSL certificate with a secure SSL certificate from a trusted CA (Certificate Authority). To replace the non-secure dummy SSL certificate with a secure SSL certificate, you need to generate a CSR (Certificate Signing Request) and submit the CSR to your CA. Please perform the following in your Retrospect Virtual Management Server.
- Navigate to System Settings → Basic → General → SSL certificate, click on the + button as highlighted below.
- Enter the CSR details, then click the Next button to proceed.
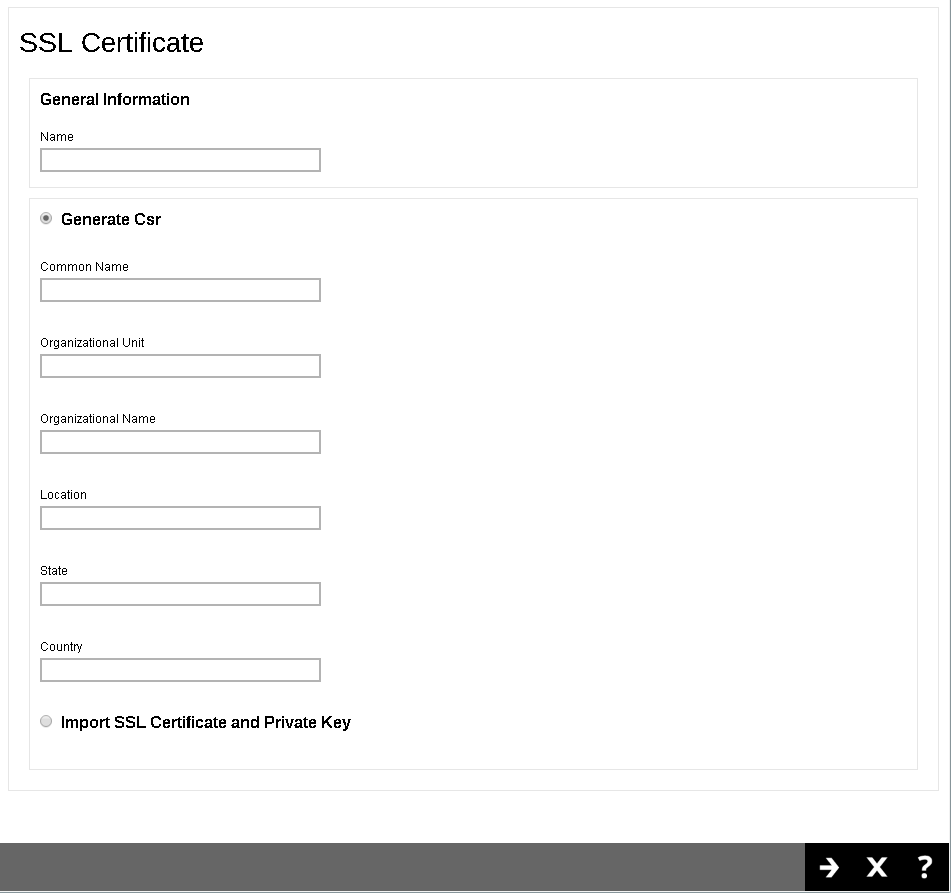
- Generate a CSR to apply the SSL certificate from your trusted CA.
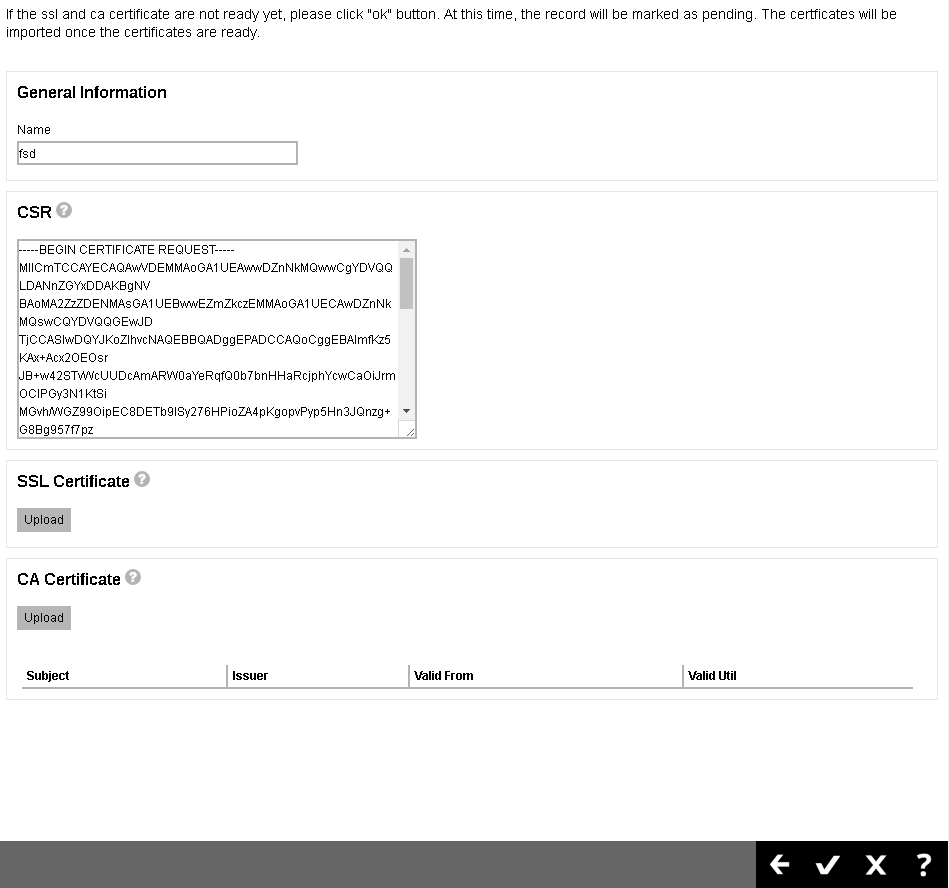
- You will see a Pending status in the SSL Certificate page.
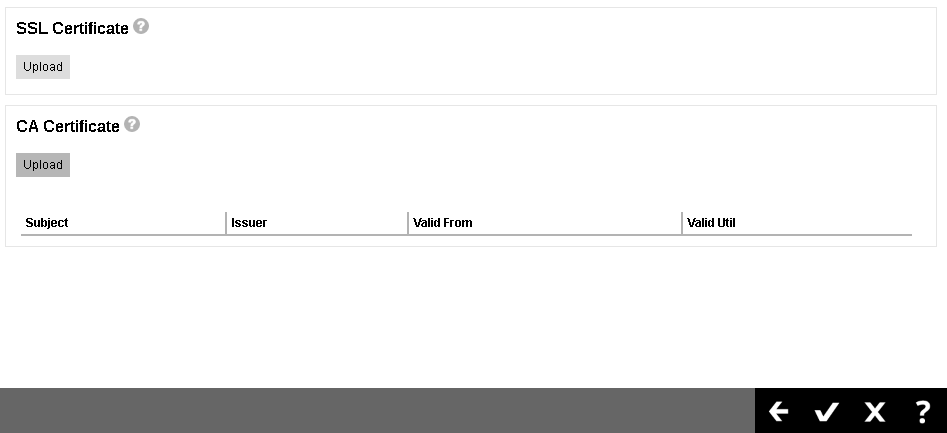
- When the SSL certificate is ready, click into the certificate entry and import the SSL certificate and CA certificate.
- You will be able to see the status of the certificate as Ready and a valid Expiry Date.
- To apply the SSL certificate to your connector, click into the HTTPS entry.
- Add the SSL certificate to this connector as shown below.
- Click the Save button at the bottom right corner to save the settings.
Renew a trusted SSL certificate
When your SSL certificate is due to expire, you can renew your SSL cert via your CA’s website. Your CA may ask you to use the existing CSR that you submitted previously or submit a new CSR.
- If you decided to use a new CSR, most likely the information on the old CSR is not up-to-date. Most CA will not consider this as a renew process and you need to start from the beginning of a certificate process described in previous section.
- If you purchase a renew SSL certificate with the existing CSR, wait for your CA to sign the renew SSL certificate.
Note: The renewal process may be different for different CA. You need to follow your CA’s instruction on the renewal process.
The import step of a renewed SSL certificate is similar to the installation of a SSL certificate. Please perform the following in your Retrospect Virtual Management Server.
- Enter System Settings → Basic → General → SSL certificate.
- Click into the certificate entry.
- Import the SSL certificate and CA certificate.
- You will see the date of “Expiry Date” is extended.
The following shows the Email tab under System Settings > Basic. This is used for defining the various email settings that Retrospect Virtual Management Server uses to generate email reports to backup system administrator and backup users.
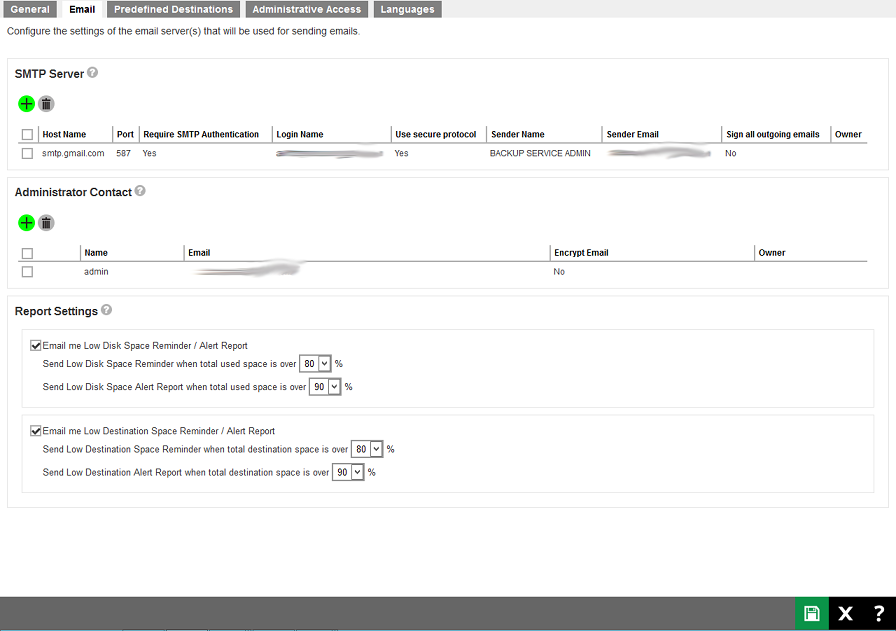
There are several groups of settings under the Email tab, and they are listed below.
Multiple SMTP servers can be setup for Retrospect Virtual Management Server. If the first SMTP server is unavailable, the next SMTP server will be used. To avoid your report emails being filtered by the SMTP server or mail client, you need to enter a valid report sender in the email settings.
Note: If you don’t have an SMTP server, you can consider using a free SMTP such as Gmail.
Administrator Contact: This entry defines the administrative contact of Retrospect Virtual Management Server. Retrospect Virtual Management Server will send usage, error and all critical system alerts to all email addresses defined here.
Report Settings: This setting allows the Retrospect Virtual Management Server administrator to define the threshold for email reminder / alert low disk space on Retrospect Virtual Management Server and backup destinations. The default settings are 80% and 90% respectively:
- Low Disk Space Reminder / Alert Report for Retrospect Virtual Management Server user home and system home drives:
- Send Low Disk Space Reminder when total used space is over 80%. A Low Disk Space Reminder email is sent to the administrator 15 minutes when the disk usage has exceeded the preset threshold.
- Send Low Disk Space Alert Report when total used space is over 90%. A Low Disk Space Alert email is sent to the administrator every 15 minutes when the disk usage has exceeded the preset threshold.
- Low Destination Space Reminder / Alert Report for OneDrive and Google Drive destinations only.
- Send Low Destination Space Reminder when total destination space is over 80%. A Low Destination Space Reminder email is sent to the administrator at 6:00 AM daily when the destination disk usage has exceeded the preset threshold.
- Send Low Destination Alert Report when total destination space is over 90%. A Low Destination Alert email is sent to the administrator at 6:00 AM daily when the destination disk usage has exceeded the preset threshold.
Predefined Destinations Tab
The following shows the Predefined Destinations tab under System Settings > Basic. Predefined destination defines a list of local directories, FTP or cloud storages in which the Retrospect Virtual Management Server server, users and sub admin can be used to store backup is stored on cloud destinations.

You can set predefined destination on the following destination storage:
- Local / Mapped Drive / Removable Drive
- Amazon Cloud Drive
- Amazon S3
- AWS S3 Compatible Cloud Storage
- Google Cloud Storage
- Google Drive
- Microsoft Azure
- OneDrive
- OneDrive for Business
- Rackspace
- Open Stack
- Dropbox
- FTP
- SFTP
- Retrospect Virtual Management Server
Set up predefined destination on cloud storage
Retrospect Virtual Management Server allows setting a backup destination on some common cloud storage, local hard disk and FTP servers. The setup method is similar on different cloud storage. In the following example, we show you how to set up a predefined destination for Google drive. The steps for other destination storages are similar.
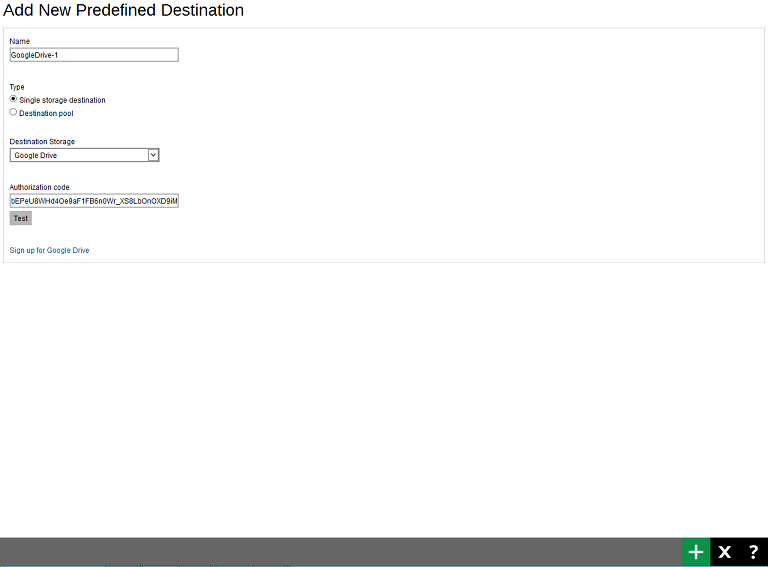
- Click the green Plus (+) button in the middle of the page to add a predefined destination. The following screen appears:

- Enter the name of the backup destination. In our example, the name is GoogleDrive-1.
- Select Single storage destination as the type of predefined destination.
Note: The option Destination pool is defined from a number of single storage destination.
- Select Google Drive from the Destination Storage dropdown box.
- If you do not have Google Drive, please click the link Sign up for Google Drive to create a Google account.
- Click the green Add (+) button at the bottom right hand corner of the page.
- Enter your login credential for Google Drive.
- A browser pops up and Google asks for your permission to access the storage. Click Allow.
- On the browser, a code is displayed. Copy this code, then switch to Retrospect Virtual Management Server to paste the code.
- Paste the code to the Authorization code field on the Add New Predefined Destination page in Retrospect Virtual Management Server. Click the green Add (+) button at the bottom right hand corner of the page.
- You can see the newly created predefined storage GoogleDrive-1 appears under the Predefined Destination page.
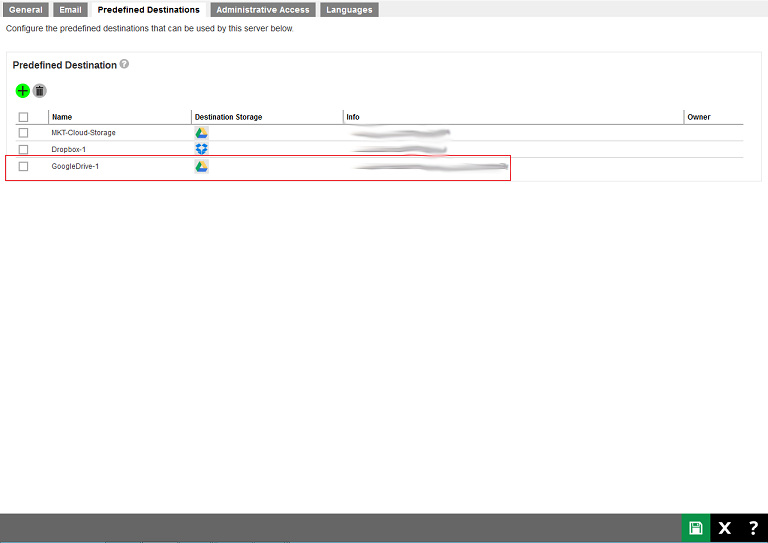
- When you create a backup set for a user, you will be able to see the new predefined destination.
For more examples on setting up other cloud storages, refer to Appendix: Setting up Cloud Storage.
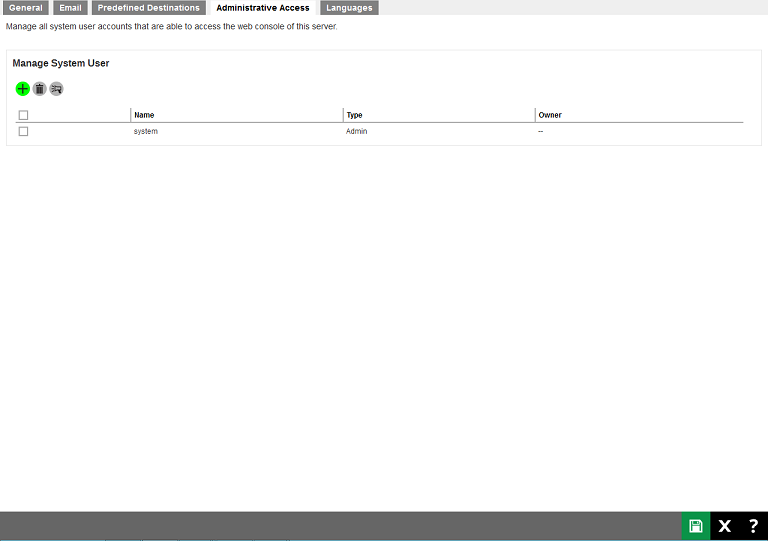
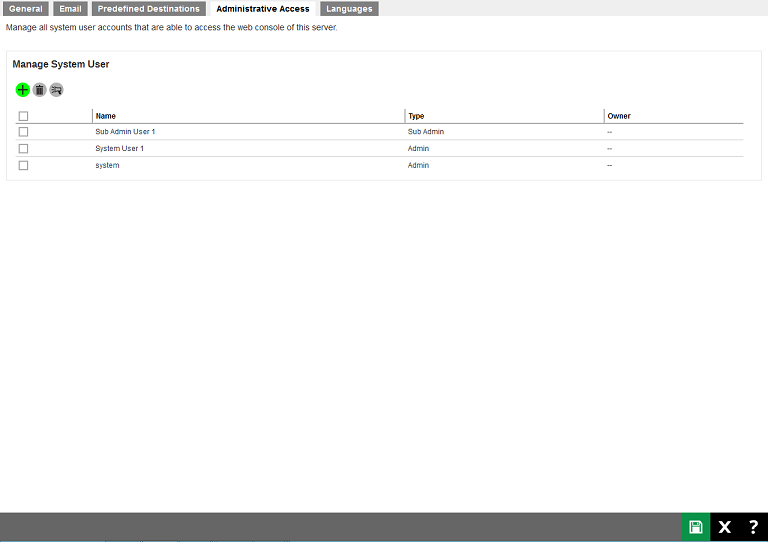
Administrative Access Tab
The following shows the Administrative Access tab under System Settings > Basic. You can manage your system user accounts on this page.
On daily operation, you may need to assign your operators or administrators to work on your Retrospect Virtual Management Server. You may have programmers to write API for your applications with the Retrospect Virtual Management Server. You may also want to hire some resellers so that you can expand your business. You will need to setup different system users with different role/privileges to work on the Retrospect Virtual Management Server.
Add a new system user
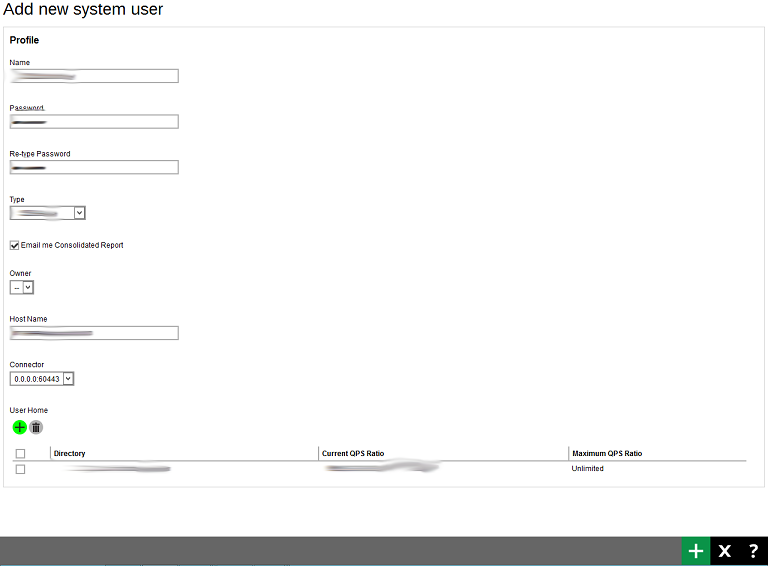
- Click the green Plus (+) button in the middle of the page to add a new system user. The following screen appears:
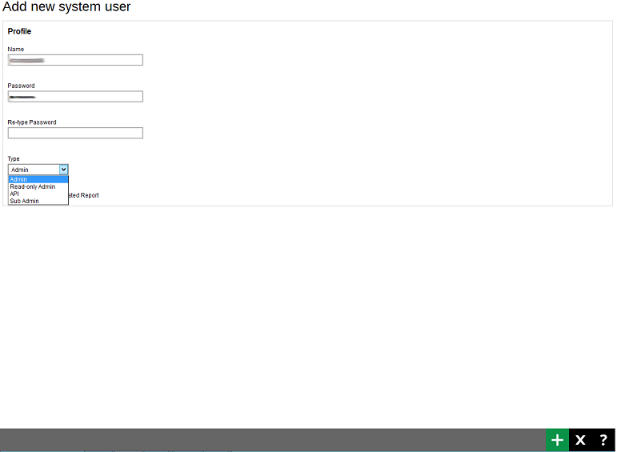
- Enter the Name of the system user.
- Enter the Password of the system user. Enter the same password again at the Re-type Password field.
- Select the system user type from the Typedropdown Box. There are four types of system users:
- Admin
The Admin role has the same privilege as the build-in system account. For example, you can assign this account for your administrator(s) to configure or administer the Retrospect Virtual Management Server for you.
- Read-only Admin
The Read-only Admin role shares similar accessibility as its creator with Admin role, except with read permission only.
- API
The API role has full access right to the system; it has the same privilege as the build-in system account. This account is created for external application developers who can use this for API login authentication purposes.
- Sub Admin
The Sub Admin role has the full access right to the users that was created under this sub admin and has the right to manage the backup and restore jobs or activities similar as the system administrator with less admin options.
- Table
The following table provides a summary of the permissions of different system users in Retrospect Virtual Management Server.
Permission | Admin | Read-only Admin | API | Sub Admin |
|---|---|---|---|---|
Read permission | ✔ | ✔ | ✔* | ✔ |
Write permission | ✔ | ✘ | ✔* | ✔ |
Login Retrospect Virtual Management Server | ✔ | ✔ | ✘ | ✔ |
Create new system users | ✔ | ✘ | ✔* | ✔ |
Profile page | ✔ | ✔ | ✘ | ✔ |
Backup User Settings page | ✔ | ✘ | ✘ | ✔** |
Export/Import profile | ✔ | ✘ | ✘ | ✔ |
- "*" API role has full access to the Retrospect Virtual Management Server which is similar as the Admin role through the API call, except login to the Retrospect Virtual Management Server interface.
- "**" Sub Admin role has full access to the settings (except the Backup User Settings page) and users under this sub admin user only.
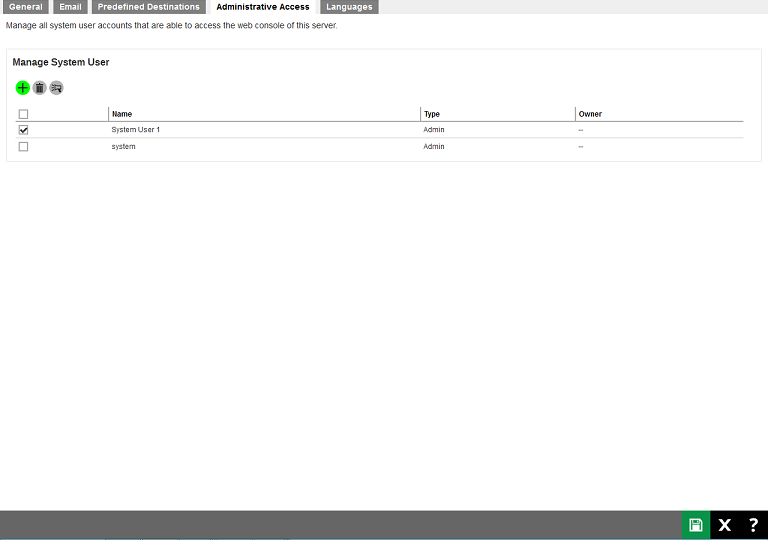
- Click the green Add (+) button at the bottom right hand corner of the page. The newly-created system user, System User 1, appears on the page.
- Click the green Save button at the bottom right corner of the page to save the changes.
Sending a broadcast message
If you want to send broadcast message to other Sub Admin or Read-only Admin, do the following:
- Select the system users to whom you need to send the broadcast message. In our example, System User 1 is selected.
- Click the Broadcast icon in the middle of the page. The following appears:
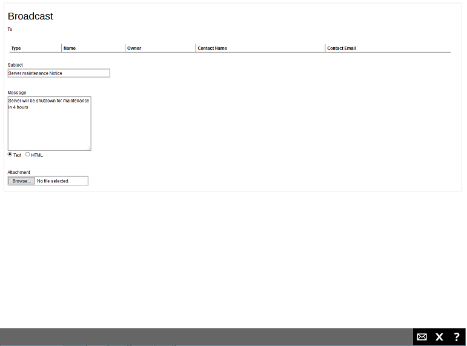
- Enter the Subject and Messagefor the broadcast message.
- You can select Text or HTML for the message body.
- If you want to include an attachment, click Choose File and browse to the desired location to select the file you want.
Click the Send button at the bottom right hand corner of the page to send the broadcast message. Click X to exit.
Managing System User
You can modify the setting of your system user by clicking into the system user’s name. You will see 4 tabs:
Each of these 4 tabs are described in detail below.
- Profile Tab
The profile tab is available to all Admin, Read-Only Admin, and Sub Admin users after they login.
The following screen shows the Profile tab of the user used in our example, System User 1, the type of the user is Admin.
You can change the Password and Type of the user on this page.

For Sub Admin users, the Profile page contains more settings.
The Sub Admin profile page is different from the Admin profile page in the following 3 ways:
- Another Sub Admin is possible to be delegated for a Sub Admin user through the interface.
- A Hostname that is different from the hostname of the system admin needs to be defined for each Sub Admin user. Thus if you have multiple Sub Admin users, you will have multiple hostnames. In our example, the host name of the system admin is 10.23.6.89 while the hostname for the Sub Admin user, Sub Admin User 1, is reseller.mybackup.com.
- A different connector can be applied for the Sub Admin users.
Note: The hostname setup for a Sub Admin user is important, as Retrospect Virtual Management Server uses connecting hostname to determine which branding should be applied on the interface.
The Sub Admin user has fewer privileges as the full Admin user. In our example, the Sub Admin User 1 account shows a subset of the functions available when the Sub Admin user logs onto Retrospect Virtual Management Server and even within each subset a sub admin user has only access to certain functions:
Available functions for Sub Admin users.
- Monitoring
- Dashboard
- Live Activities
- Administration Logs
- Basic
- Users, Groups, & Policies
- System Settings
- Backup User Settings Tab
The Backup User Settings tab is available to admin and sub admin users after they login, although for sub admin user they have read-only access. The administrator can assign the number of Retrospect Virtual Host Server licenses and add-on modules to each sub admin user.
The following screen shows the Backup User Settings tab of the user used in our example, Sub Admin User 1, the type of the user is *Sub
Languages
The following shows the Languages tab under System Settings > Basic. You can select the language(s) available to your users.
To change the default language settings for the Retrospect Virtual Management Server web console, simply drag your preferred default language to the top of the list.
To select the language you want to make available to your users, simply click check the box next to that language.
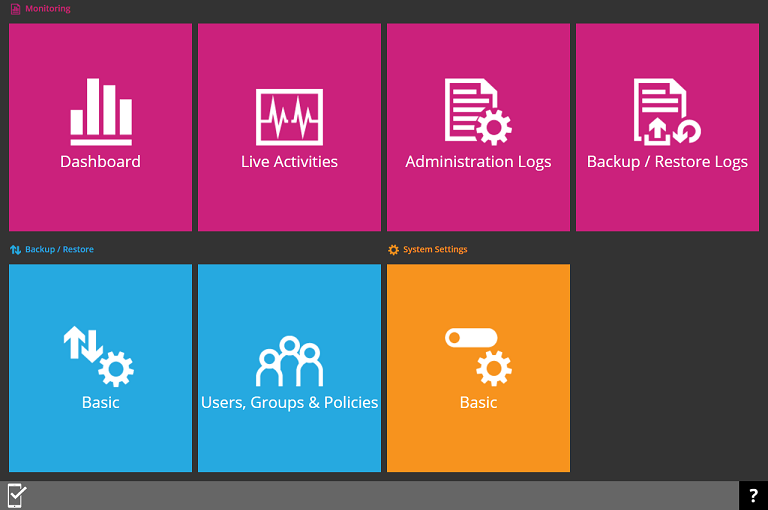
Advanced Backup Server Configuration
To manage your Retrospect Virtual Management Server advanced backup server configurations, simply click the Advanced icon under System Settings from your Retrospect Virtual Management Server environment.

You can perform the following advanced configurations on your Backup Server:
- Restore data that has been automatically saved to the License Server.
- Configure settings for proxy connection
- Publish system and error messages to third party monitoring tools
- Retrieve system files for troubleshooting
- Configure run time options such as Java heap size, thread stack, etc.
There are 5 tabs under the Advanced system settings section, each of which is described below.
Proxy
The following shows the Proxy tab under System Settings > Advanced. It is used for defining whether Retrospect Virtual Management Server should use a proxy to gain access to the Internet.
Two types of proxy, HTTP/HTTPS and SOCKS 4/5, are supported. You can use the Proxy Host and Port entries to define the location of your proxy server.
If the proxy server you are using requires user authentication, please use the Proxy Username and Proxy Password entries to set the username/password for your proxy server.
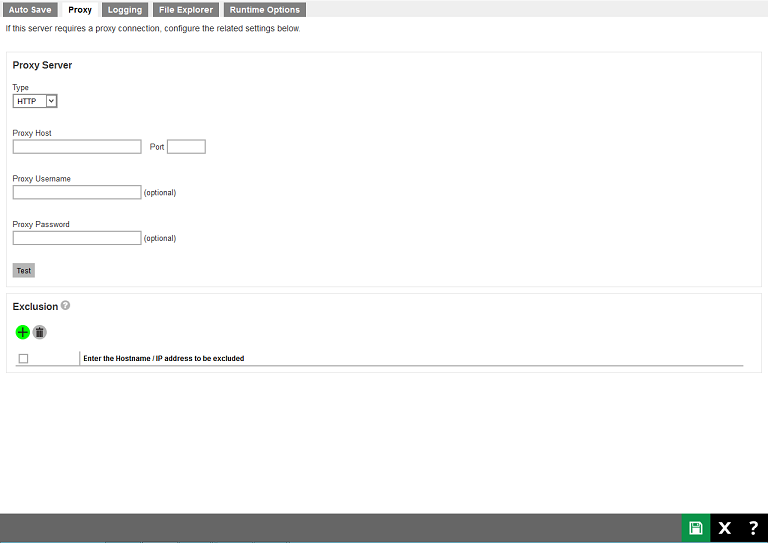
If you need to exclude some hostnames and IP address for proxy connection, you can add those excluded hostname and IP address at the bottom of the page.
Note: Please make sure there are no traffic restrictions on the proxy server, which could affect backup/restore performance.
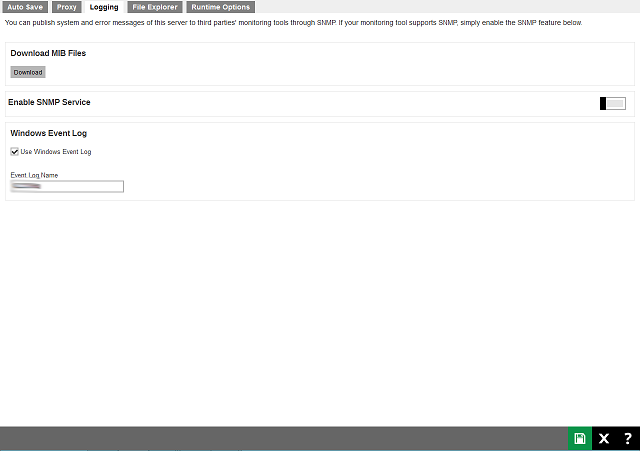
Logging
The following shows the Logging tab under System Settings > Advanced. There are two types of third party monitoring support, SNMP and Windows Event Log.
- SNMP
For the SNMP, you can download the MIB definition file and import to your SNMP application by clicking the Download button under Download MIB Files.
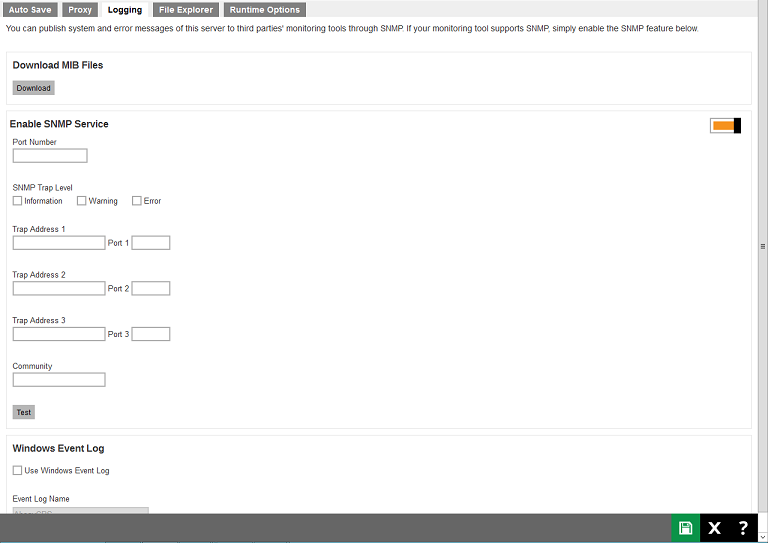
- Windows Event Log
This feature is supported for Retrospect Virtual Management Server installations on Microsoft Windows platforms where the Windows Event Log service enabled. All Retrospect Virtual Management Server system log information such as errors, warnings, and information message types will also be written to the Windows event logs. The event log name is limited to eight characters.
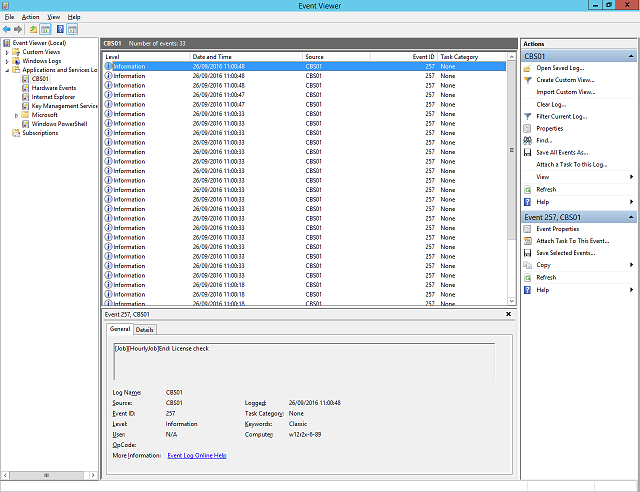
The backup server’s administrator can view the logs entries using the Windows event viewer.
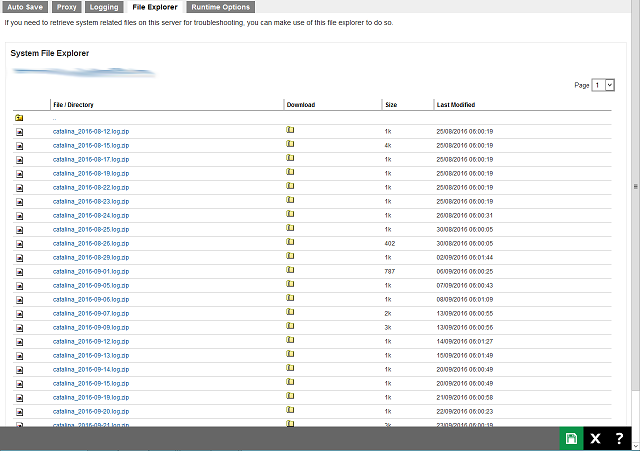
File Explorer
The following shows the File Explorer tab under System Settings > Advanced. If administrator or support staff needs to retrieve system related files on the Retrospect Virtual Management Server server for troubleshooting, they can make use of the File Explorer feature to download log or configuration files from the server without having to login remotely using RDP or SSH.
The File Explorer feature is limited to access files/folder related to Retrospect Virtual Management Server:
- Retrospect Virtual Management Server Application Home.
- Retrospect Virtual Management Server System Home.
- Retrospect Virtual Management Server User Home(s).

All files download via the Retrospect Virtual Management Server File Explorer tab are compressed by default.
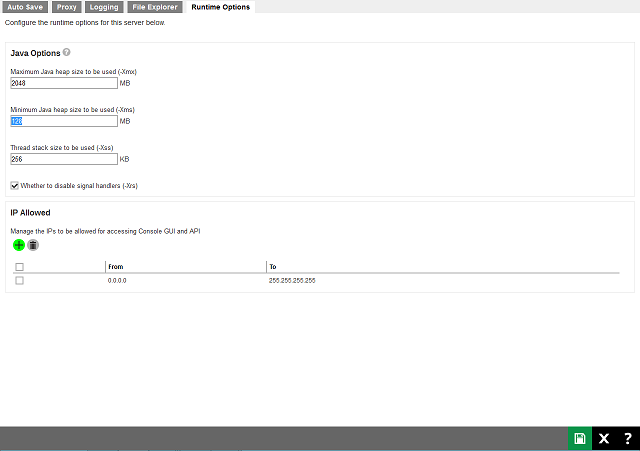
Runtime Options Tab
The following shows the Runtime Options tab under System Settings > Advanced. It allows administrators to modify Java options such as Java heap size (maximum and minimum), thread stack size and IP allowed to access the Retrospect Virtual Management Server Console.
By default the maximum Java heap size is 1024MB and there are no restrictions on IP address access to Retrospect Virtual Management Server web console.
Important: When editing the maximum heap size for Retrospect Virtual Management Server, ensure that there is sufficient memory reserved for the operating system. It is not recommended to set excessively high values for the maximum Java heap size, as this could result in Retrospect Virtual Management Server performance issues during internal Java VM garbage collection or memory recycling routines. For changes in Java heap size setting the Retrospect Virtual Management Server service needs to be restarted before it becomes effective.