The User Initiated Restore feature is a new add-on to Retrospect 7.5 which allows client users to restore lost data via a Web Browser, freeing administrators from common restore tasks.
Requirements
Server-level version of Retrospect (Disk-to-Disk, Small Business Server, Single Server, Multi-Server)
User Initiated Restore Add-on
Internet Information Services (IIS)
Microsoft .NET 1.1
Disk Backup Set only (not available for tape, cd, file, etc.)
Recommended
The IIS server should use HTTPS, SSL, or equivalent encryption to ensure all communication is secure.
Pre-Setup
Installing IIS and Microsoft .NET 1.1 (will need Windows Install CD)
Start > Control Panel > Add/Remove Programs > Add/Remove Windows Components.
Click Details on Application Server > Check ASP.NET and Internet Information Services.
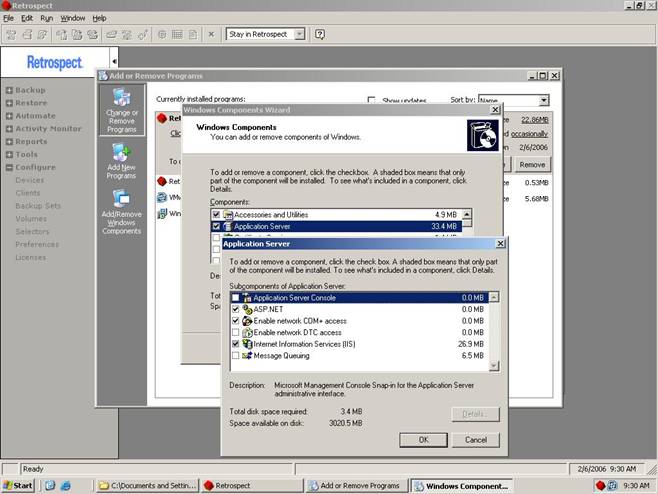
Insert Windows CD to start installation.
Users of Windows 2008 may need to manually install .net 1.1 before running the UIR installer for Retrospect.
- Download and install the .net 1.1 package from Microsoft.
- You do not need to configure any specific IIS rolls under Windows 2008
- Retrospect 7.6.123 or later is required for UIR support under Windows 2008
- Follow Setup steps below.
Setup
- Launch Retrospect > Configure > Preferences > Clients > User Restore.
- Check Enable User Initiated Restore. Then Click the Install UIR button.
Setup
Launch Retrospect > Configure > Preferences > Clients > User Restore.
Check Enable User Initiated Restore. Then Click the Install UIR button.
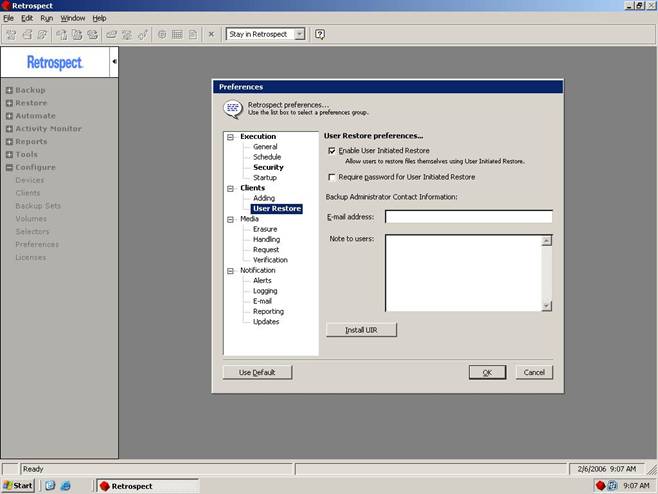
Keep default settings during UIR installation and click Finish.
Client Access via Web Browser
- Go to a client machine that has been backed up to a DISK BACKUP SET.
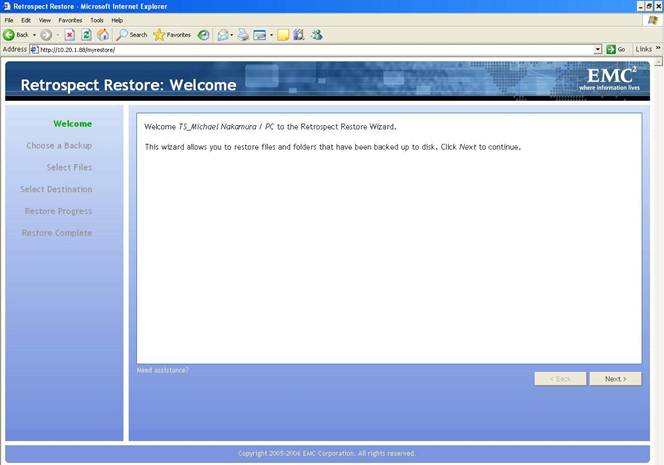
- The User URL is http://ComputerName/myrestore, where ComputerName is the DNS name or IP address.
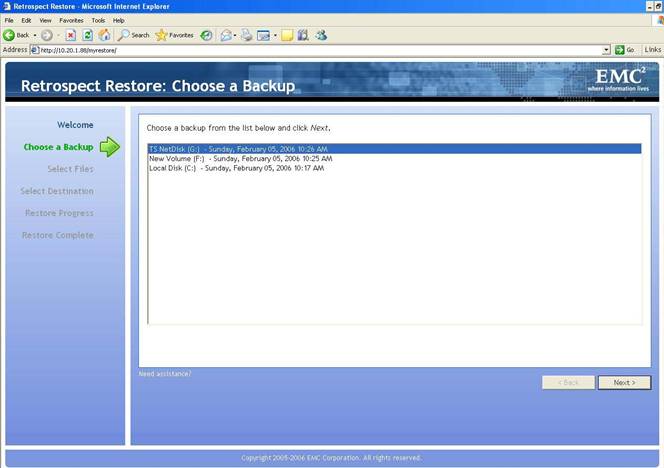
Select a Restore Point to restore from.
Select files/folders to restore.
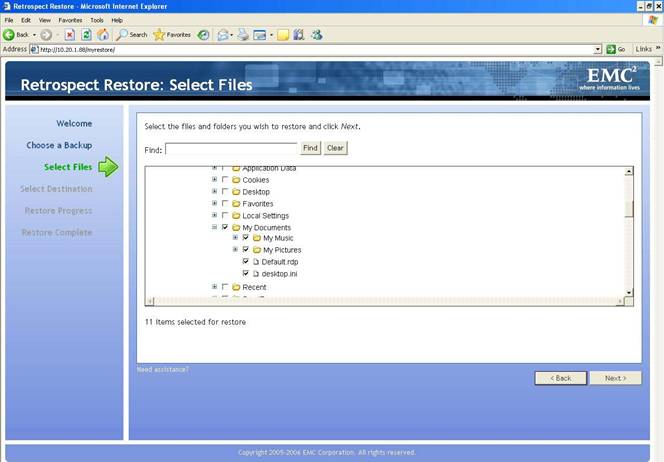
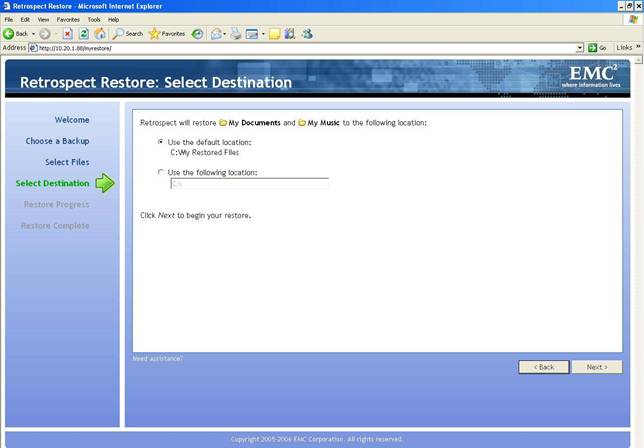
Select the default My Restored Files folder as the destination for your restored files. ** This will create a new My Restored Files folder at the root of your C: drive from which you can access your restored files. You can then move the files to the desired location.
: User Initiated Restore will not overwrite existing files or restore the Operating System. Please contact the Backup Administrator for this.
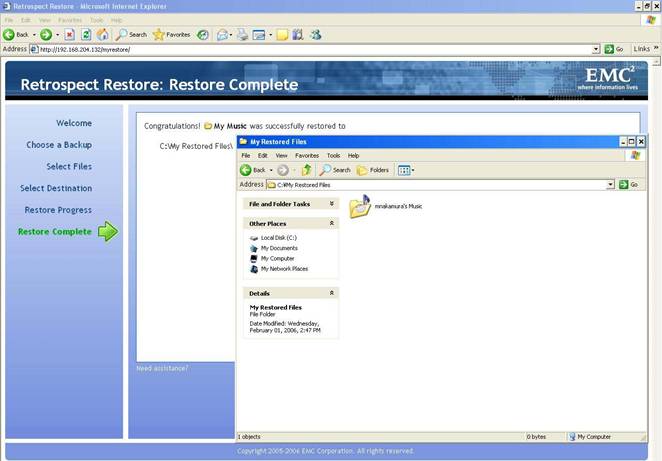
Once the restore has completed, verify that your files are there.
Admin Access via Web Browser
The Admin feature allows the Backup Administrator to access data from any backed up client and restores data to any client via Web Browser. This feature requires the Retrospect Server Application to be password protected.
Go to Configure > Preferences > Security > Click the "Protect" button to assign a password.
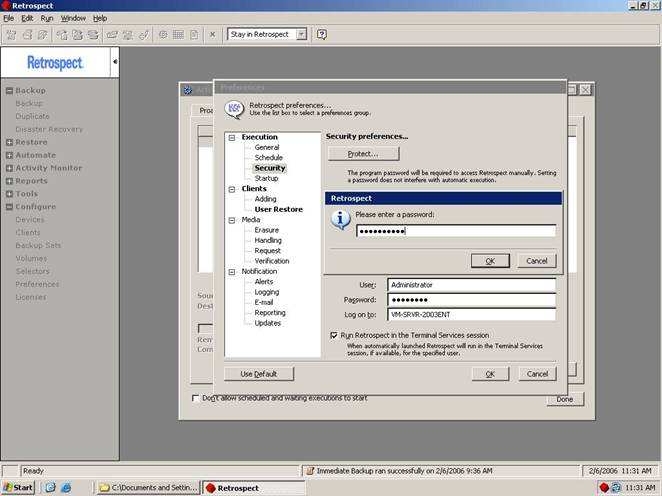
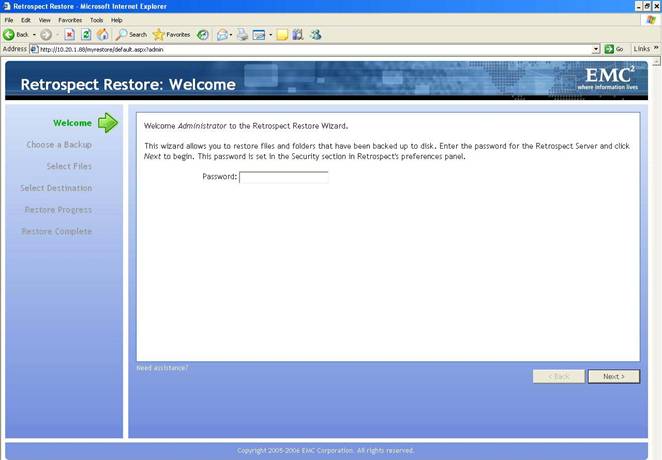
The Admin URL is http://ComputerName/myrestore/default.aspx?admin, where ComputerName is the DNS name or IP address.
You will be prompted to enter the Retrospect Server Application password from above.
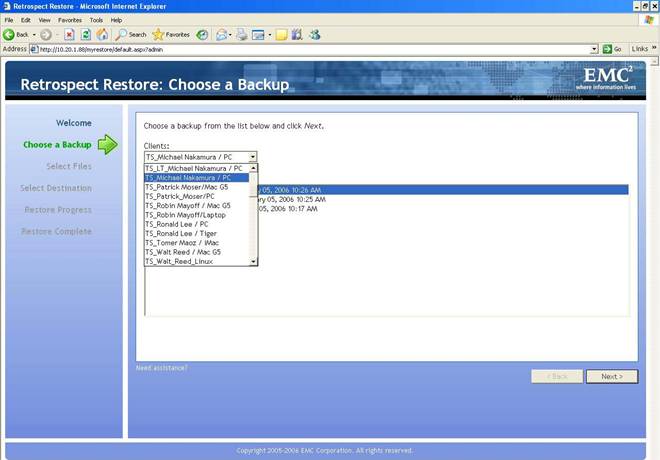
Admin UIR will allow the Administrator to ACCESS backed up data from any client machine via the Clients dropdown box.
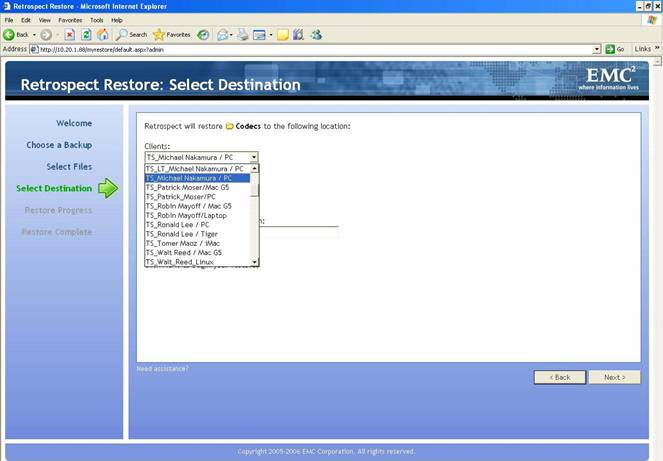
Admin UIR will allow the Administrator to RESTORE data to any client machine via the Clients dropdown box.
Last Update: February 14, 2012