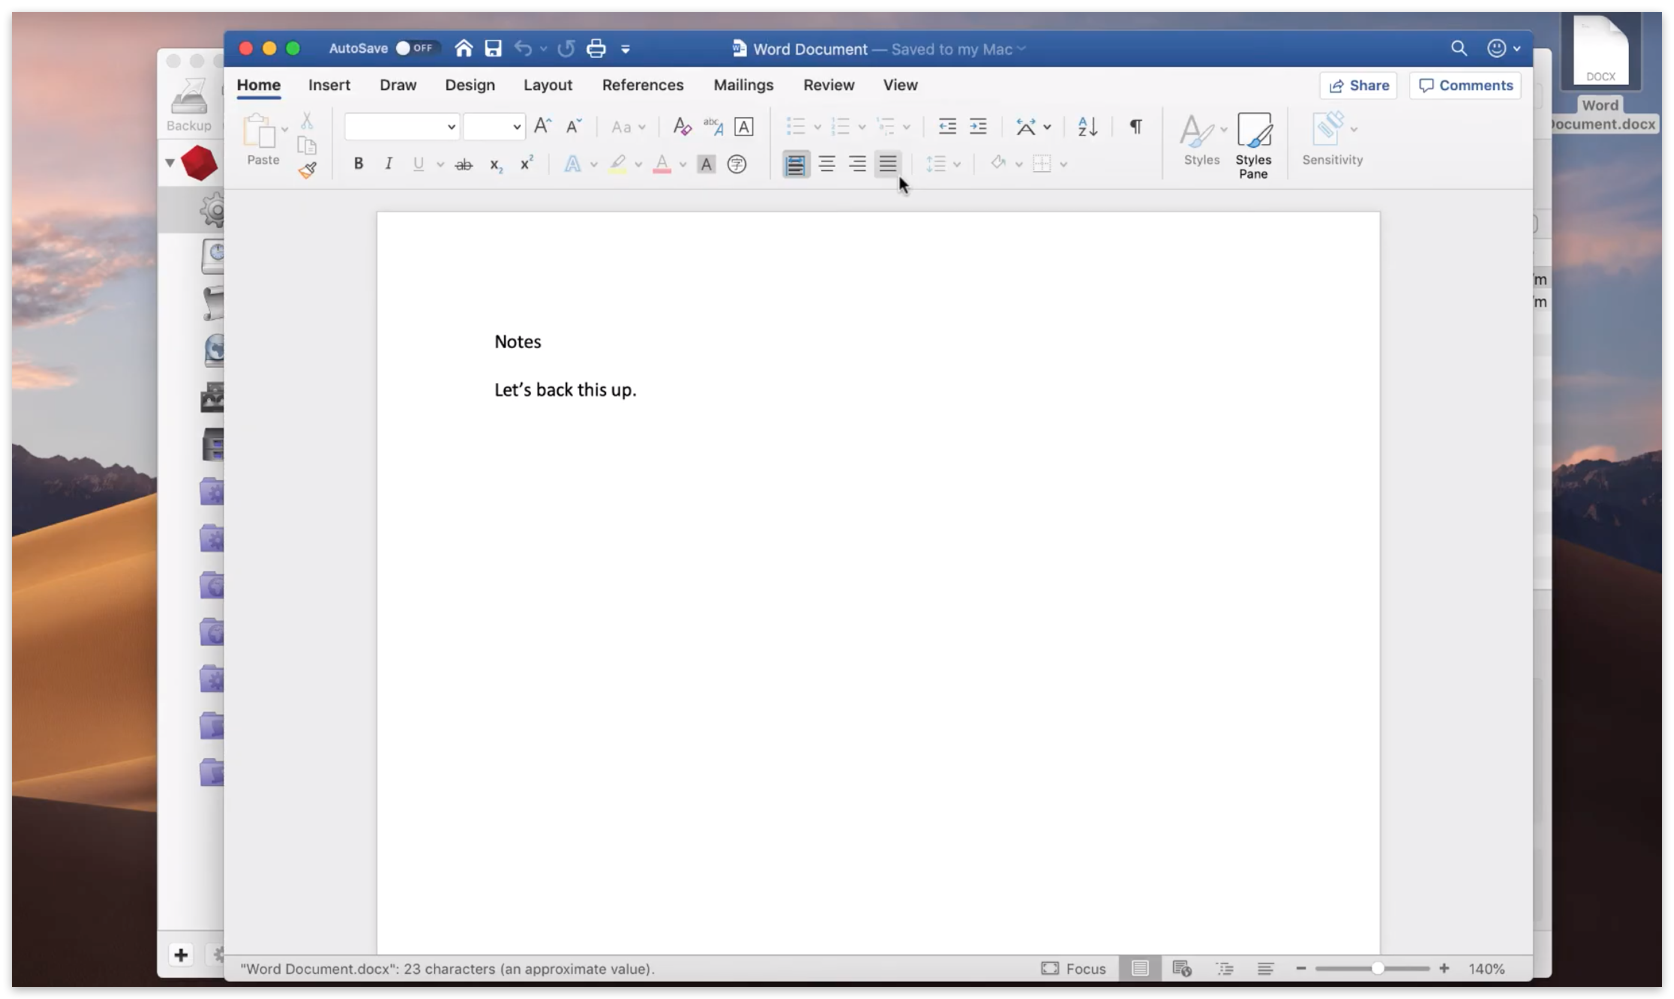
Retrospect Backup is a powerful data protection suite with a multitude of features. Before we dive into the details, let’s walk through a simple example of using Retrospect Backup to protect a Word document on your desktop.
First Launch Experience
Retrospect Backup has been protecting data at homes and businesses since 1989. Getting a first backup can mean the difference between success and failure as a business, and Retrospect Backup has a simple workflow to simplify that experience while making it easier for new users to see what will be backed up.
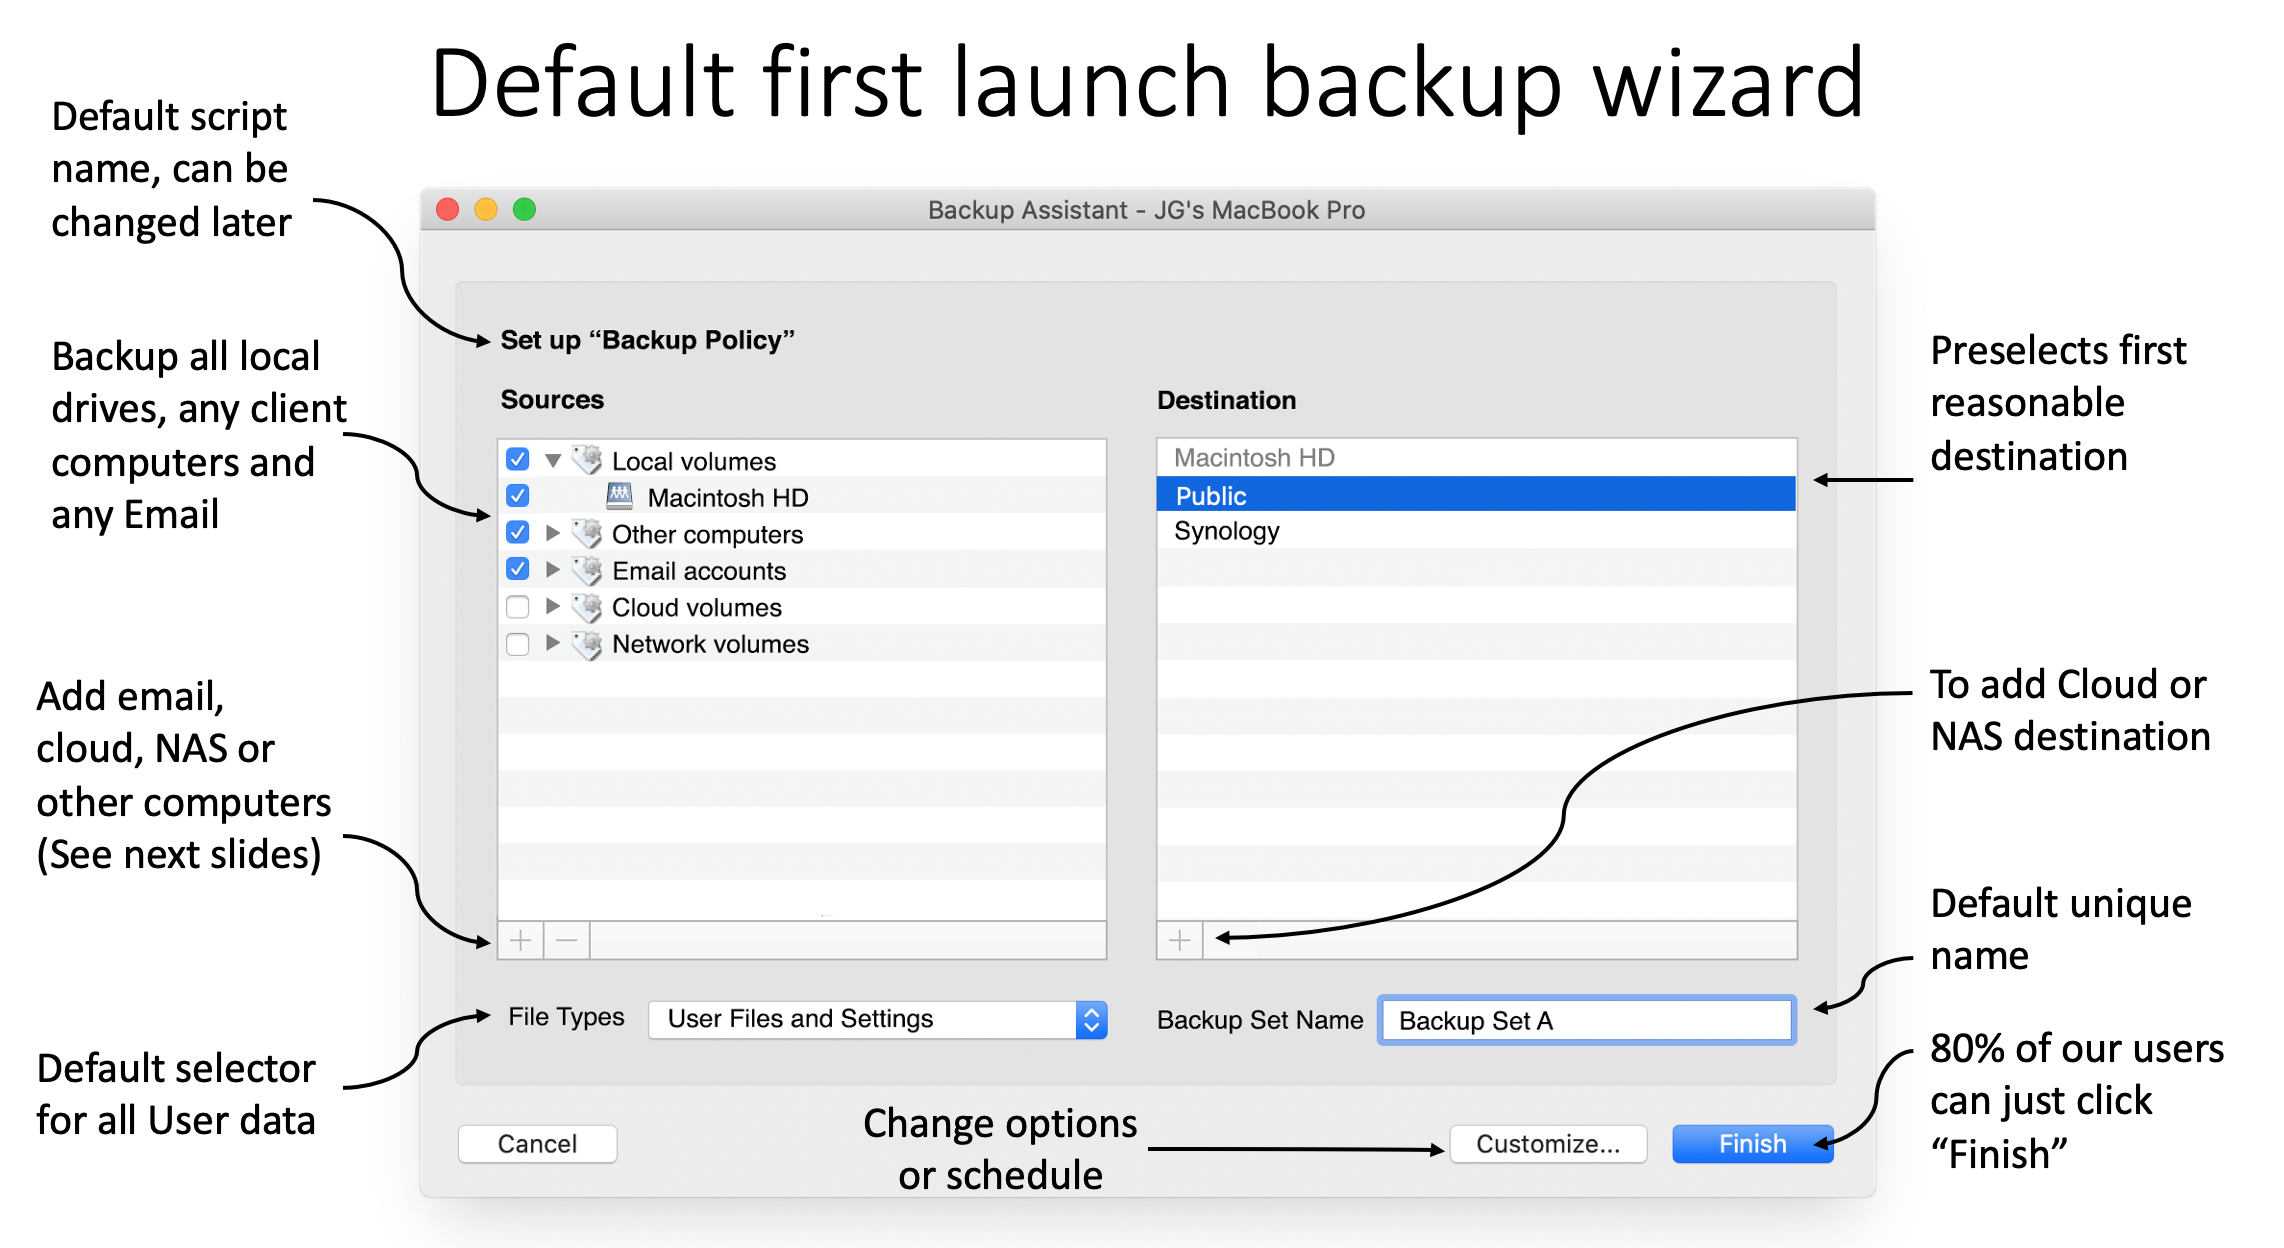
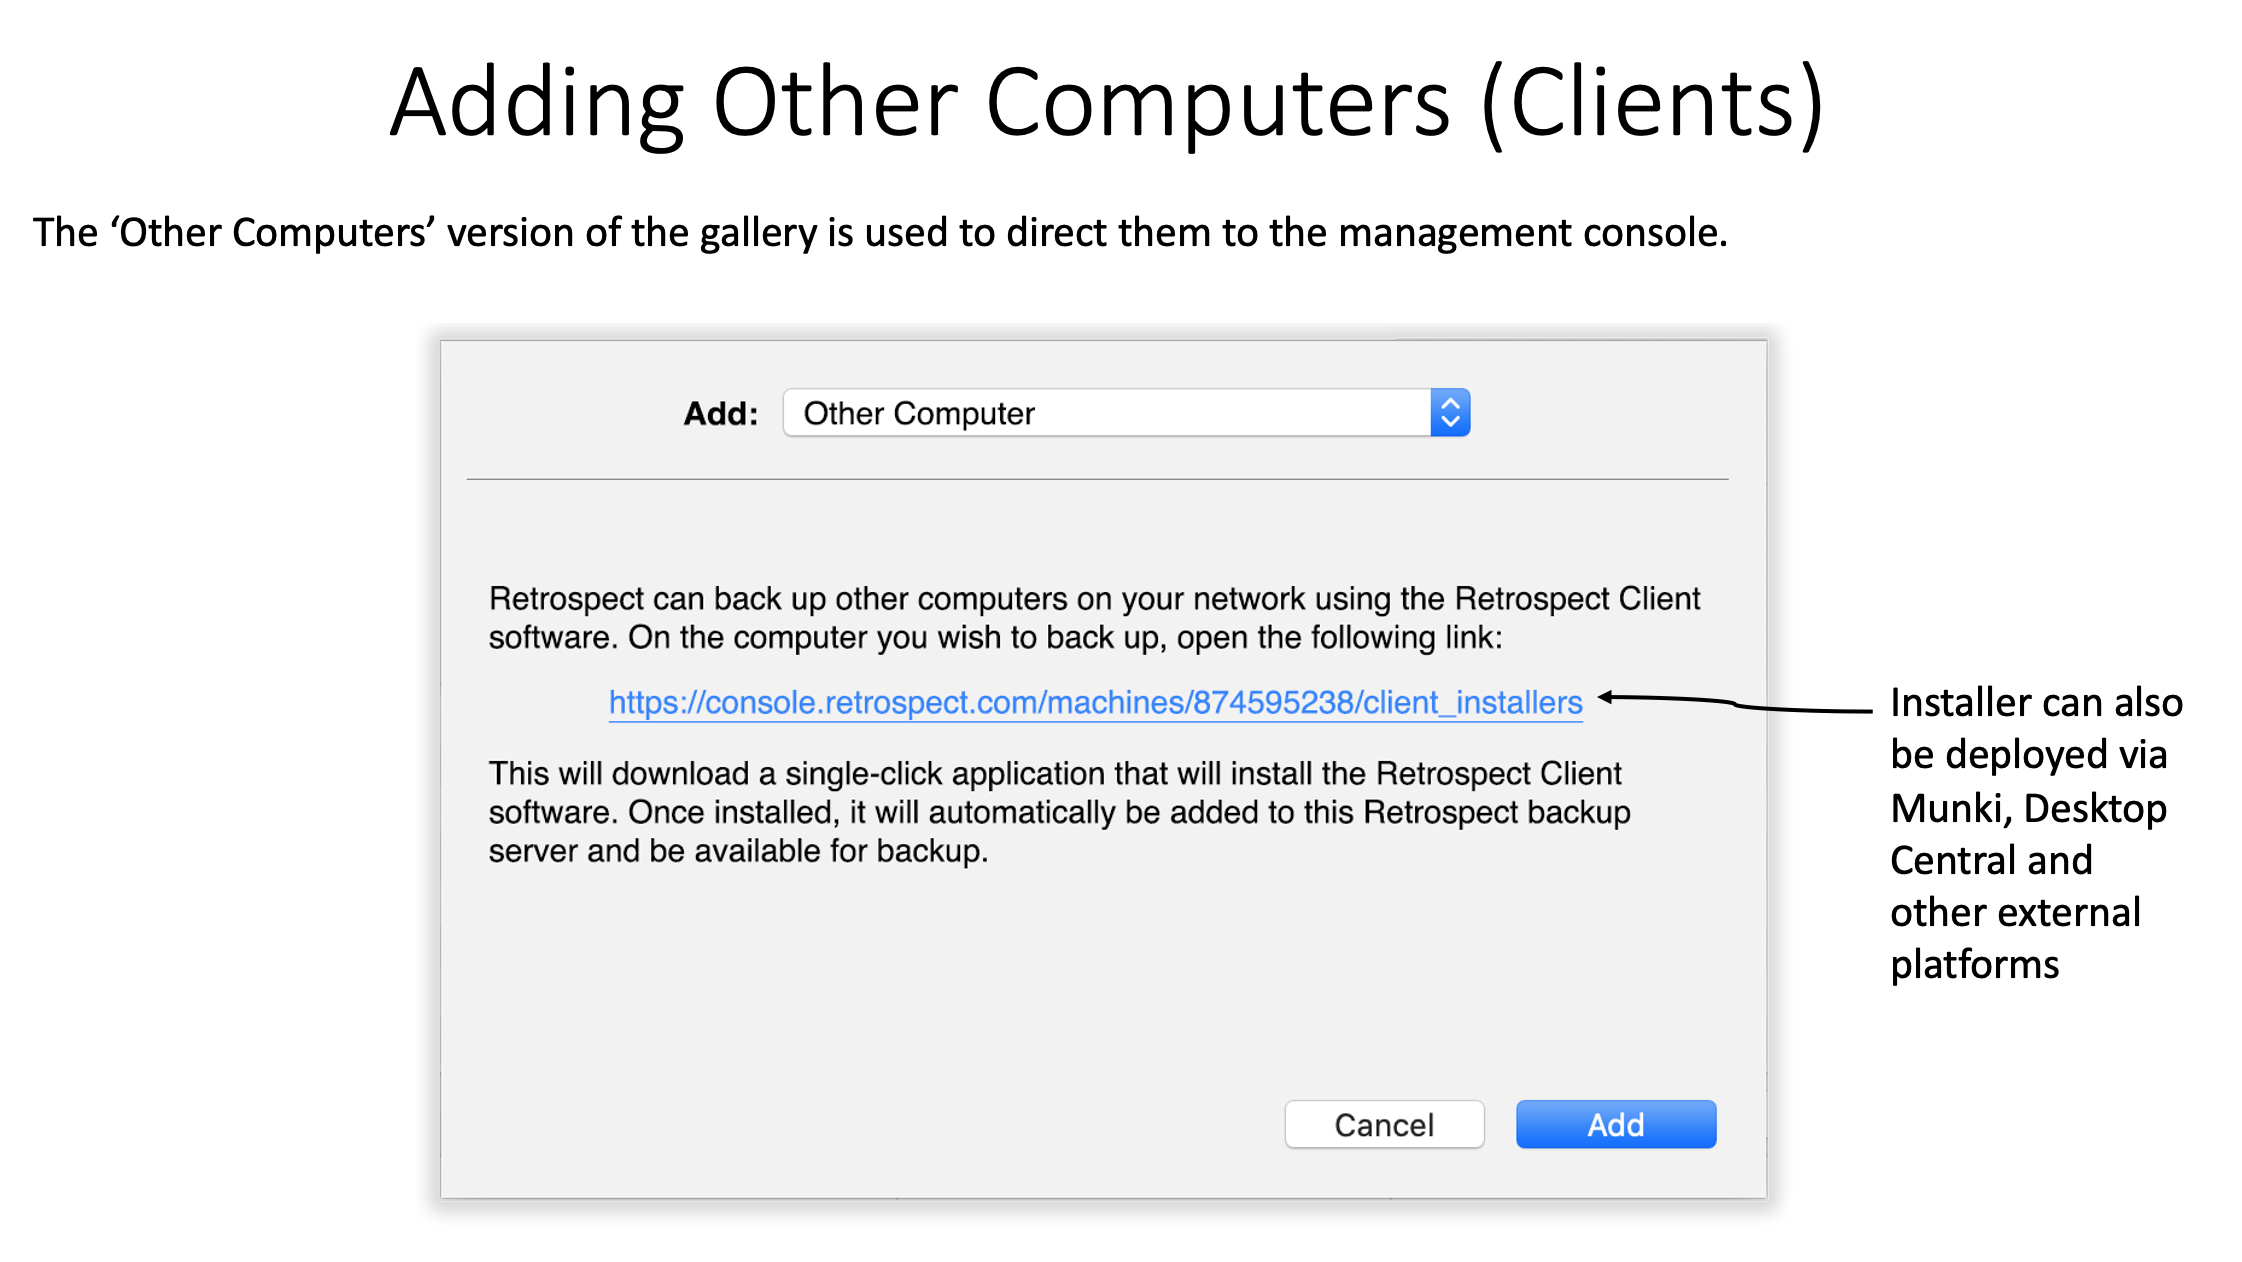
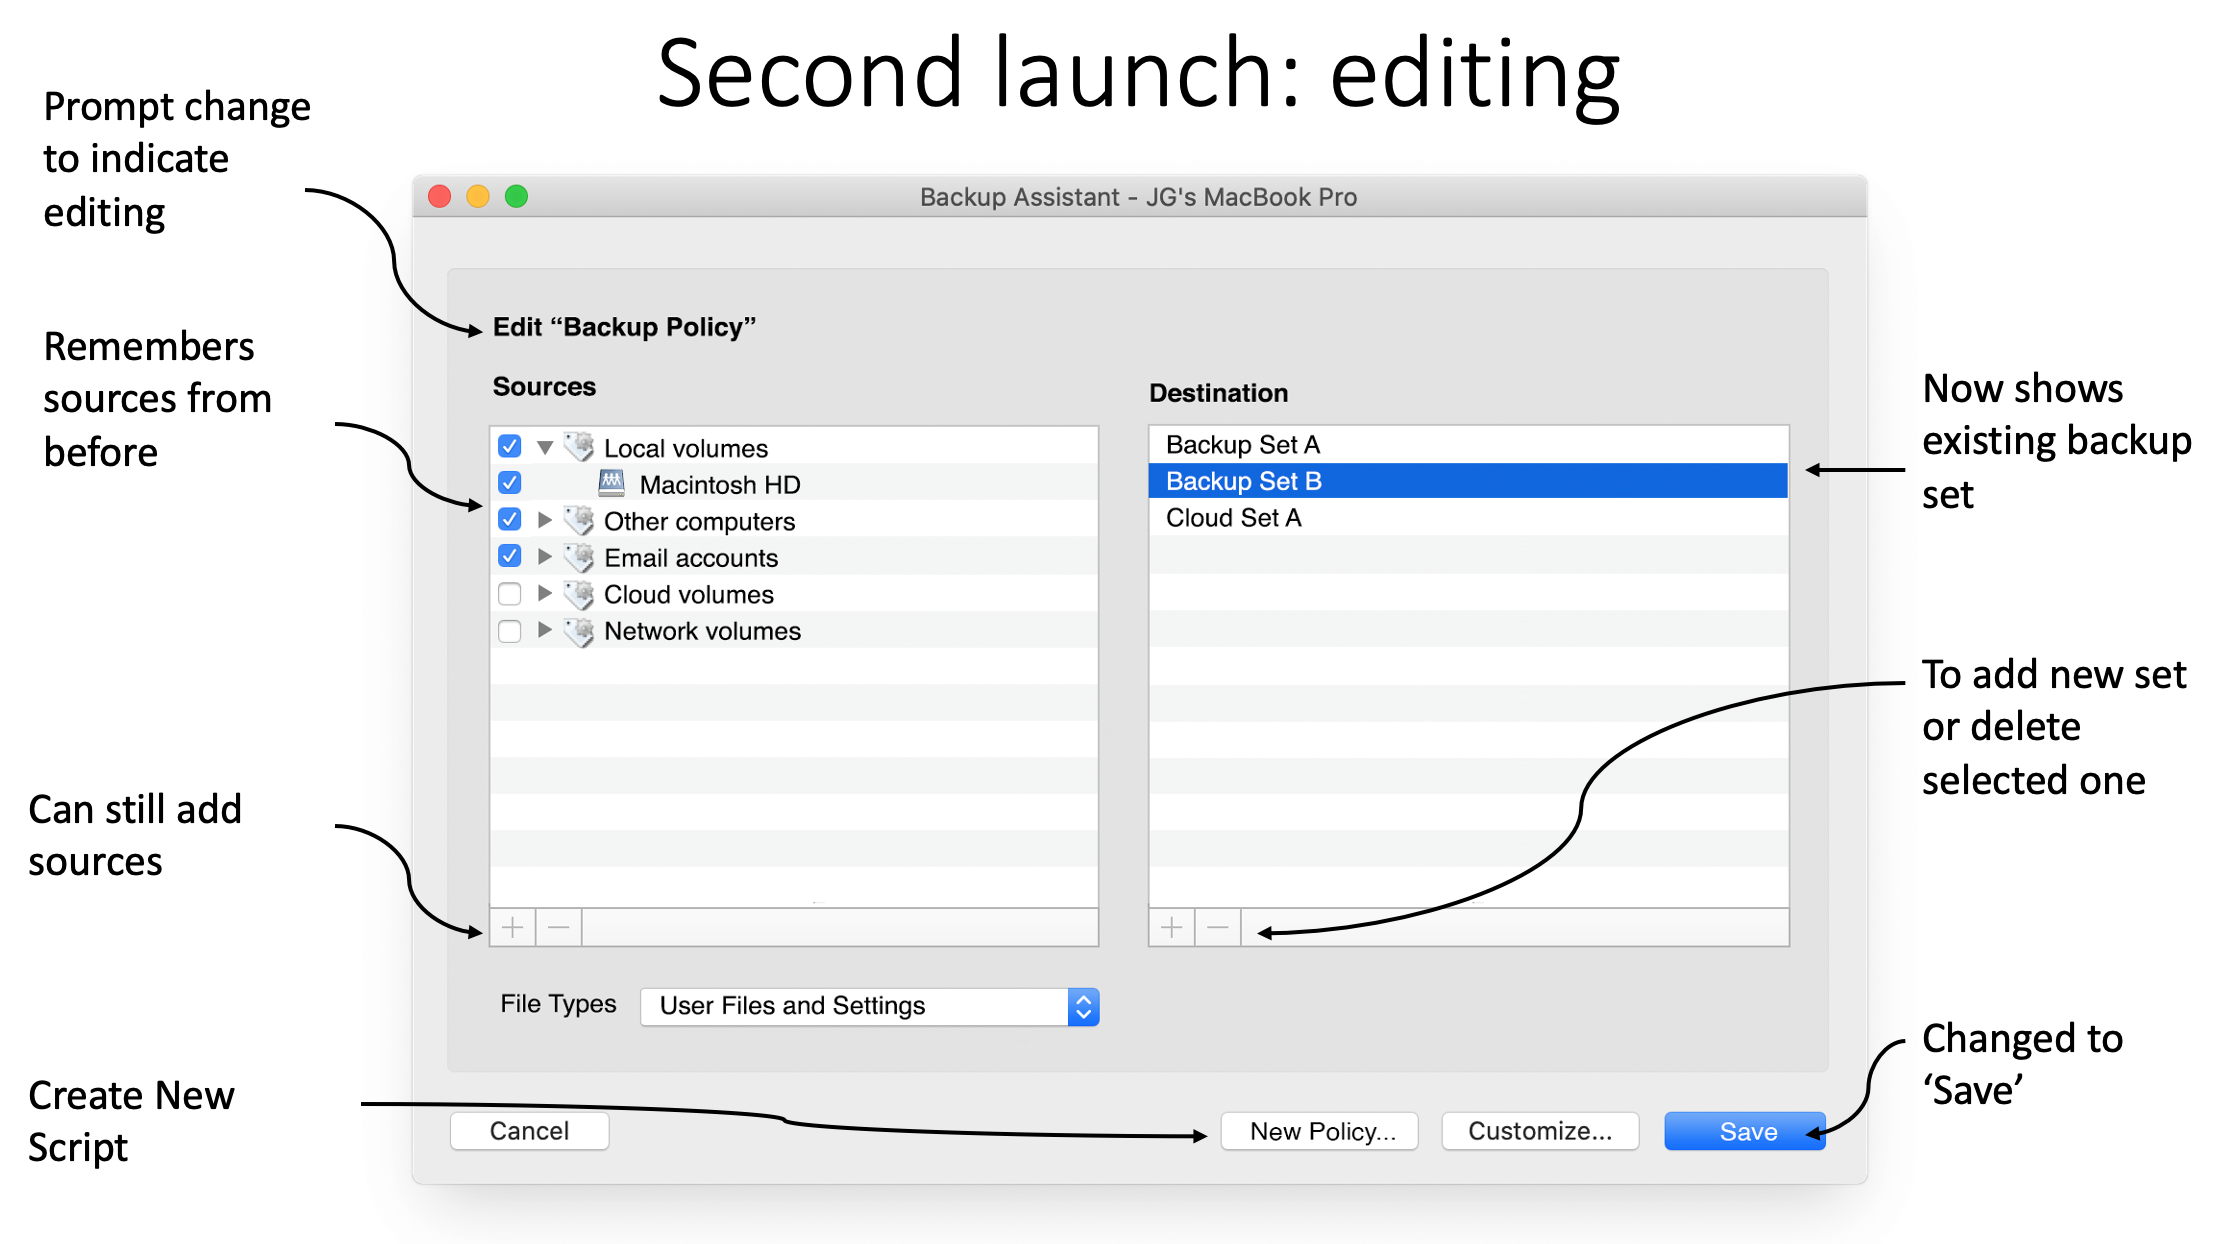
The backup wizard starts with a single screen, showing sources and destinations with a default backup selector. Finish with a single click or add new data sources or destinations. With deep integration with Retrospect Management Console, Retrospect Backup makes it easy to send a single download link to an entire company for everyone to download the Retrospect Backup agent, install it with a single click, and let Retrospect Backup take care of the rest.
Under the hood, Retrospect Backup includes new features like 10x faster automated generation for public/private keypairs with seamless upload to Retrospect Management Console and embedded unique trial licenses to remove any barriers to getting that first backup.
Backup
We are going to back up the Word document, and then we are going to restore it.
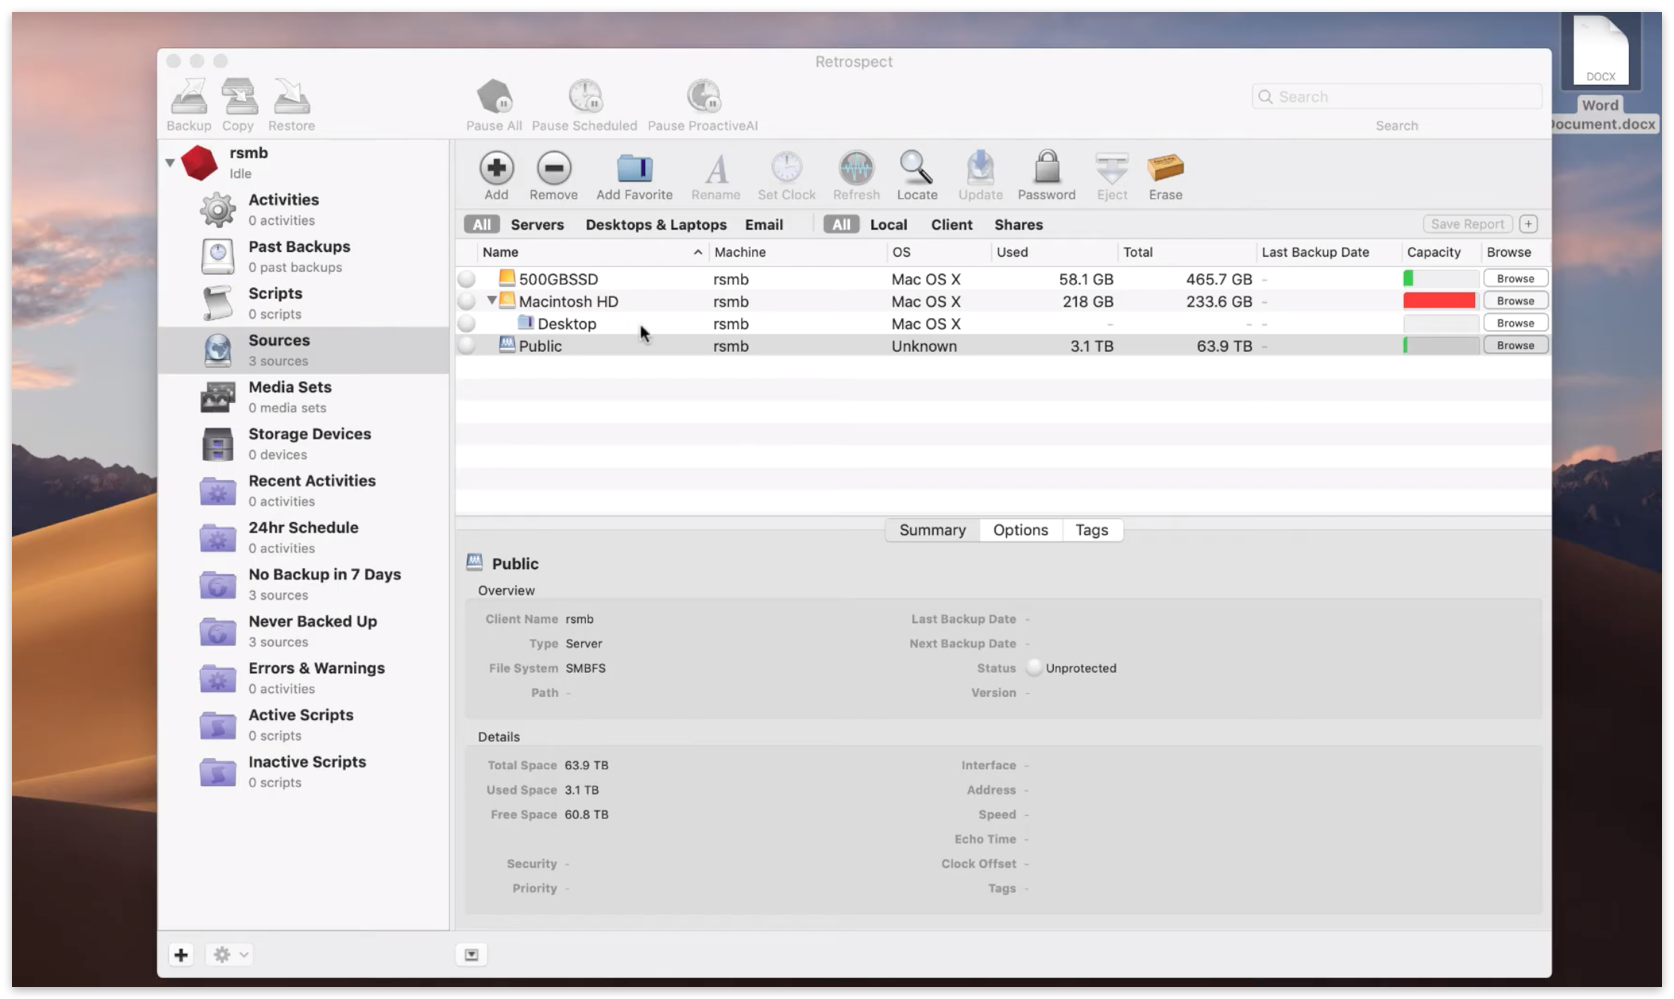
You see the Word document at the top right of the screen on the Desktop. Let’s back up the Word document using Backup Assistant. The Backup Assistant is how you set up your backup strategy using sources (volumes and clients), media sets (destinations for your backups), and scripts (the backup plan for your sources and sets).
Launch the Backup Assistant by clicking "Backup" at the top left of the screen in Retrospect.
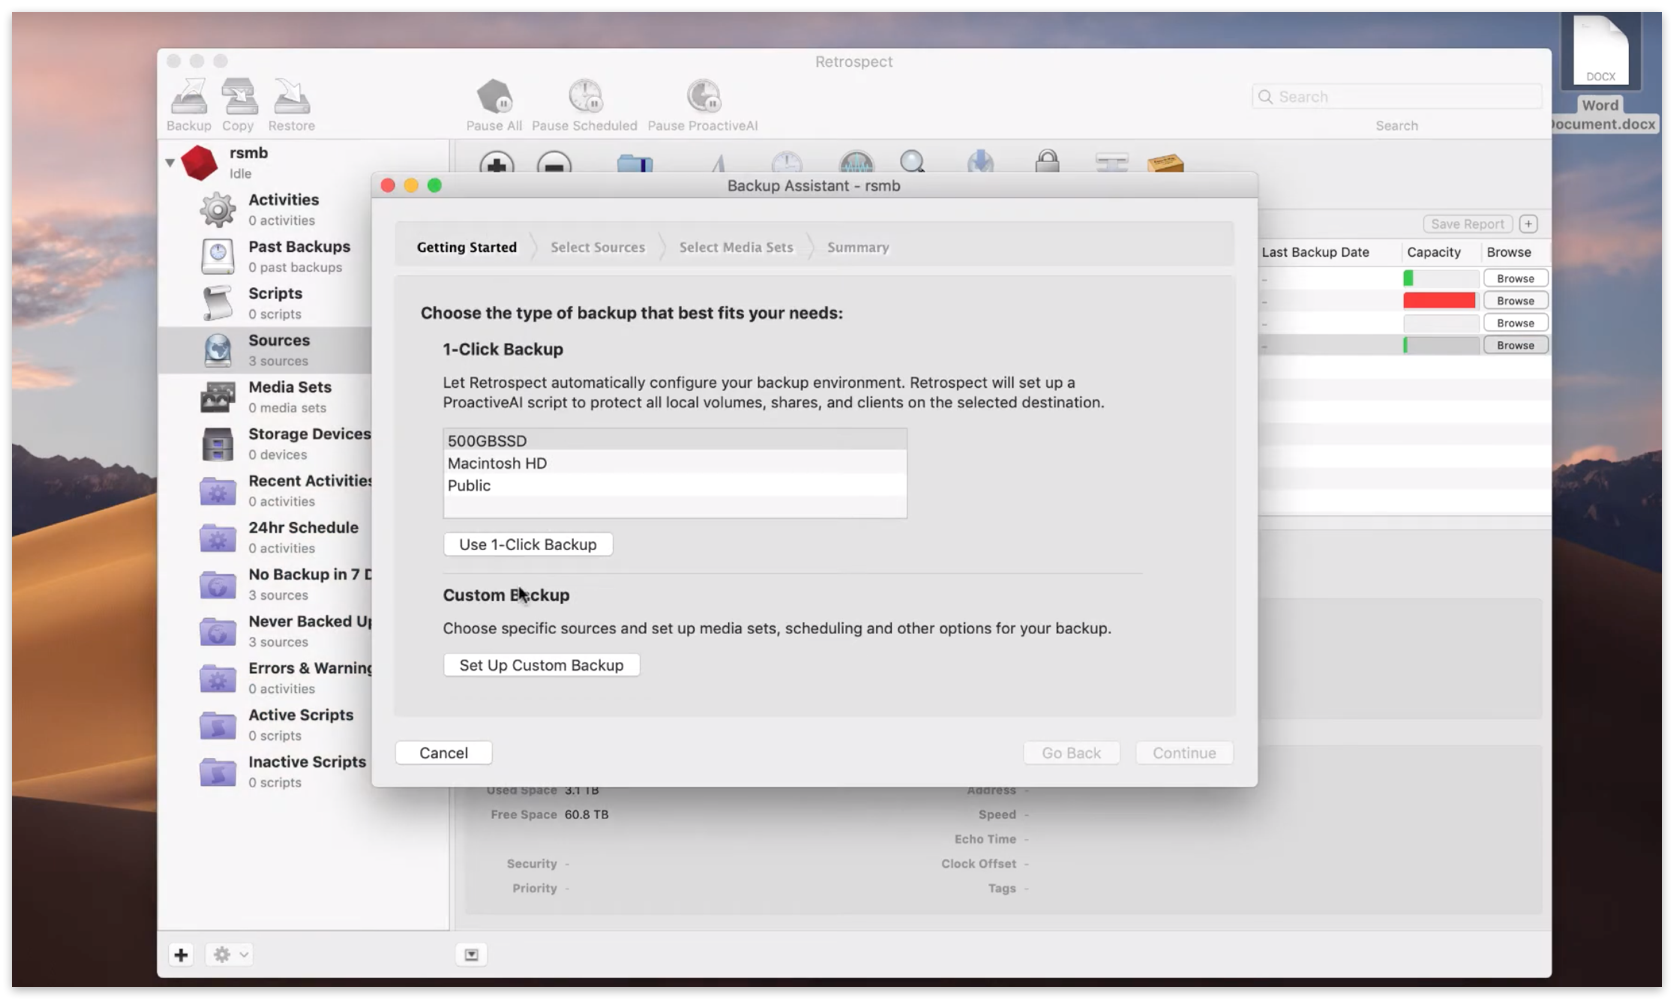
In Backup Assistant, select "Set up Custom Backup".
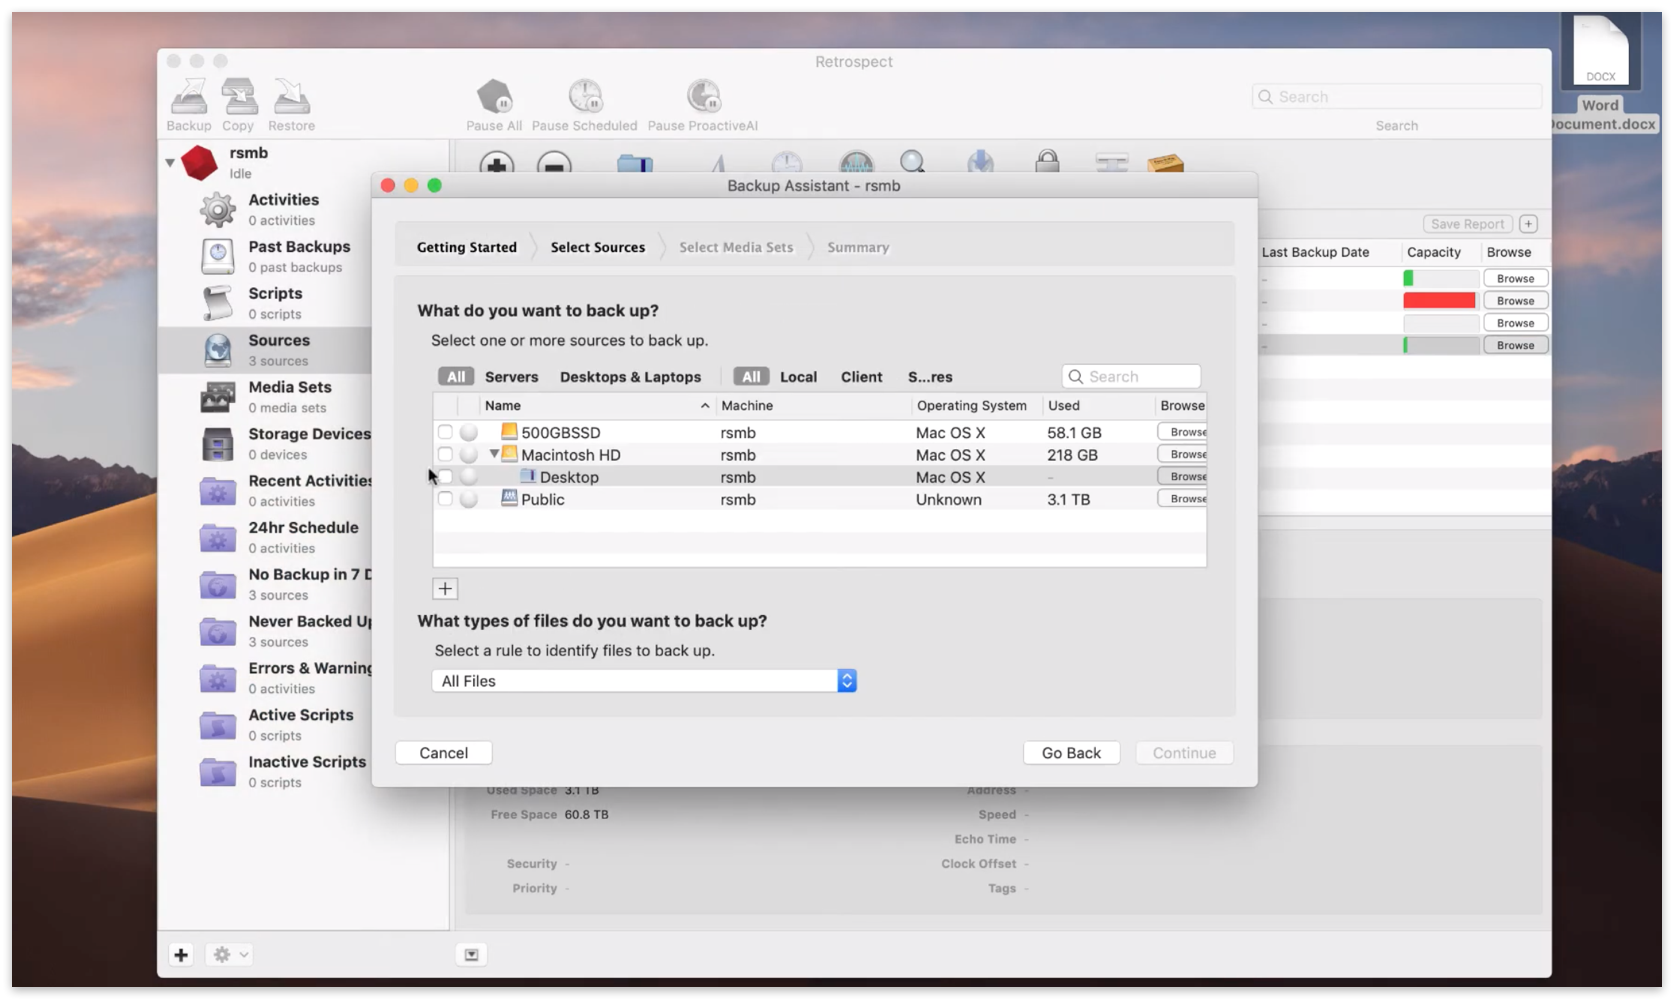
To back up only the Desktop, we need to create a favorite folder. Click "Browse" on "Macintosh HD", browse to your Desktop under /Users/your_name/Desktop and click "Add as Favorite Folder". Then select "Desktop" in Backup Assistant.
Next, we need to create a destination for the backup to be stored on, called a media set (or a backup set). Click the "+" icon at the bottom to create a new media set. We are going to use "Disk", but you can also use "Cloud" or "Tape" as a destination. Type in a media set name.
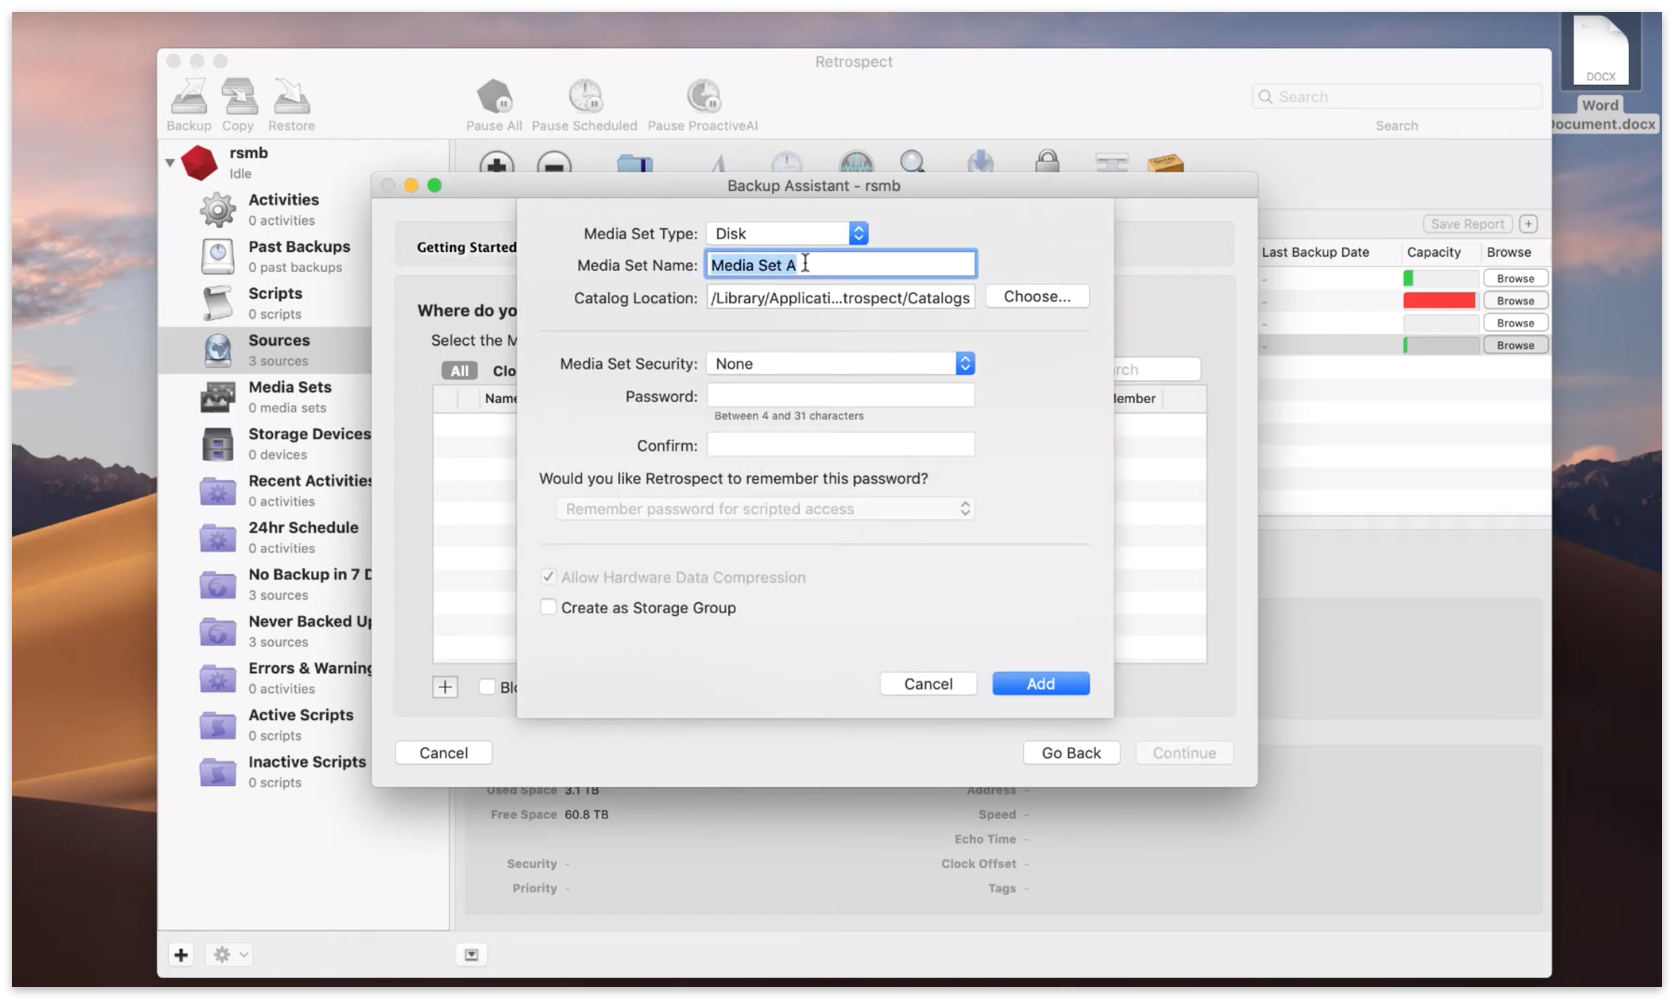
Retrospect supports many types of encryption, including AES-256, to ensure only you can read your backups, even if you store your backups in the cloud. Select "AES-256" and type in a password. Please write down your password. If you lose it, your data will not be recoverable by anyone.
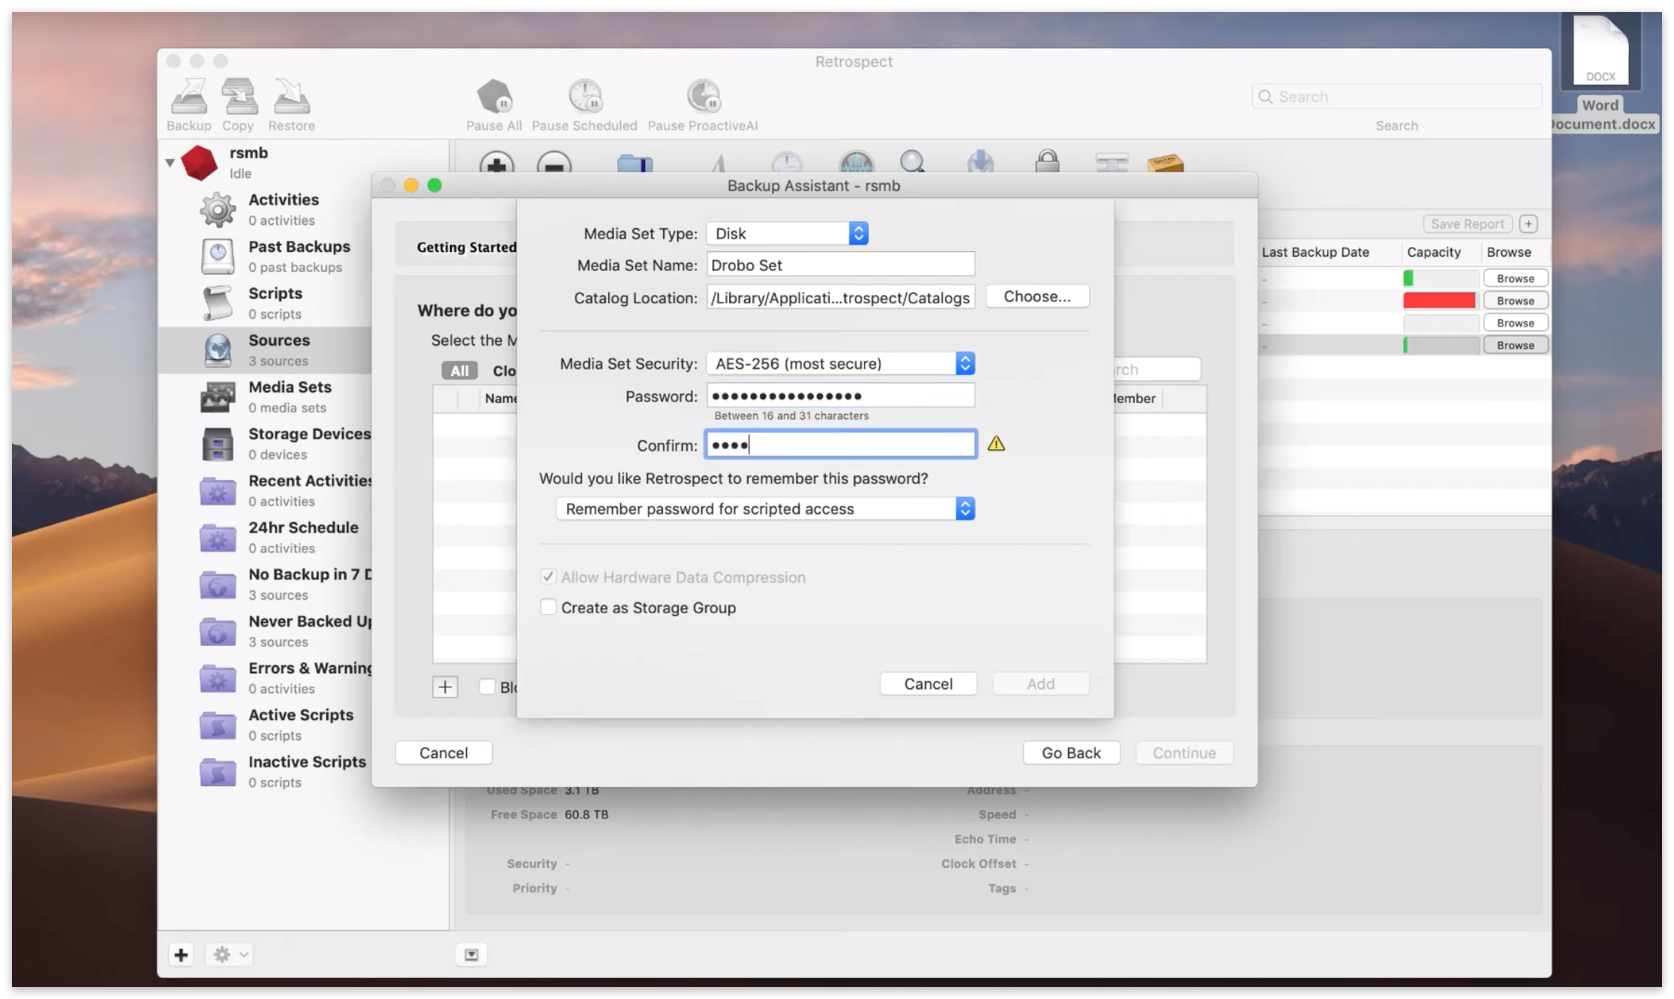
We are going to select a NAS share, but you should select the appropriate destination, be it an external hard drive or a NAS. Click "Add".
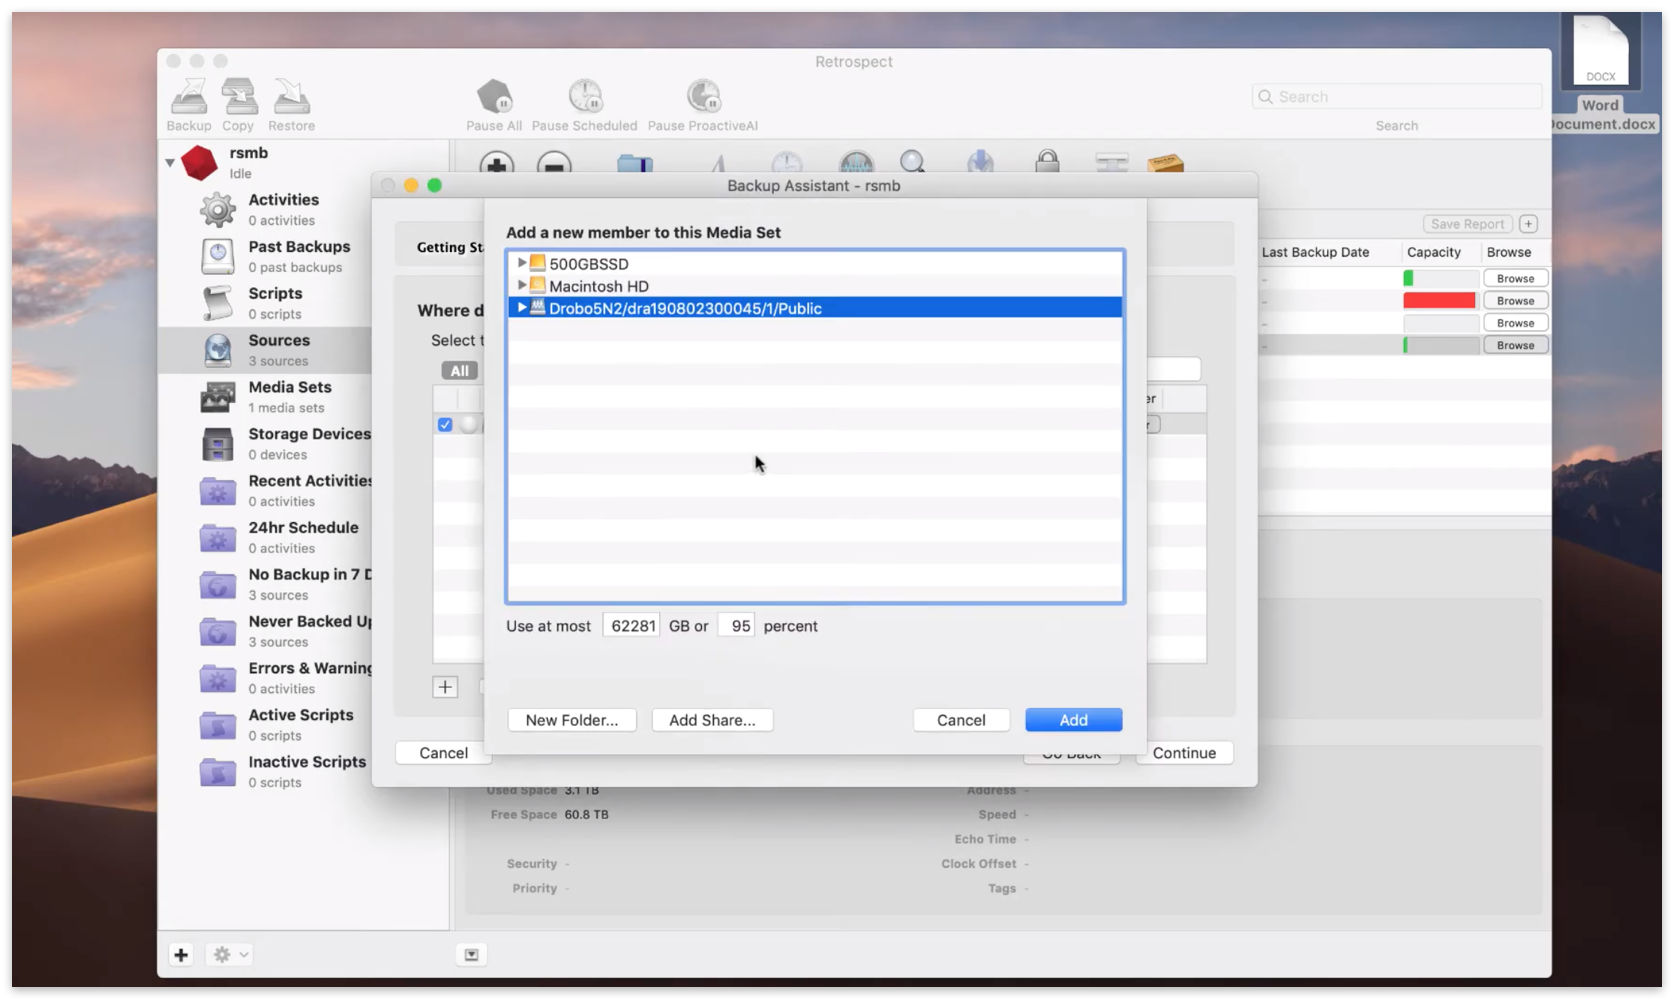
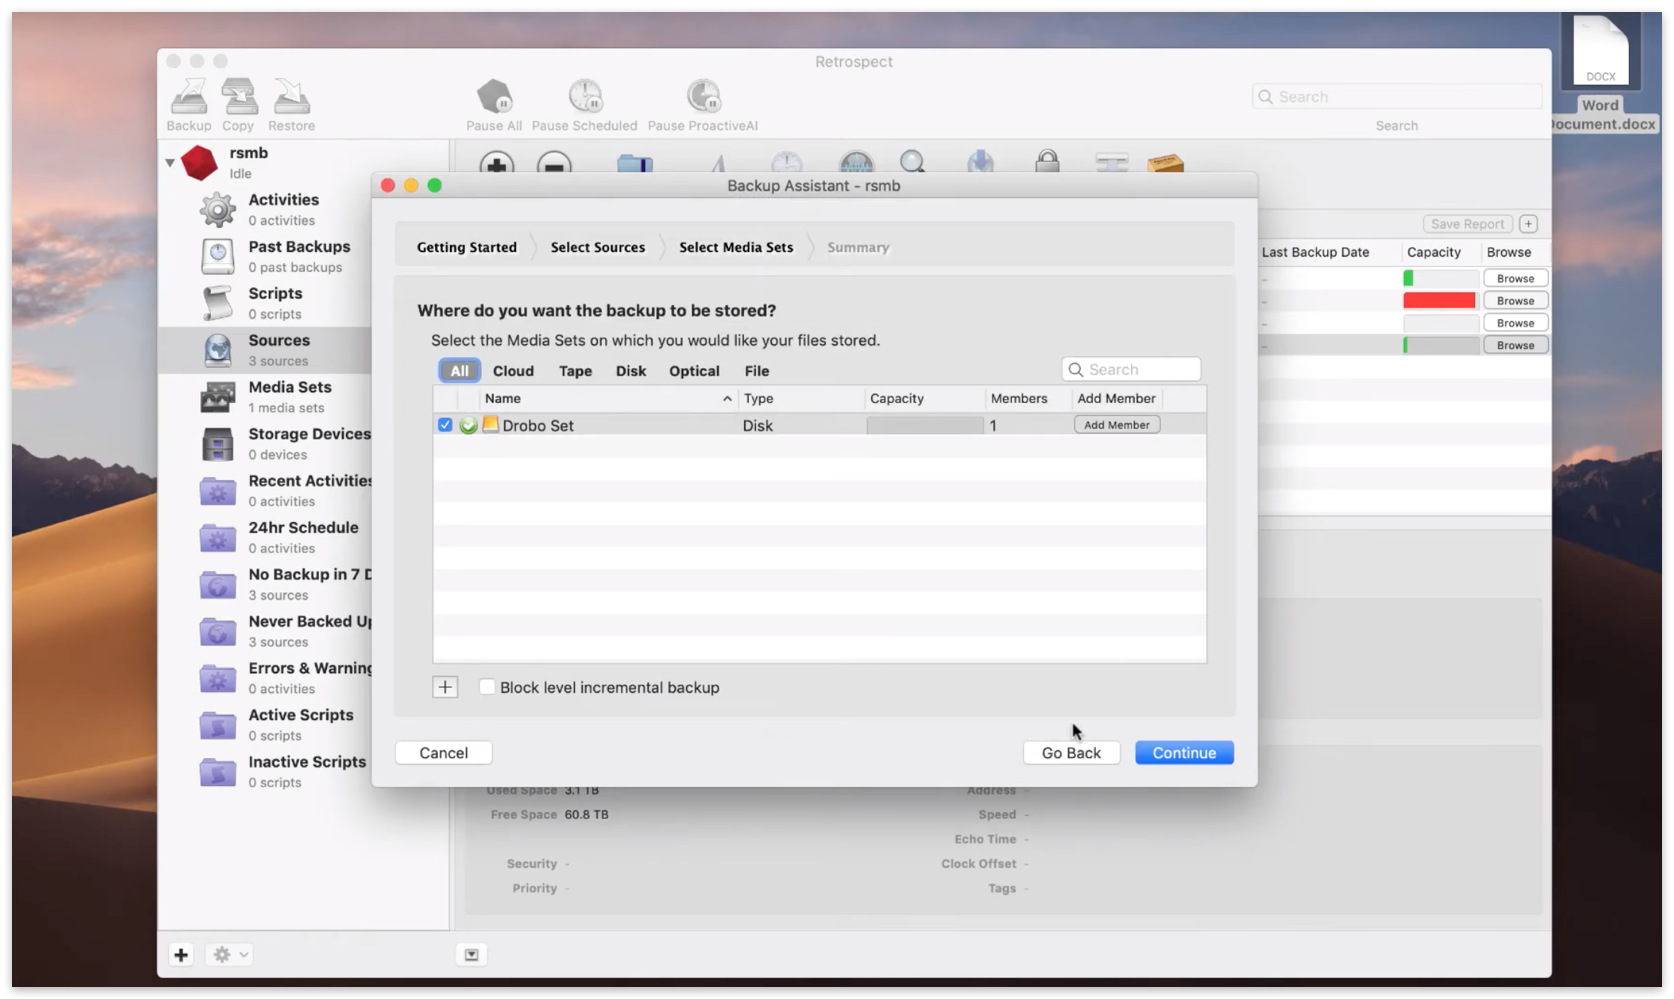
The media set is created. Select it and then click "Continue".
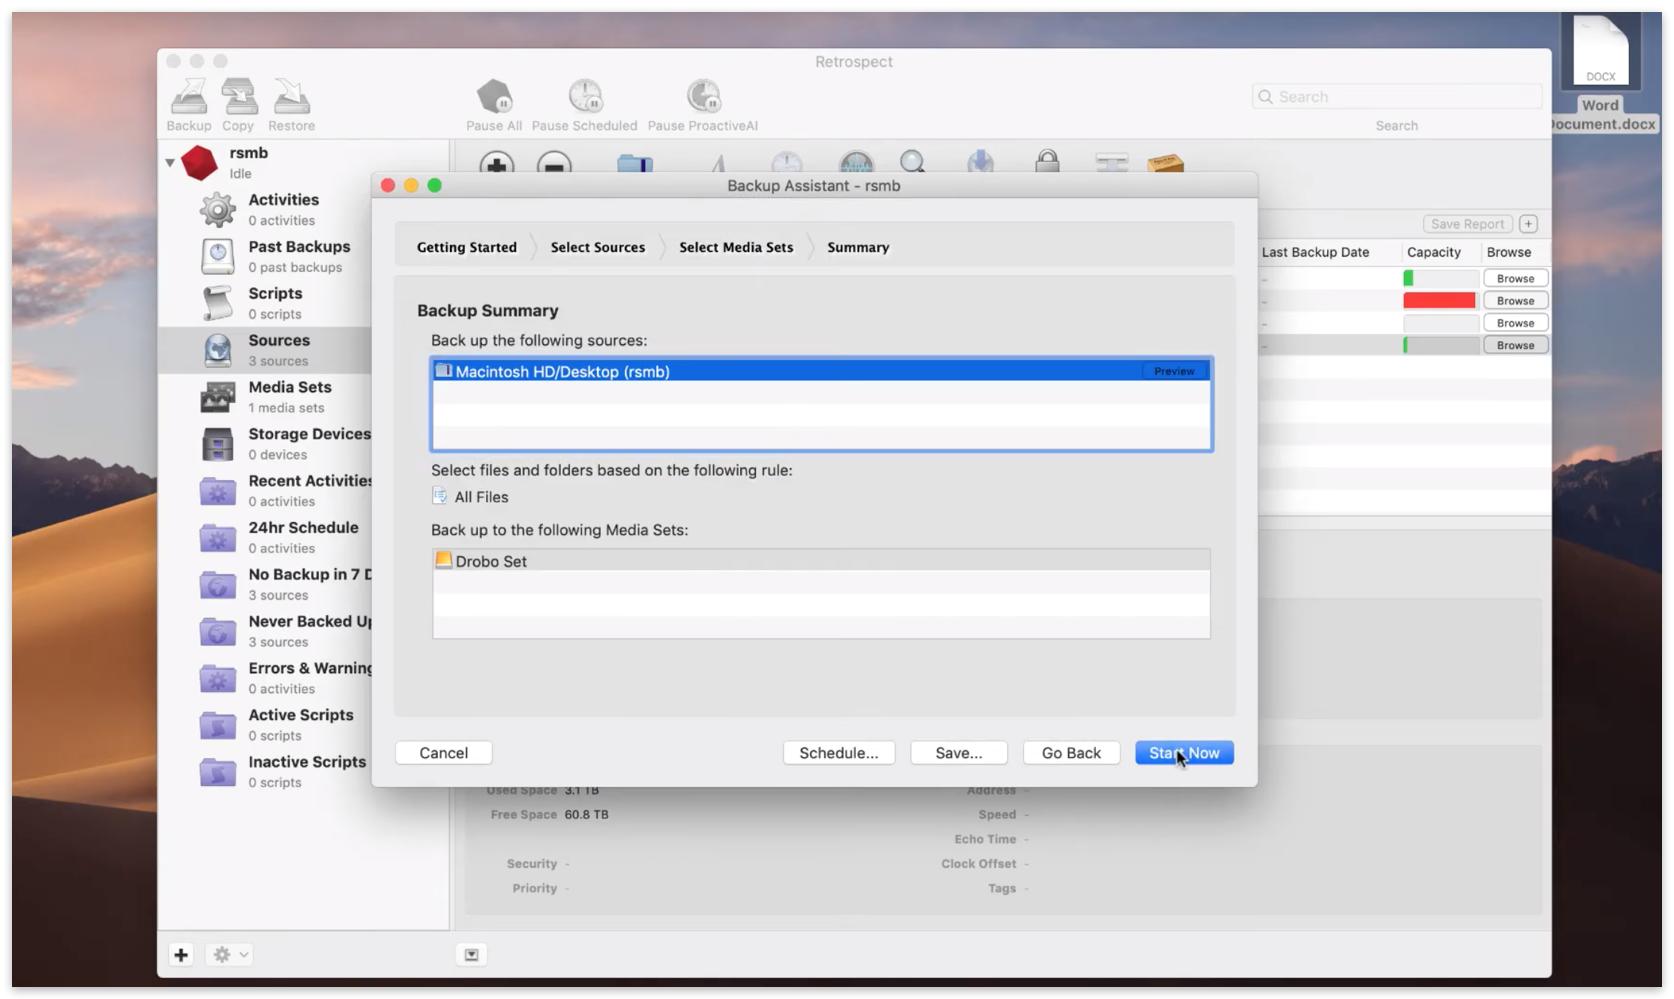
Backup Assistant is done. You can see the summary here. Click "Start Now" to start the backup.
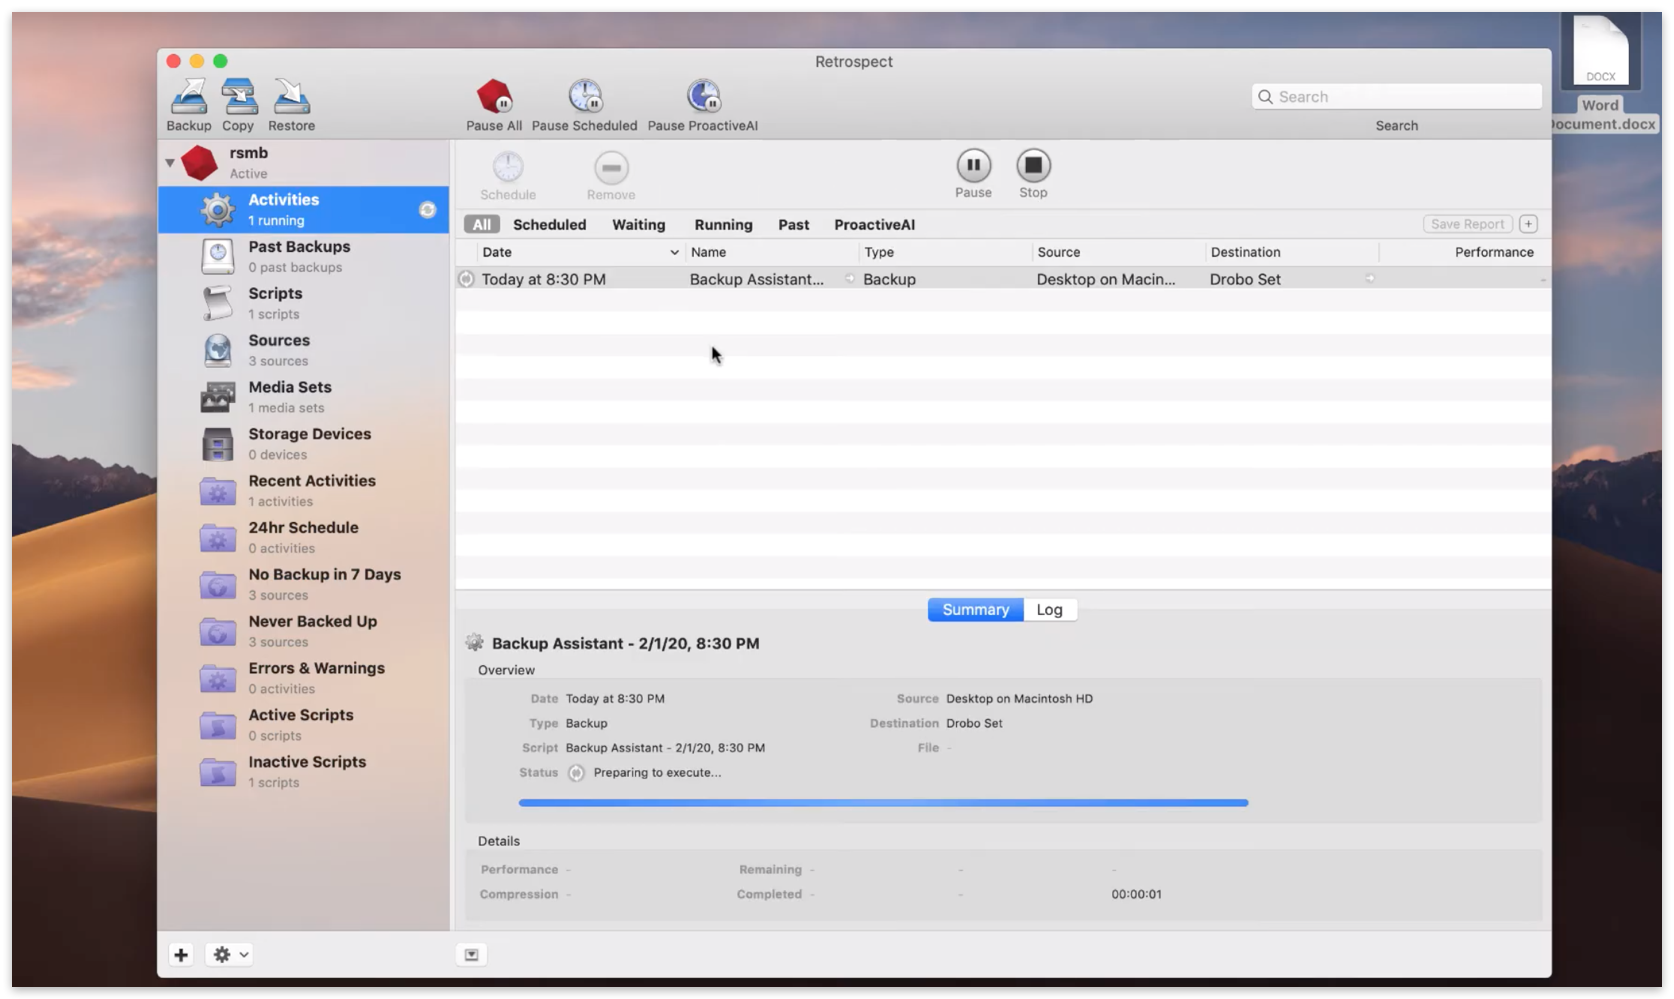
The backup is now running. Your Word document is being safely protected on the destination you chose.
Restore
Let’s now delete the Word document from the Desktop and restore it with Retrospect.
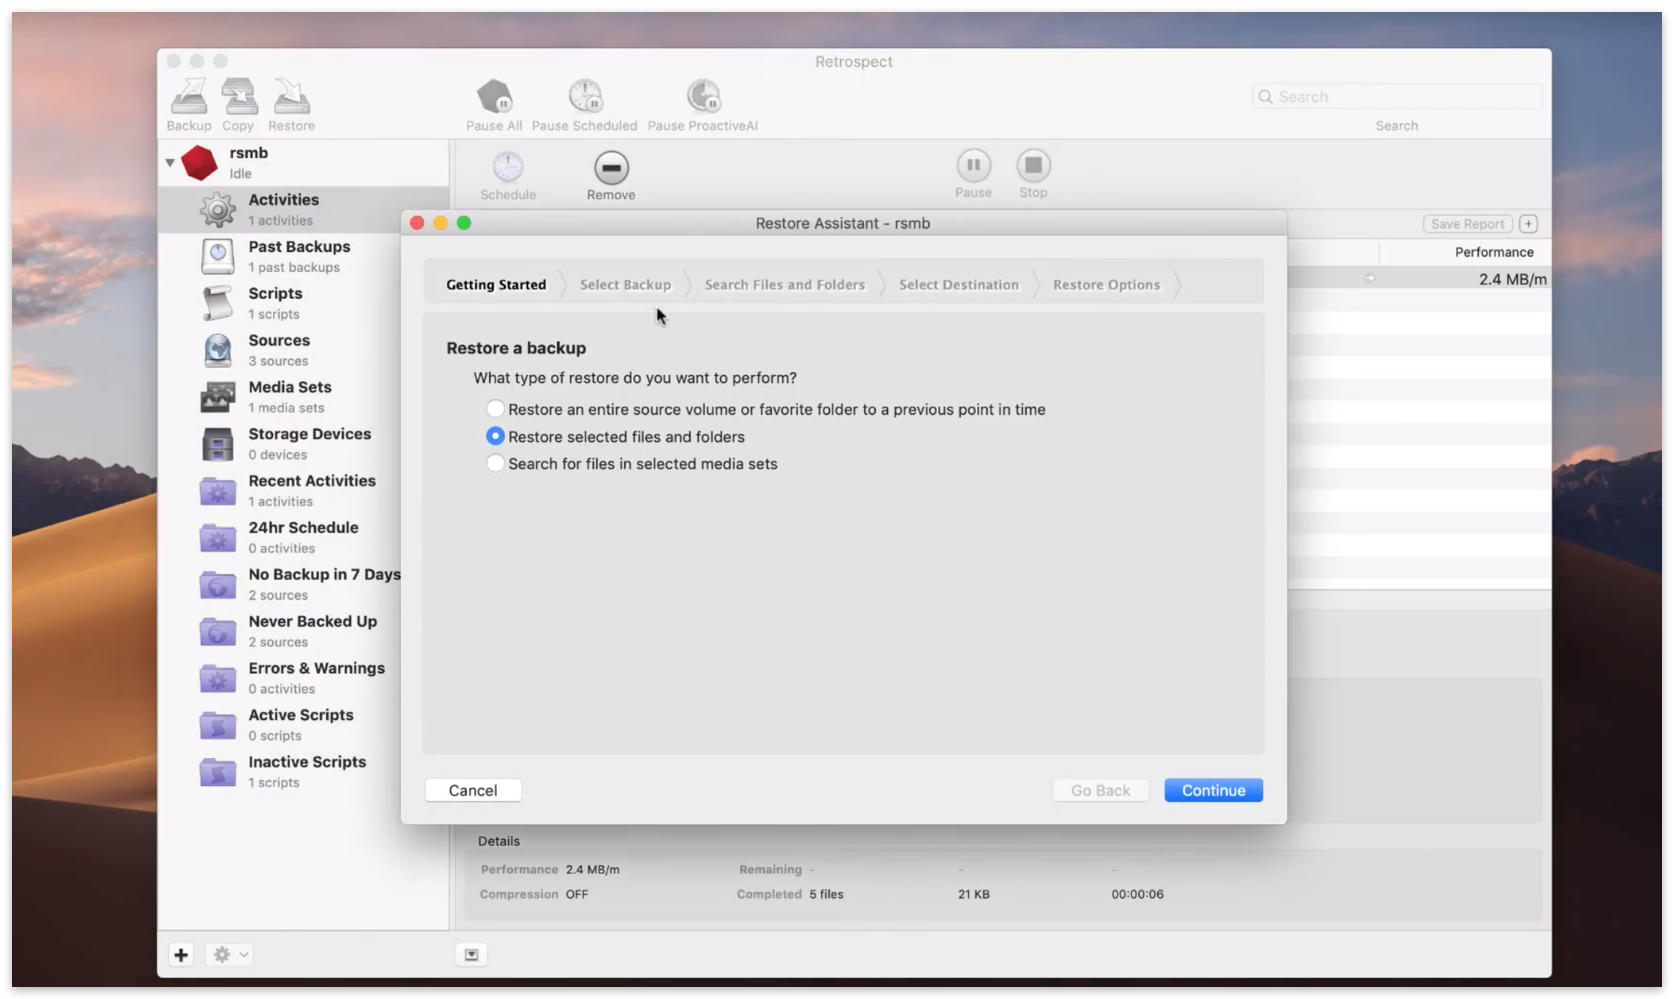
Launch Restore Assistant by clicking "Restore" in the top left corner of Retrospect. Click "Restore selected files and folders".
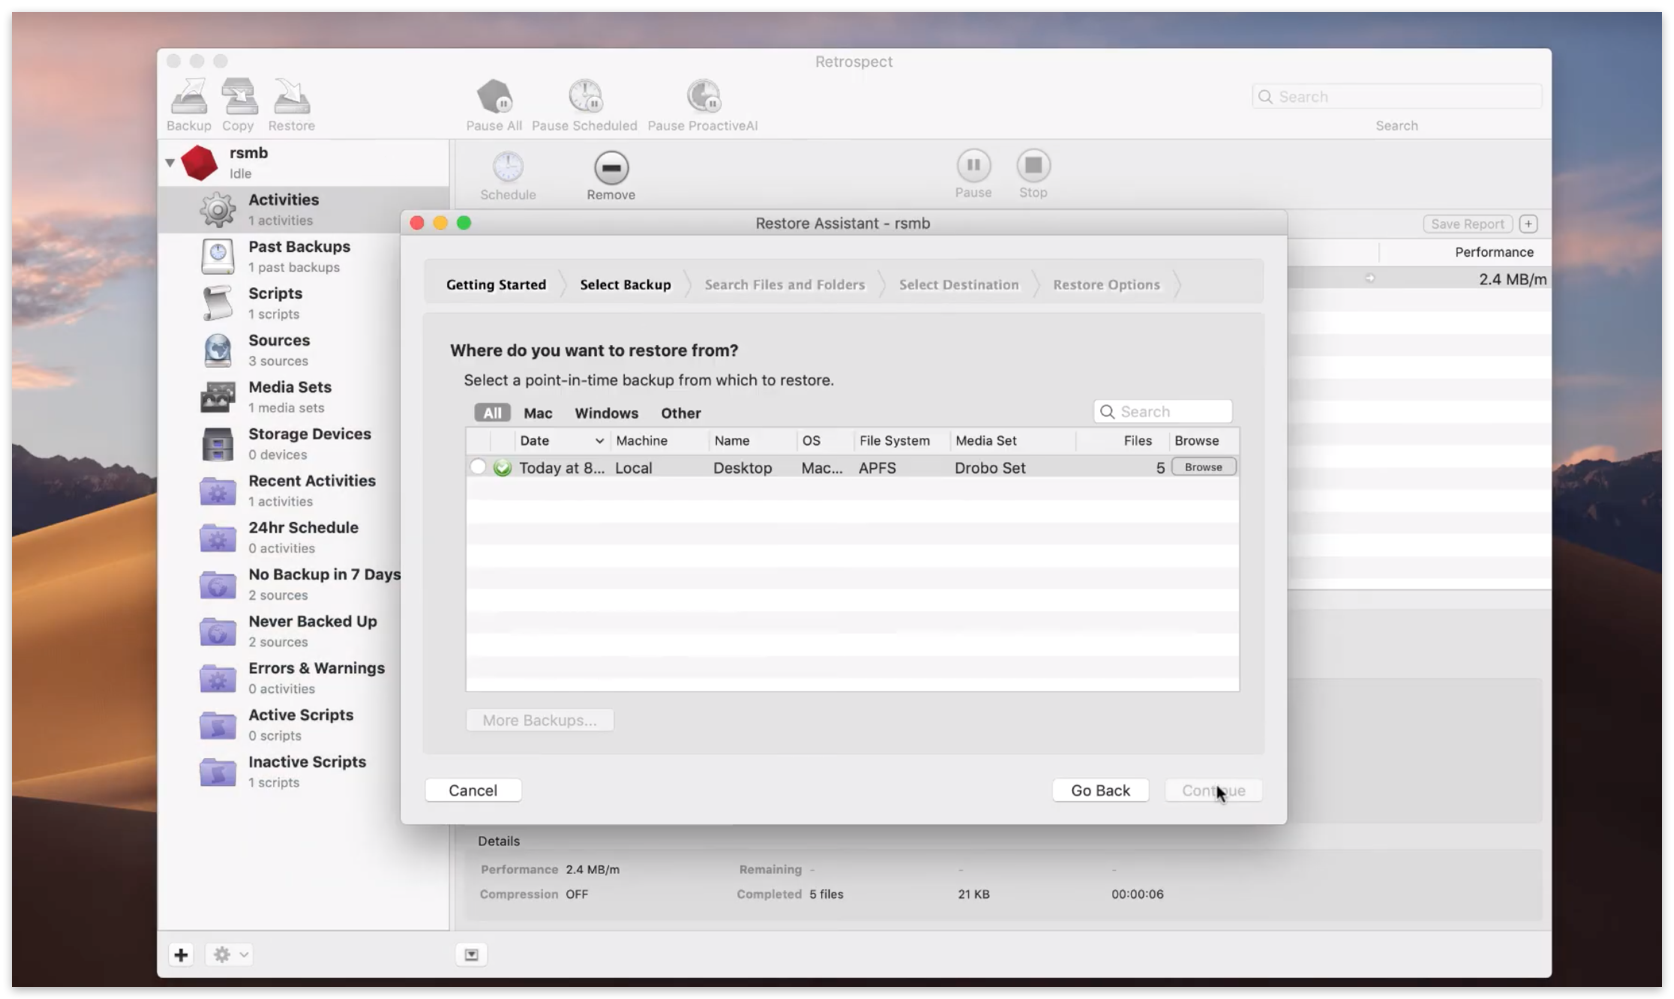
Select the latest backup and click "Continue".
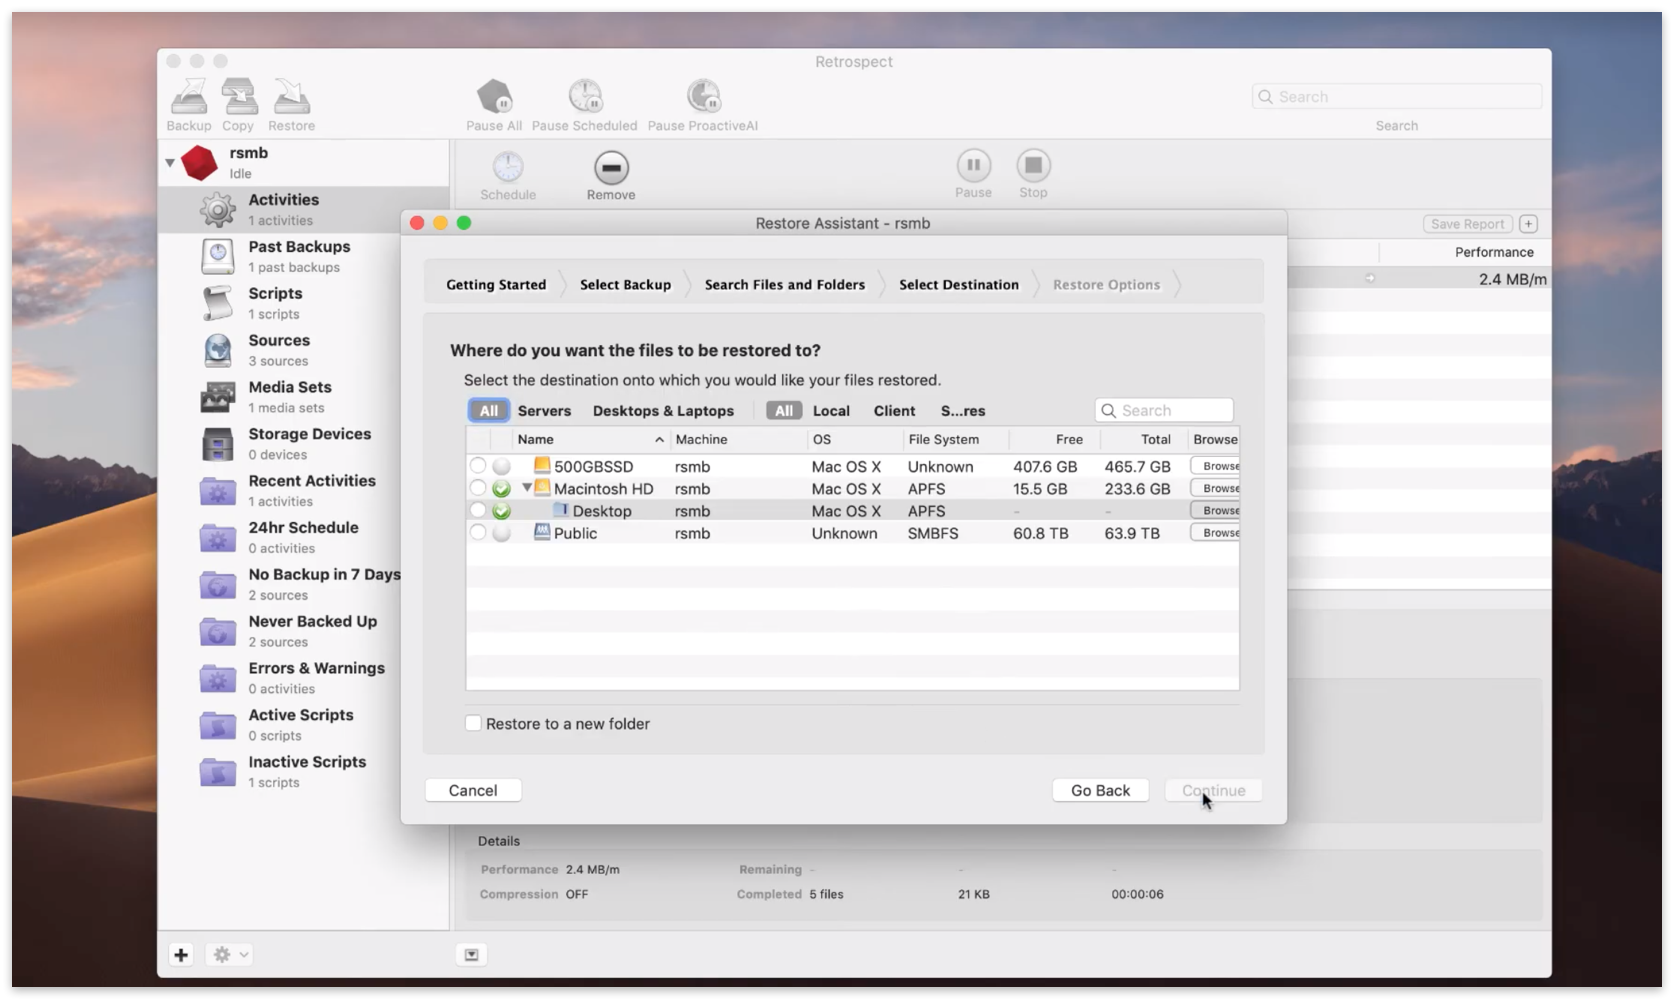
Now you need to choose where to restore the backup to. Select "Desktop" to restore the desktop files, including the Word document, back to where they were.
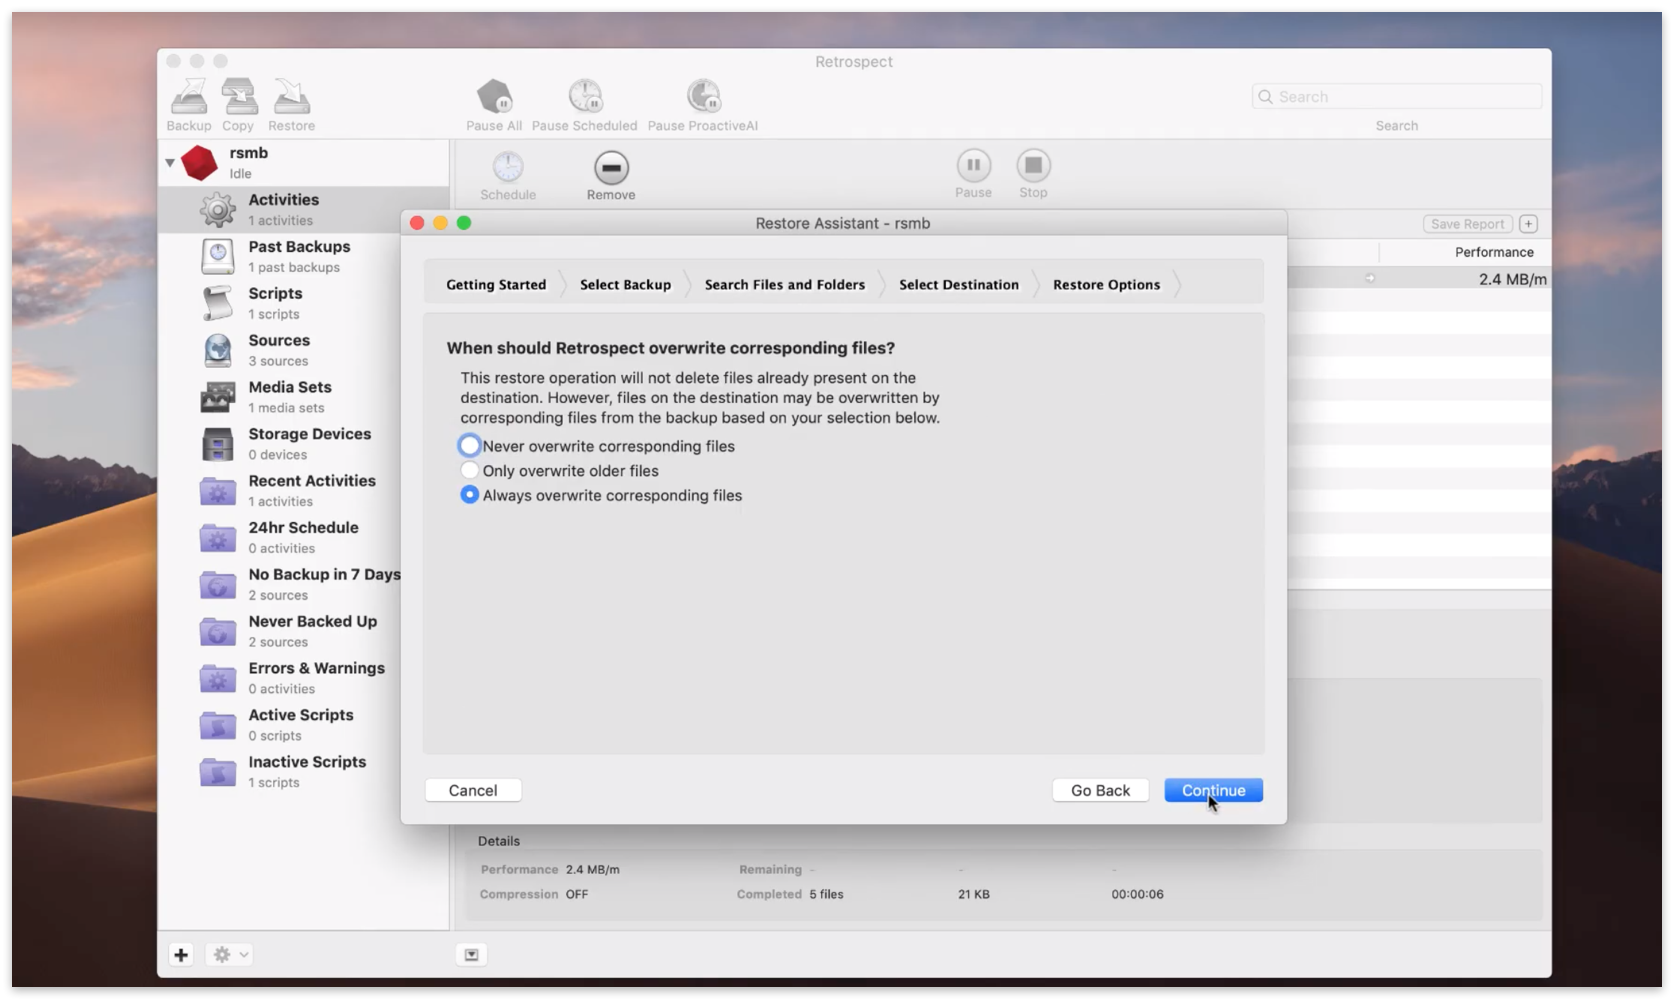
Retrospect offers granular restore options. For this scenario, we select "Always overwrite corresponding files". Click "Continue" and then click "Restore".
The restore is now running.
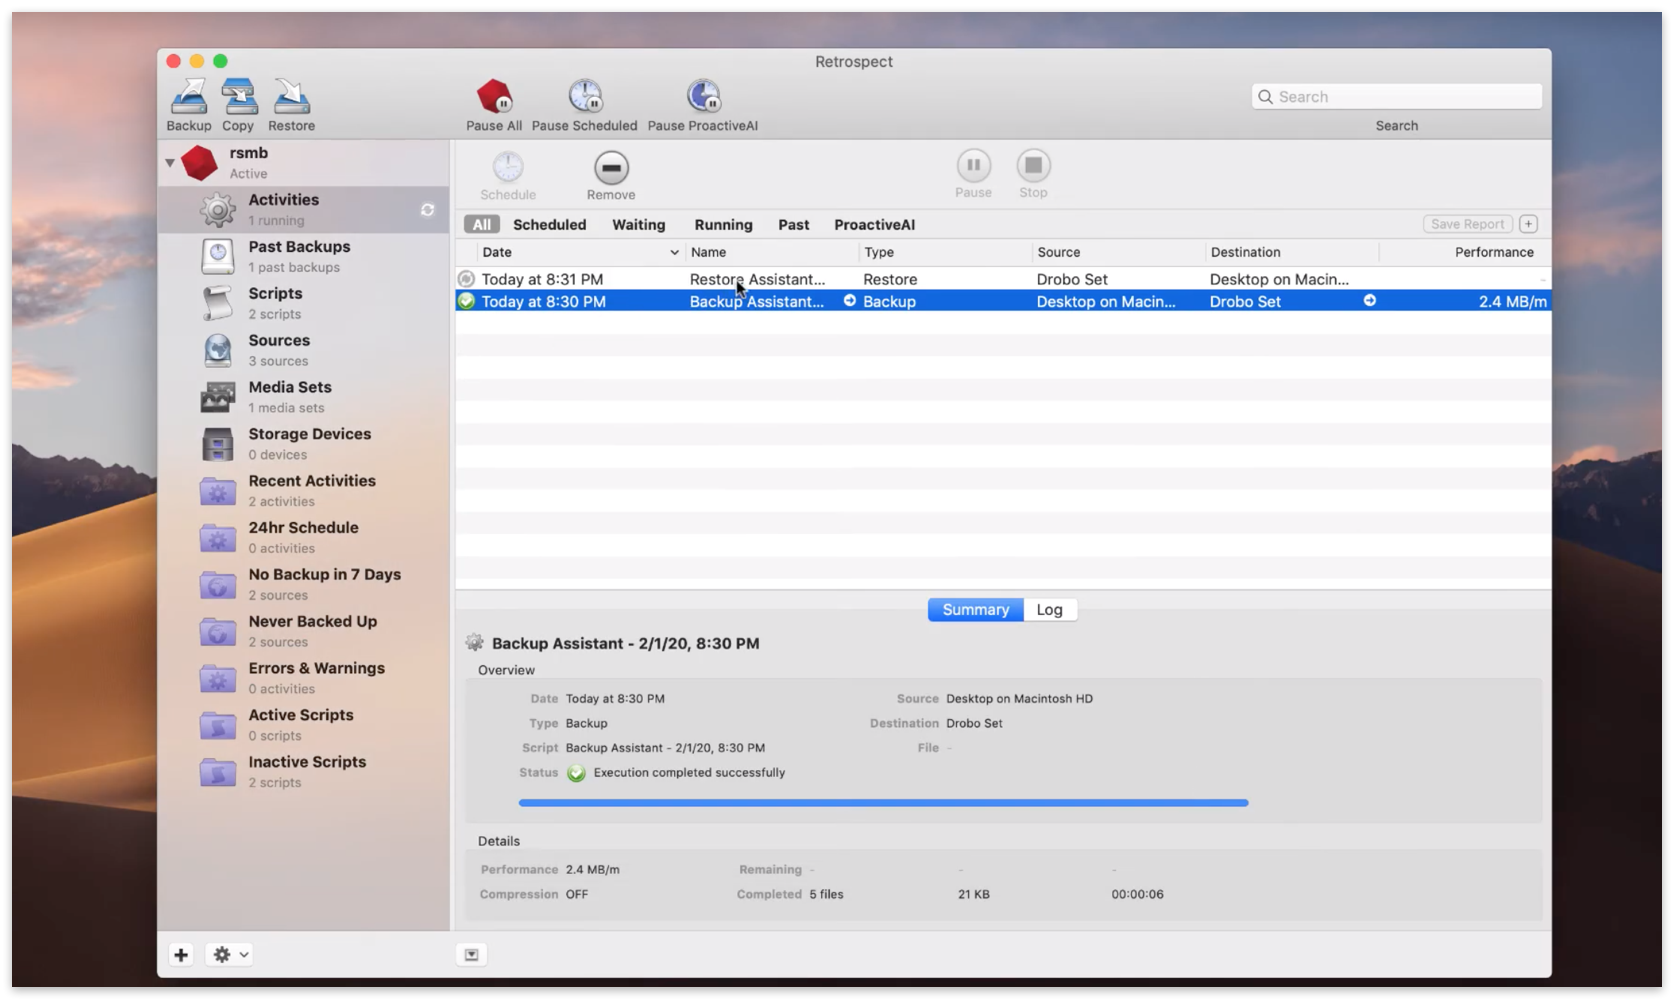
Our Word document is back on the Desktop.
