White Papers
Retrospect protects your entire computer out of the box. To only protect Microsoft Office documents, we will walk through creating a rule to identify only Microsoft Office documents, creating a script for it, running a backup, restoring a file from the backup, and transferring to a different set.
We have included instructions for both Retrospect for Mac and Retrospect for Windows, as Windows and Mac systems run Microsoft Office.
Creating a Rule
We'll create a rule to identify only Microsoft Office documents.
Retrospect for Windows steps
- Open "Selectors".
- Click "New...", use "Microsoft Office" as the title, and click "OK".
- Add the following rules:
- Microsoft Word: File name ends with ".docx"
- Microsoft Excel: File name ends with ".xlsx"
- Microsoft PowerPoint: File name ends with ".pptx"
- Microsoft Access: File name ends with ".accdb"
- Microsoft Publisher: File name ends with ".pub"
- Click "Save".

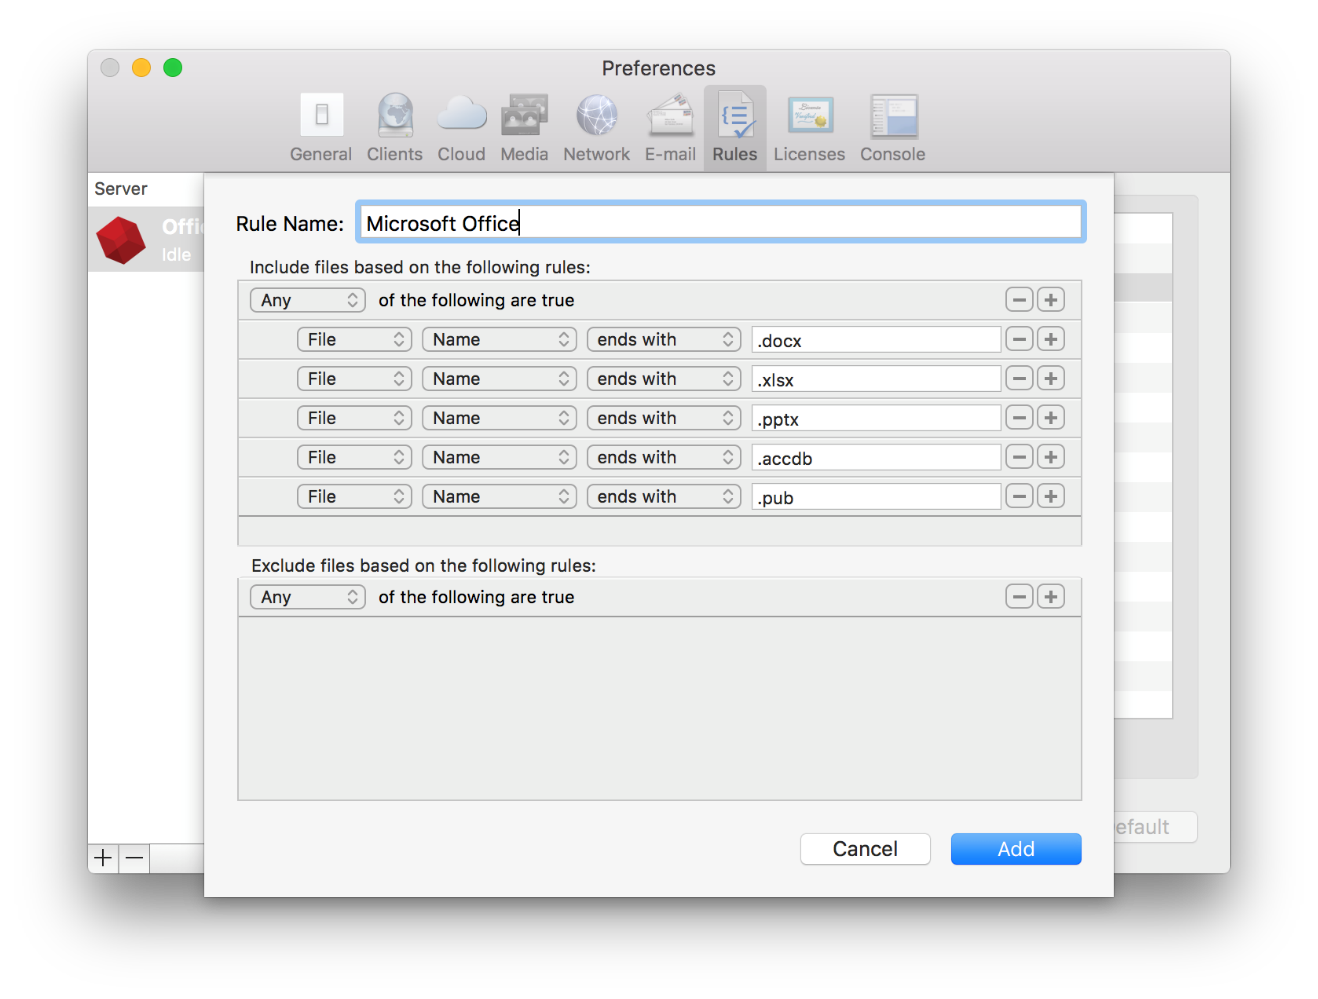
Retrospect for Mac steps
- Open "Preferences" and select "Rules".
- Click the "+" button to create a new rule, title it "Microsoft Office", and add the following rules:
- Microsoft Word: File name ends with ".docx"
- Microsoft Excel: File name ends with ".xlsx"
- Microsoft PowerPoint: File name ends with ".pptx"
- Microsoft Access: File name ends with ".accdb"
- Microsoft Publisher: File name ends with ".pub"
- Click "Add".
There are a number of other current extensions as well as legacy extensions. See Wikipedia for a complete list.
Backing up Microsoft Office documents
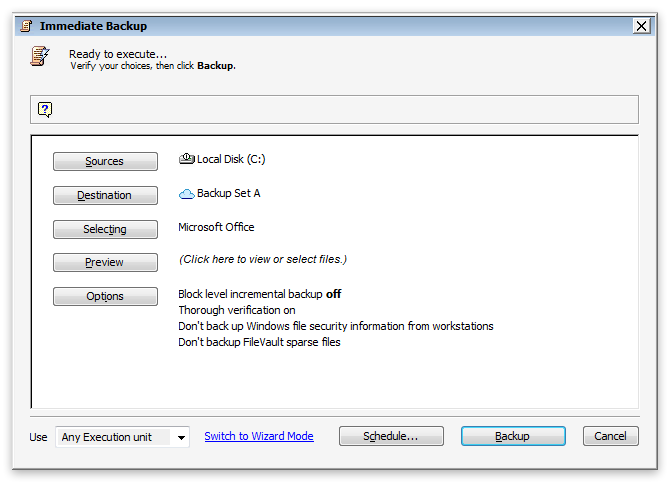
Retrospect for Windows steps
- Click "Backup".
- Select the appropriate source and destination.
- Click "Selecting" and select "Microsoft Office" then click "OK".
- Click "Backup".
Retrospect for Mac steps
- Select "Scripts" and click the "+" button.
- Select "Backup" and add an appropriate script name.
- In the script, select the appropriate source and media set.
- Finally, under "Rules", select "Microsoft Office".
- Click "Save".
- Click "Run".

Restoring Microsoft Office documents
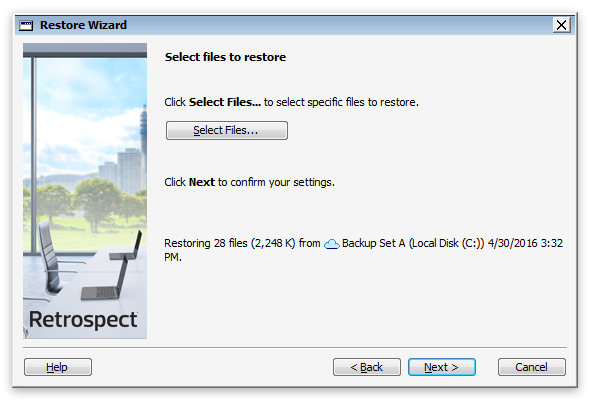
Retrospect for Windows steps
- Click "Restore".
- Select the appropriate backup set and snapshot.
- Step through the other options.
- On the final screen, select the files you want to restore.
- Click "Restore".
Retrospect for Mac steps
We will perform a quick restore with the Restore Assistant.
- Click "Restore Assistant".
- Click "Restore selected files and folders".
- Select the recent backup. Click "Browse" to select an individual document you want to restore.
- Select a destination for it. This can be its original location or inside a new folder.
- Select an appropriate policy for overwriting corresponding files.
- Click "Start Now".

Transferring Microsoft Office documents
We will perform a backup set transfer to a cloud storage location but only including files matching our "Microsoft Office" rule. Please set up a cloud set beforehand, following our Cloud Backup - How to Set Up a Cloud Backup.
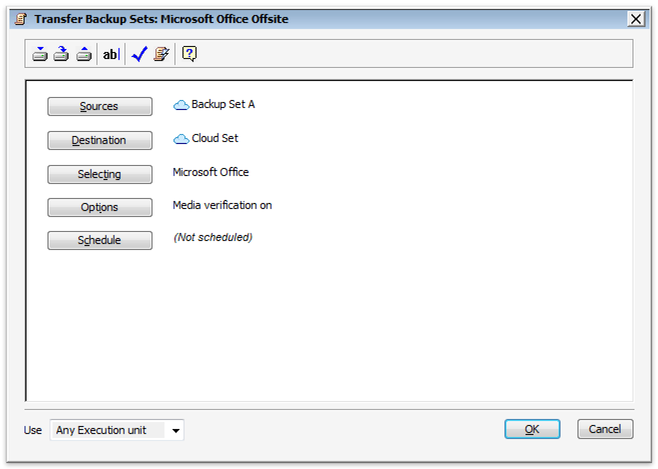
Retrospect for Windows steps
- Click "Manage Scripts" then "New..." then "Transfer Backup Set".
- Select the appropriate source and destination.
- Click "Selecting" and select "Microsoft Office" then click "OK".
- Click "OK".
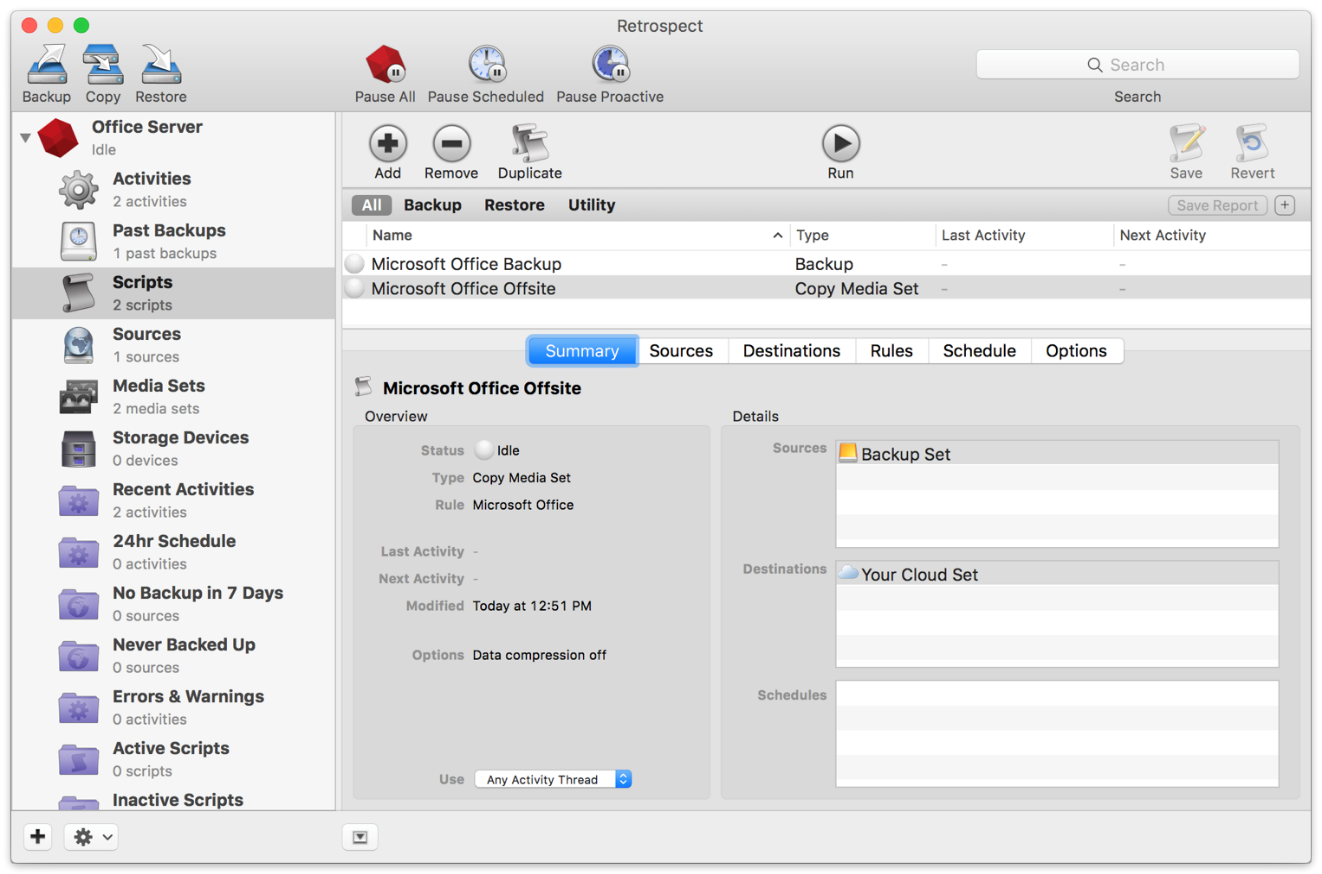
Retrospect for Mac steps
- Select "Scripts" and click the "+" button.
- Select "Copy Media Set" and add an appropriate name.
- In the script, select the appropriate source set and destination set.
- Finally, under "Rules", select "Microsoft Office".
- Click "Save".
- Click "Run".