Resources
Update: We worked with Microsoft to resolve this error, and it is resolved with Windows 10 May 2019 Update and Retrospect Backup 16.1.
The below article is kept for reference.
WARNING: We are working with Microsoft to resolve an issue with backing up the OneDrive folder when "Files On-Demand" is checked. In that setup, the OneDrive folder is currently not protected, even with Retrospect Backup 15.6, and if you do a full system restore (bare metal recovery), you need to uncheck the OneDrive "Files On-Demand" option.
Otherwise, Retrospect Backup will restore a blank folder, and the empty folder will be synced to the cloud, deleting any cloud files you may have.
Windows April 2018 Update requires Retrospect 15.1 for Windows and Mac. We found two issues with Microsoft’s VSS writer mechanism that returns an incorrect error when scanning the OneDrive folder, and previous versions stop scanning or stop system state backup:
Scanning incomplete error -1103 (write protected)
Trouble copying folders, error -1103 (write protected)
With Retrospect 15.1.2, the scan and backup do not stop. However, there is still a known issue where the OneDrive folder is not protected. We are in contact with Microsoft to resolve this.
If with the latest version of Retrospect you are still noticing the -1103 errors are interrupting your backups, you can correct the problem by enabling the Default administrator account on the system being backed up, and then setting Retrospect, or the Retrospect client to always run as that user. This may not be possible if the machine acts as a Domain controller.
Windows Server
First you must enable the default local Administrator. If you are correcting these errors on for a local backup this should be done on the machine hosting Retrospect. If this is for a client backup this should be done on the client machine.
Head to Control Panel > Administrative tools > Computer Management > Local Users and Groups > Users
Right click user account called Administrator with the description of “Built in account for administrating the Computer/Domain” and click Properties.
Uncheck the “Account is disabled” checkbox and click OK.
Now right click on the account again and choose “set password”. Choose to proceed Set a very strong password for this account
Windows Home
For Windows Home users the above options are not available, the command prompt must be used instead.
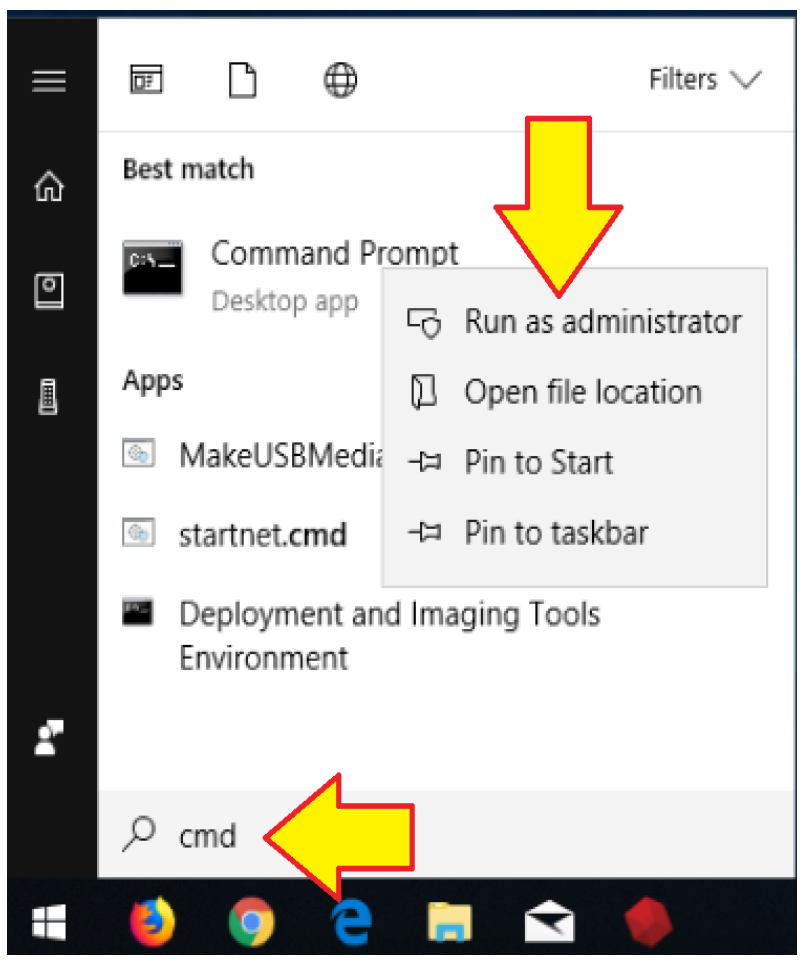
Open up the command prompt as administrator. To do this, press the Windows key on your keyboard or click the start button at the bottom left of Windows. Once the start menu is open, type cmd – you will notice at the top of the start menu it will show Command Prompt – Right click on it and choose Run as administrator.

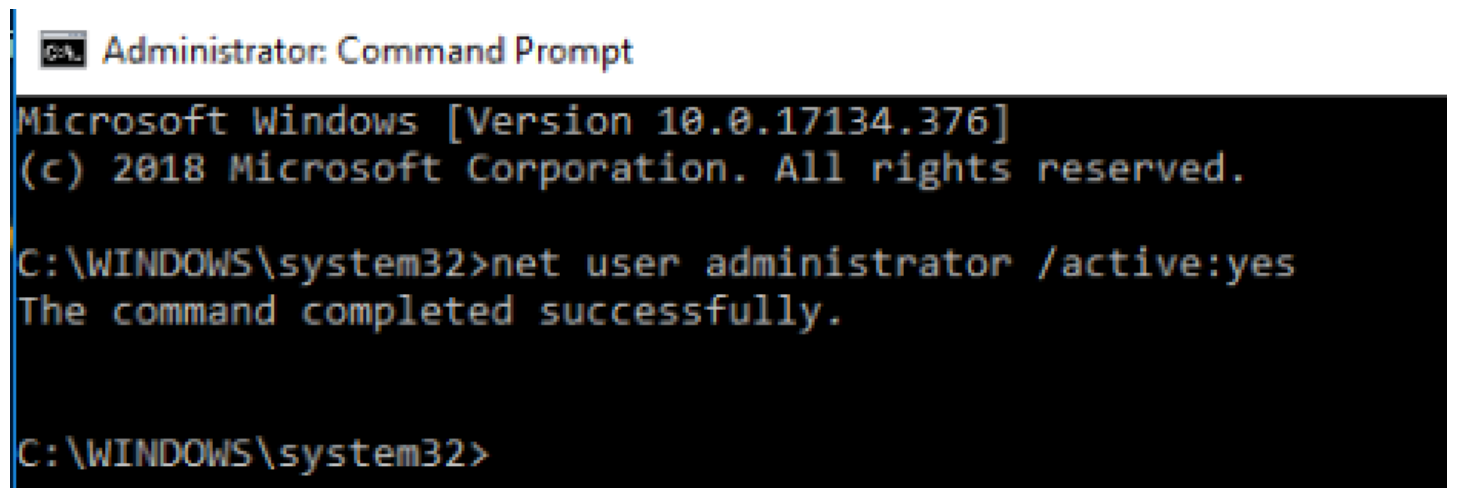
Once the command prompt is open, type: net user administrator /active:yes
After you hit enter, you should get a response stating the command completed successfully. Note: If you get a message stating access is denied, then you most likely did not run the command prompt as an administrator, please see step 1.

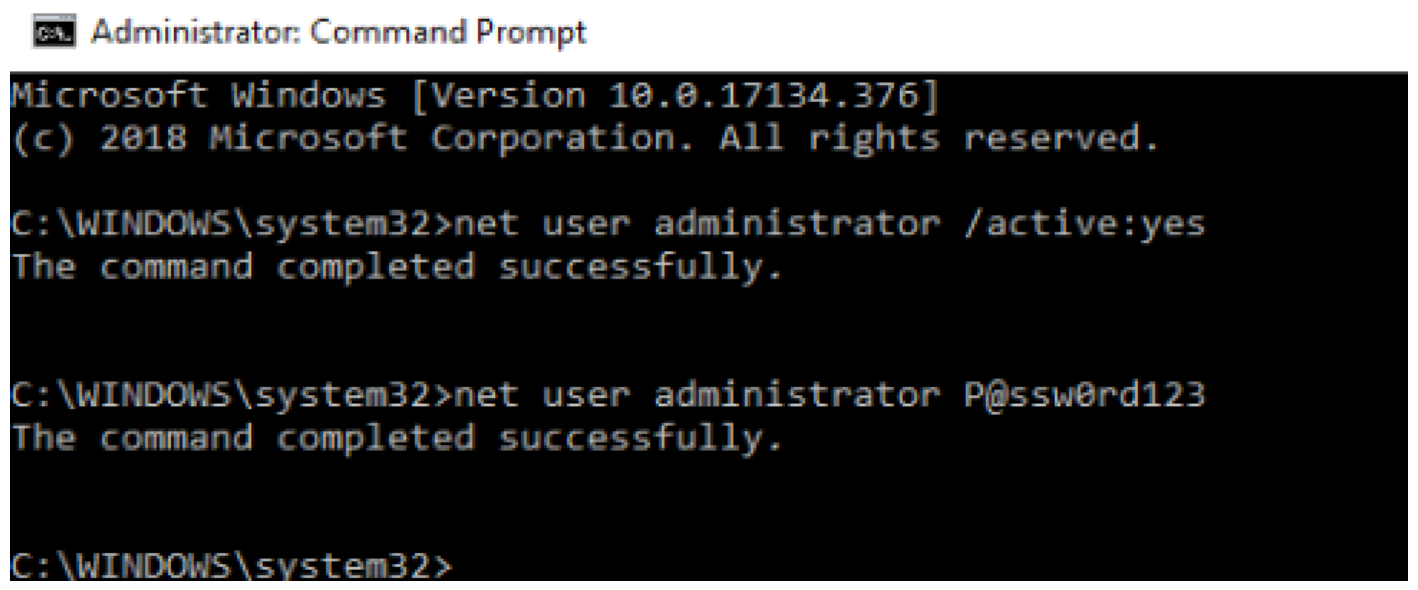
Now we are going to give the administrator account a password. Type in the following: net user administrator [Password] – Note: [Password] should be replaced with an actual password of your choosing. Please be sure to set a strong password for this account. Once this is done, you should get another message stating the command completed successfully.

In this case [Password] should be substituted for the actual password. Set a very strong password for this account
Once the Default Administrator account has been enabled you should use the following steps depending on whether or not you are fixing the problem with a client or a local backup.
For local backups:
Within Retrospect head to Configure > Preferences > Security and click the “Always run Retrospect as the specified user” radio button.
Fill in the Default Administrator credentials and click OK.
For Client backups:
Open up Services.exe on the client machine and locate the Retrospect Client service.
Right click on the Retrospect Client service and choose “Properties”
Select the “log on as” tab.
Fill in the Default administrator account credentials and click
Last Update: May 14, 2019